How To Service My Car
Overview
A good service keeps your car running smoother for longer - but it doesn’t need to cost a fortune.
From quick checks to simple home projects, we’ll show you the basics so you can DIY with confidence and keep more in your pocket.
Items
Every service job will require different tools and parts, but these few essentials are common to every job.
An ‘Automotive Bible’ (Also commonly known as...the workshop manual for your vehicle)
You should also make use of the Supercheap Auto ‘My Garage’ feature. Simply enter your rego and home state to see the correct fluid levels, quantities, and replacement parts for your vehicle.
Steps
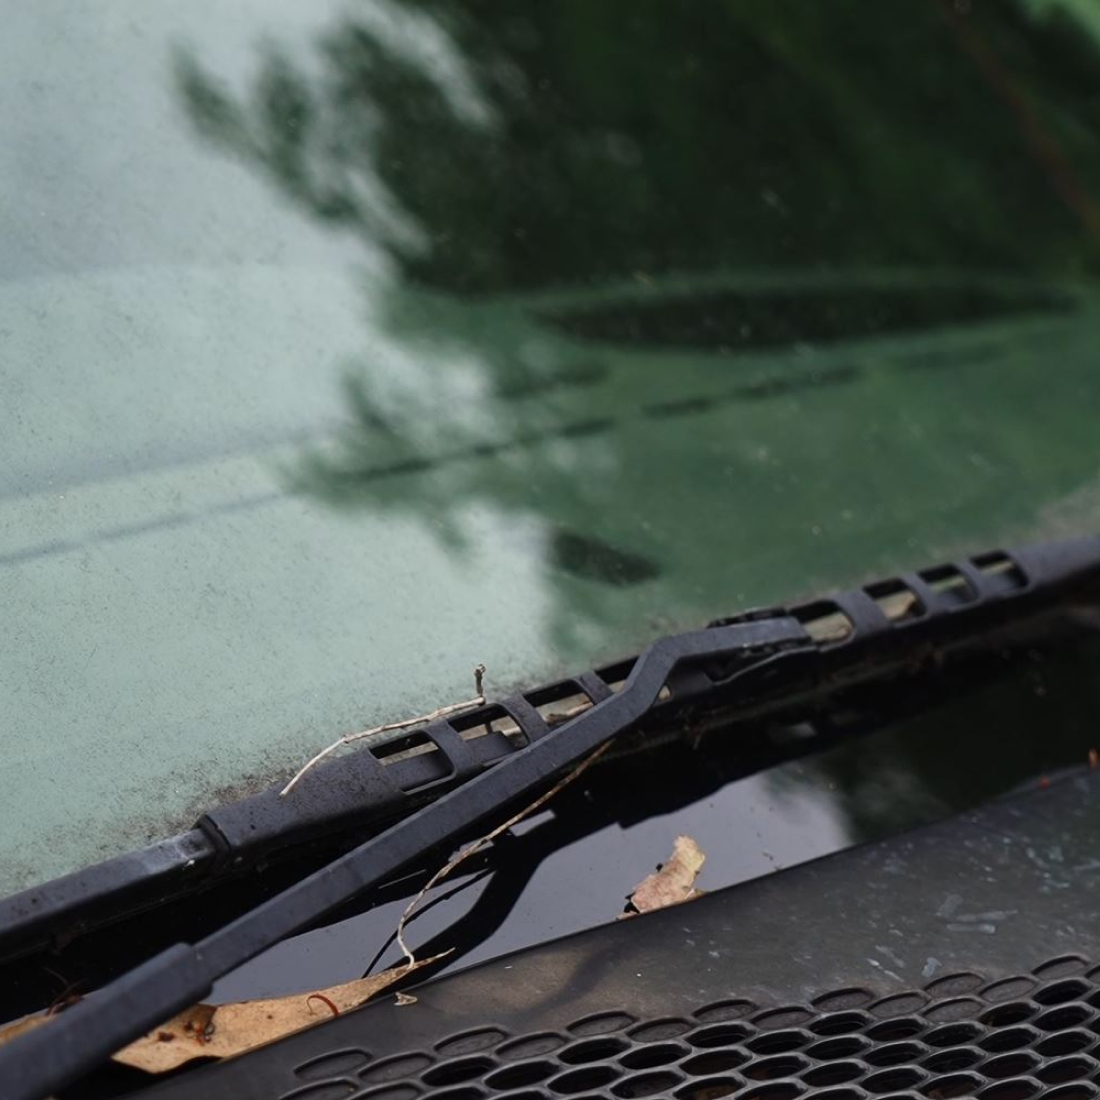
Windscreen Wipers
Check number one starts right in front of your face every time you go driving, and most obviously when it’s wet. It’s your windscreen wipers.
This is one of the first things a mechanic will check at every service. All you have to do is look and listen. Look for streaky patterns as they wipe, and listen for squeaking or shuddering. Either of these indicates that a replacement is due, and we have a full guide to help you do it.
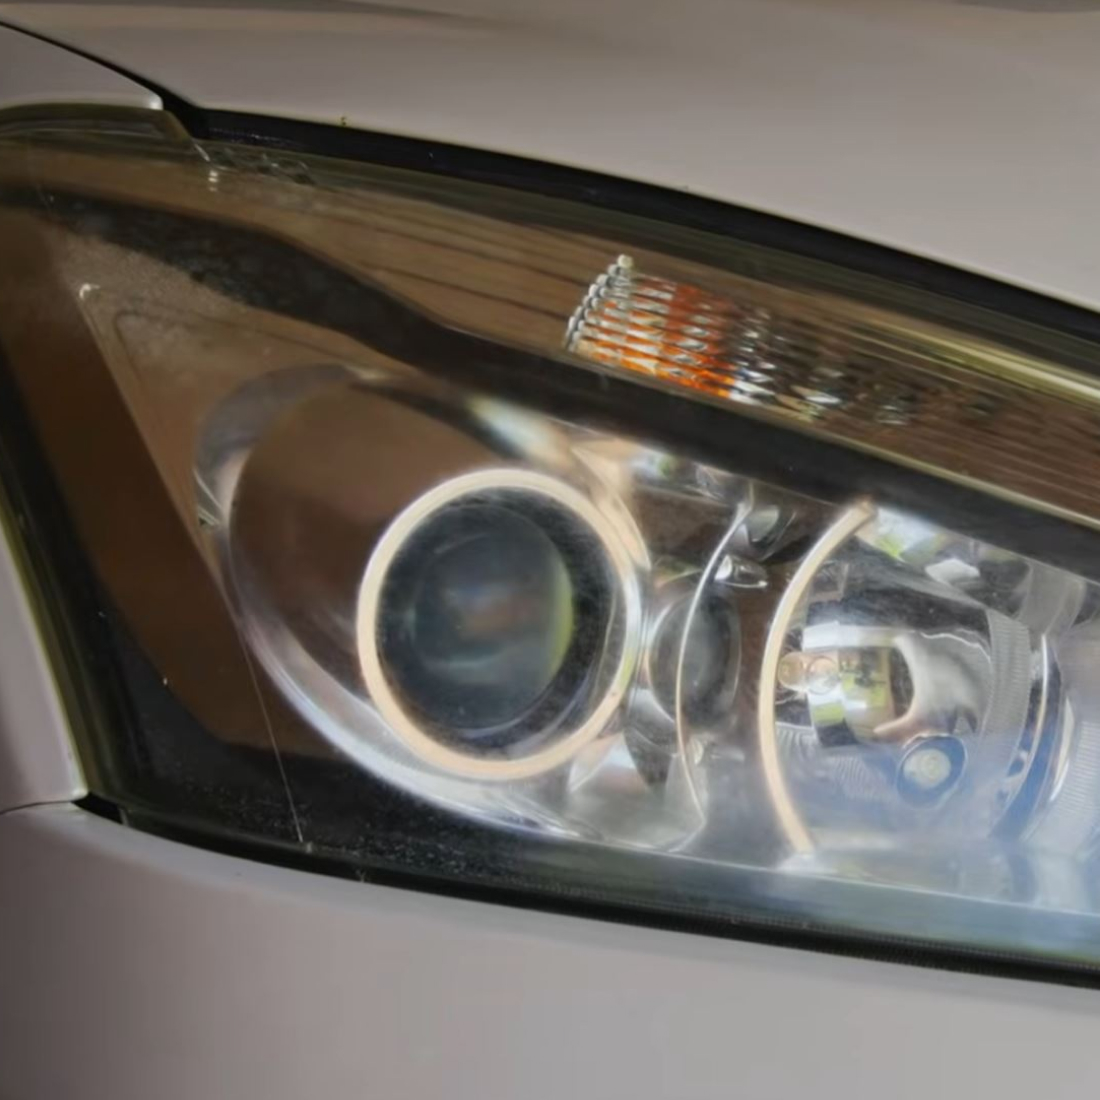
Check Your Lights
Now, let’s take a look at your lights.
Rather than flicking every light on at once, go one step at a time, it makes it easier to tell which bulb might be blown.
Brake lights can be a little trickier. If you’re backed up to a reflective or glass surface, you can see them in your rearview mirror. Otherwise, you’ll need someone to help check them for you.
If you did find any blown bulbs, check out our full guide to replacing them.
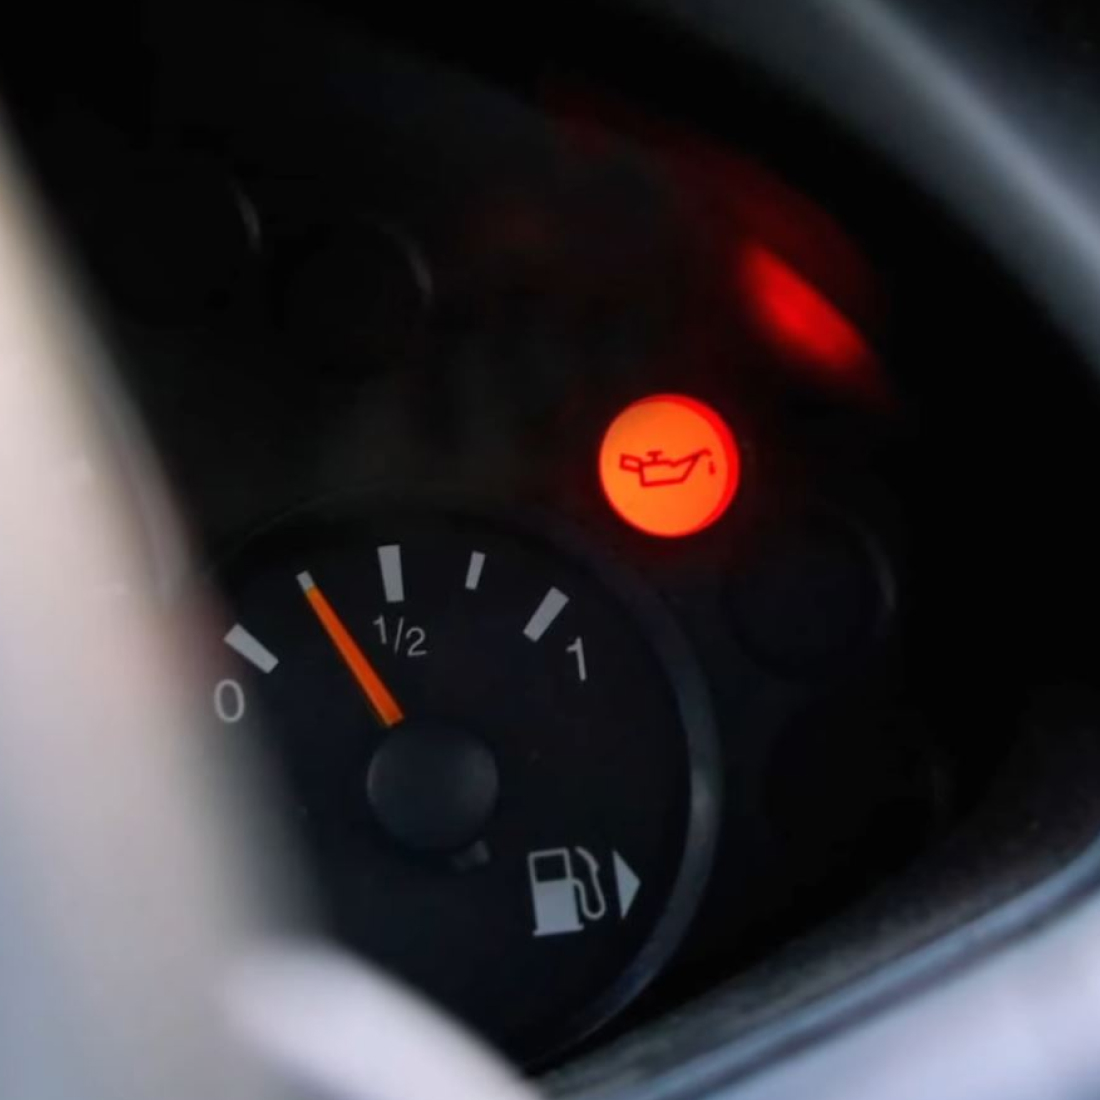
Check Your Fluids
Engine oil, coolant, power steering, brake fluid, and washer fluid. Never mind “blinker fluid”, that’s just your uncle winding you up.
Engine Oil
To check your engine oil, park on a level
surface,
pull the dipstick, wipe it clean with a rag, reinsert it, then
pull it out again and check the level. We have a full guide and
video on checking and topping up engine oil - and if
it’s due
for a change, there’s a guide for that too.
Brake Fluid
You’ll find this on the firewall (the back of
the
engine bay near the windscreen), with level markings on the side
of the reservoir. It’s a super simple check, but pay attention
to the fluid itself. If it’s looking more black than
translucent, it’s time to consider a change. Manual vehicles may
also have a clutch fluid reservoir, which should be treated the
same way.
Washer fluid
This is usually located near the front of the
car. Pop the cap - if you can’t see any fluid, top it up with
tap water until you can. For extra cleaning power, consider
adding a small amount of windscreen washer fluid.
Power Steering
This may be a reservoir with level markings
on the side, or it could have a dipstick under the cap. You’ll
typically see markers for “hot” and “cold,” so make sure you’re
checking against the right one. If you can’t find a reservoir,
your car likely has electric power steering, one less thing to
worry about.
Engine Coolant
Locate the coolant reservoir - it will
usually have a cap labelled “COOLANT” or a symbol. Shine a work
light through the side to check the level. If it needs topping
up, only do this when the engine is cold.
Our full guide and video will run you through everything you need to know.
Whenever a top up is needed, the correct fluid type is usually specified on the cap in the engine bay, in your owner’s manual, or through the Supercheap Auto ‘My Garage’ feature.
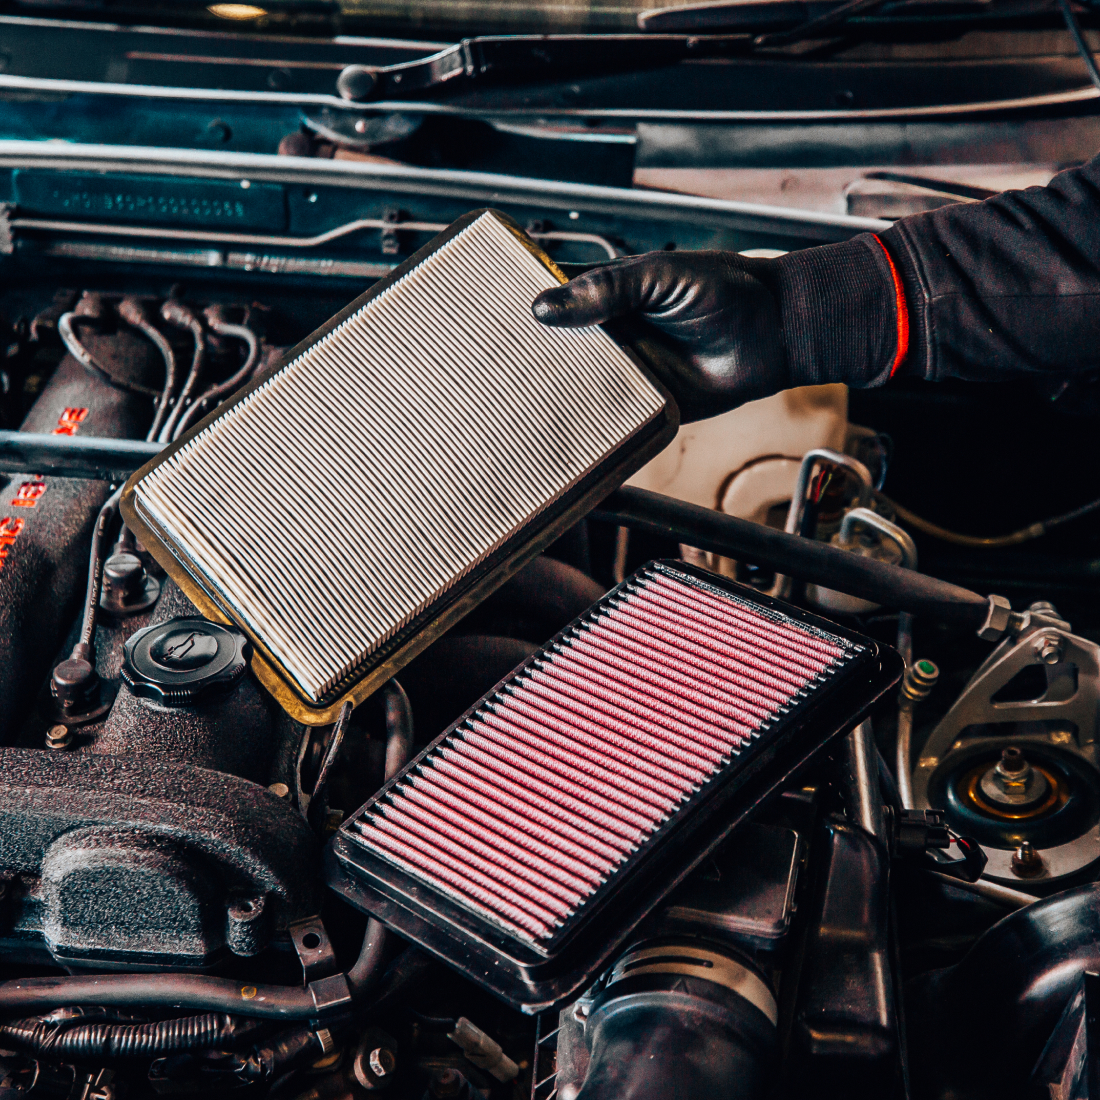
Air Filter Check & Clean
Keeping a clean air filter is one of the easiest ways to support engine longevity and optimal fuel economy - but there’s another air filter that’s just as important.
Cabin Air Filter
If you can’t remember the last time this
was changed, it’s definitely due for a replacement. We’ve got a
DIY
guide for that too, but if you’d like to give it a
quick
check, you’ll usually find it behind the glove box.
As always, your owner’s manual can point you in the right direction. At the very least, tap out any dirt, leaves, and pollen.
Engine Air Filter
A quick tap out of the air filter, along
with a vacuum of the air box to remove leaves and bugs, is all
that’s needed here. If you’re getting close to the service
interval for a replacement, be sure to check out this DIY guide
for a more thorough job.
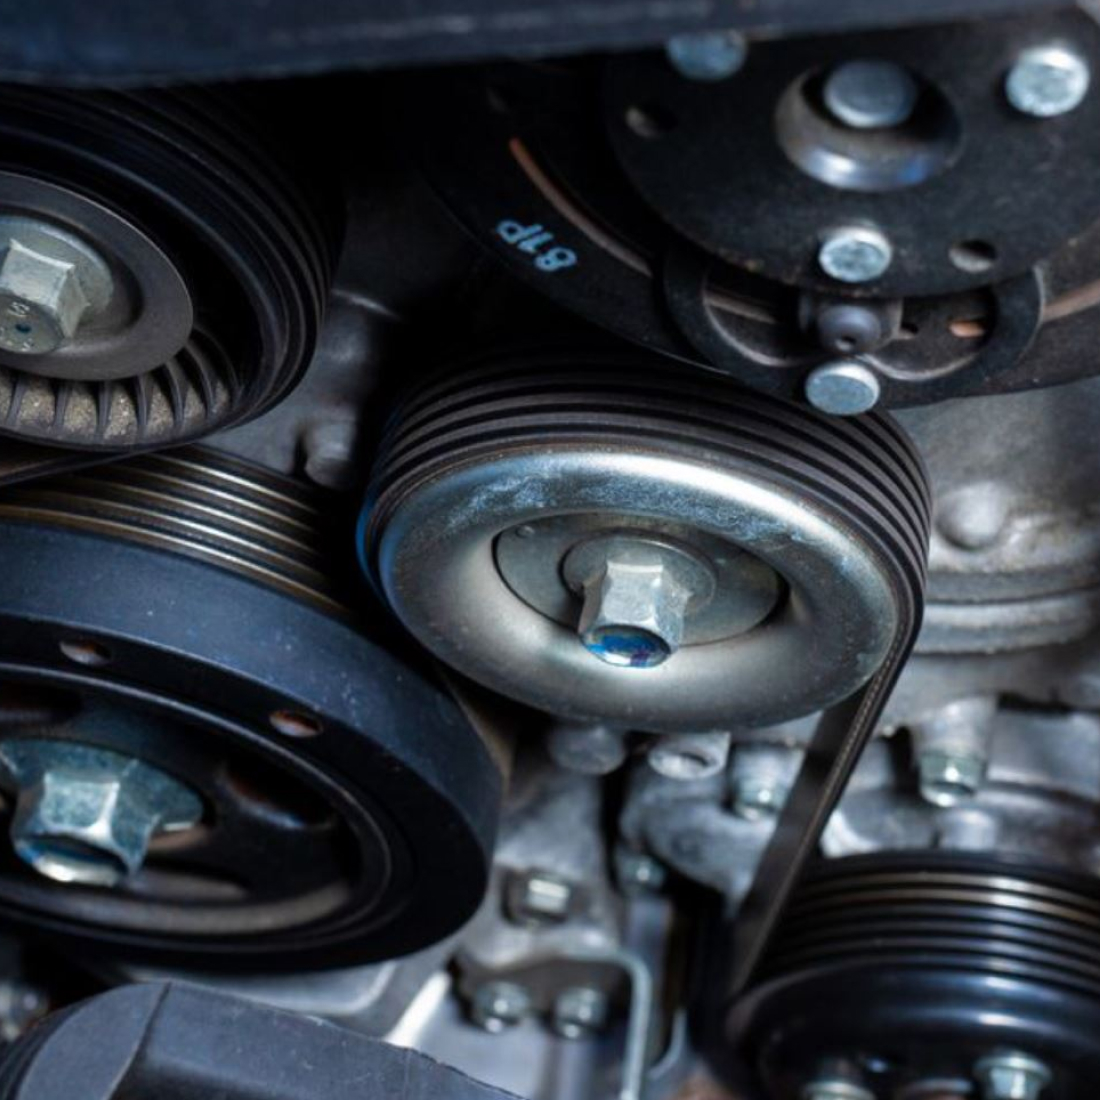
Belts & Hoses
Checking belts and hoses is best done when the car is cold - or at least an hour or two after it was last run.
All Hoses
All hoses under the bonnet should be visually
inspected. Look for leaks, signs of cracking, or build up at the
ends. Even a fine layer of moisture or oil can indicate a
problem, which could be as simple as a loose hose clamp.
Radiator & Heater Hoses
After a visual inspection, give
these a squeeze test. Each hose should feel firm, but not
brittle or “crunchy.” If it feels soft or is bulging anywhere,
it’s definitely time for a replacement.
Serpentine & Accessory Belts
Whether your vehicle uses a
single serpentine belt, multiple accessory belts, or older style
V-belts, the inspection process is generally the same:
- Get a clear view along each belt and check for fraying and cracking (these are usually most visible where the belt bends)
- Get a clear view along each belt and check for fraying and cracking (these are usually most visible where the belt bends)
- Trace the path of serpentine belts to ensure they’re properly seated on each pulley
- Check tension by pressing on the longest span of each belt and estimating the amount of movement. Around 20mm is a good guide, but your owner’s manual may specify a different amount
Most modern vehicles use an automatic tensioner to maintain correct belt tension, but some older systems require manual adjustment - refer to your owner’s manual for details.
Finally, start the engine and carefully inspect the belts again, this time looking for excessive movement or wobble in the pulleys.
Ignition, Start, & Charge
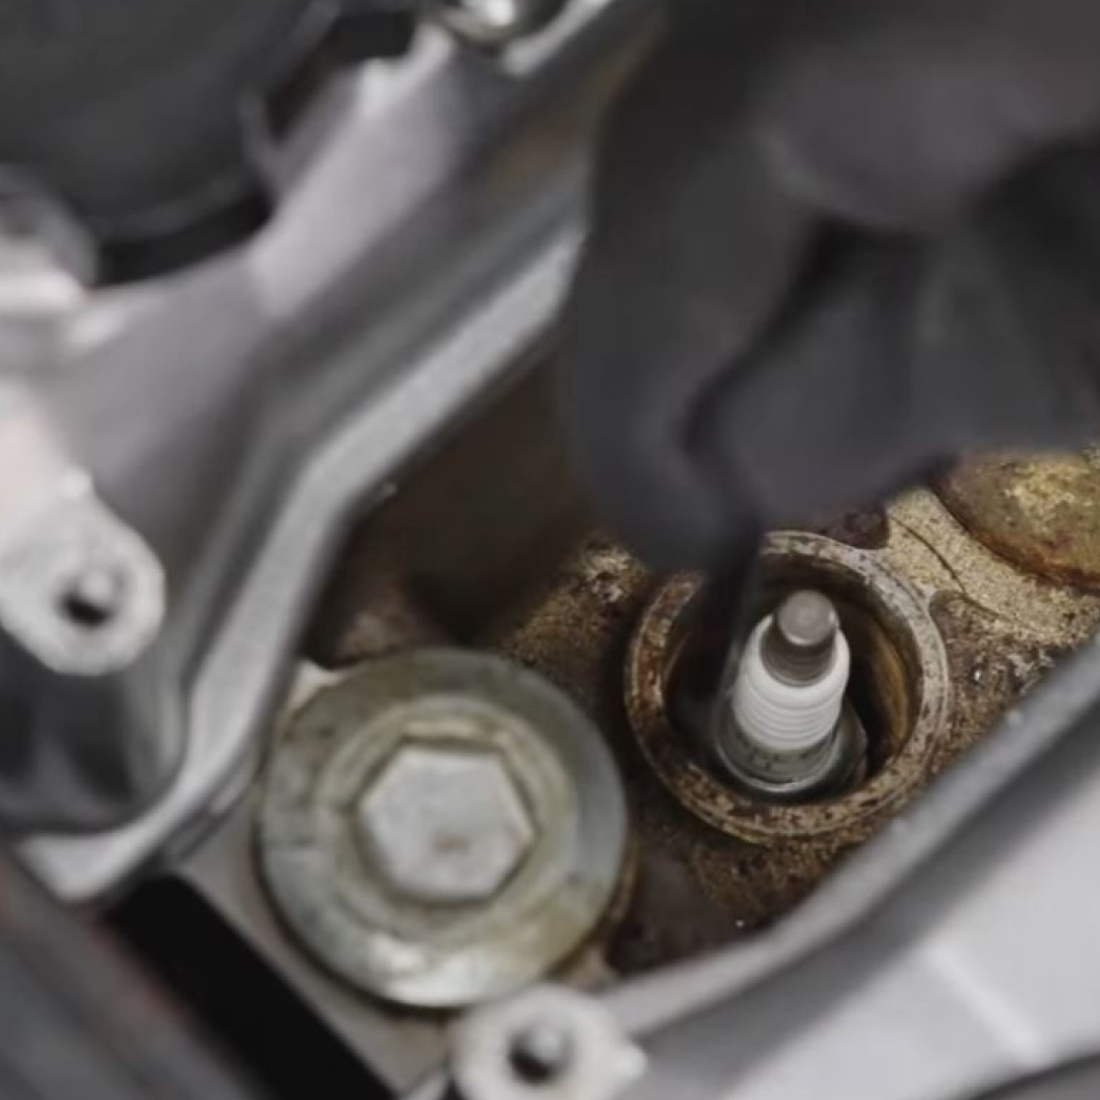
Spark Plugs & Leads
Checking and adjusting spark plugs used
to be part of every service, but these days you can usually
leave them alone until your schedule calls for it (typically
between 100,000 and 200,000km).
If that time’s approaching, or if you’re noticing rough running, we’ve got a full guide to help you check and replace your spark plugs (and inspect your leads) if needed.
Battery
Next up is your battery. Start by checking the
battery clamp, you don’t want it moving around. Then inspect the
battery case for any swelling or leaks, and look for white or
blue corrosion around the terminals.
If you spot any, mix a little bicarb soda with hot water and pour it over the terminals to dissolve the residue. Once dry, finish the job with a spray of battery terminal protector to help prevent future corrosion.
If you’ve noticed slow cranking or hard starting, it might be time for a battery test. Supercheap Auto offers this as a free service. We can also fit a new battery for you (subject to inspection and store availability), or you can tackle it yourself by following our DIY guide.
Wheels, Tyres, & Brakes
Wheels
Aside from impact damage from potholes or kerbs,
there’s not much to check on your wheels. Keep an eye out for
any dents or buckles, and consider checking the torque on your
wheel nuts.
You’ll need a torque wrench for this, and you’ll find the correct settings in your owner’s manual.
Tyres
Every tyre has a wear indicator, and you’ll want to
make sure you haven’t reached it. Look inside the tread grooves,
and you’ll see a small raised bump at intervals.
Once the surrounding tread is level with this, it’s time for new tyres. Head to our website to order a set (online and Australia only), with the option to have them fitted at your home.
Uneven wear is another sign to watch for. Tyres that have been overinflated tend to wear more in the centre, while underinflated tyres wear more on the edges. Wear that’s heavier on one side could indicate you’re due for a wheel alignment.
Finally, check your tyre pressures against the placard inside your driver or passenger door jamb. Inflate them with a compressor at home if you have one, or check out our range of tyre inflators.
Brakes
To properly check your brake pads, you’ll need to
remove the wheels. Each caliper should have an inspection
opening that allows you to check pad thickness.
You’ll see the backing plate and the friction material. If that friction layer is less than around 3mm thick, it’s time for a replacement. Yes, you can do it yourself with our DIY guide.

Tips
*Important information* - Click here to read more about our DIY Advice Terms and Conditions.