How To Use OBD2 Scanners
Overview
So, you need to know how to use an OBD2 scanner. The phrase ‘vehicle diagnostics’ may seem confronting at first, but with an OBD2 scanner it is actually incredibly simple! We’re going to go over the what’s, why’s and how’s so you can understand what is an OBD2 scanner, and how it can save your time AND your car.
What is OBD2
OBD2, or On-Board Diagnostics II, is a standardized system in vehicles, introduced in 1996. It monitors performance, emissions, and all vehicle sensors and can output this data through a diagnostic port. When paired with an OBD2 scan tool, OBD2 enables vehicle owners and mechanics to view engine sensor data and identify issues triggering the check engine light.
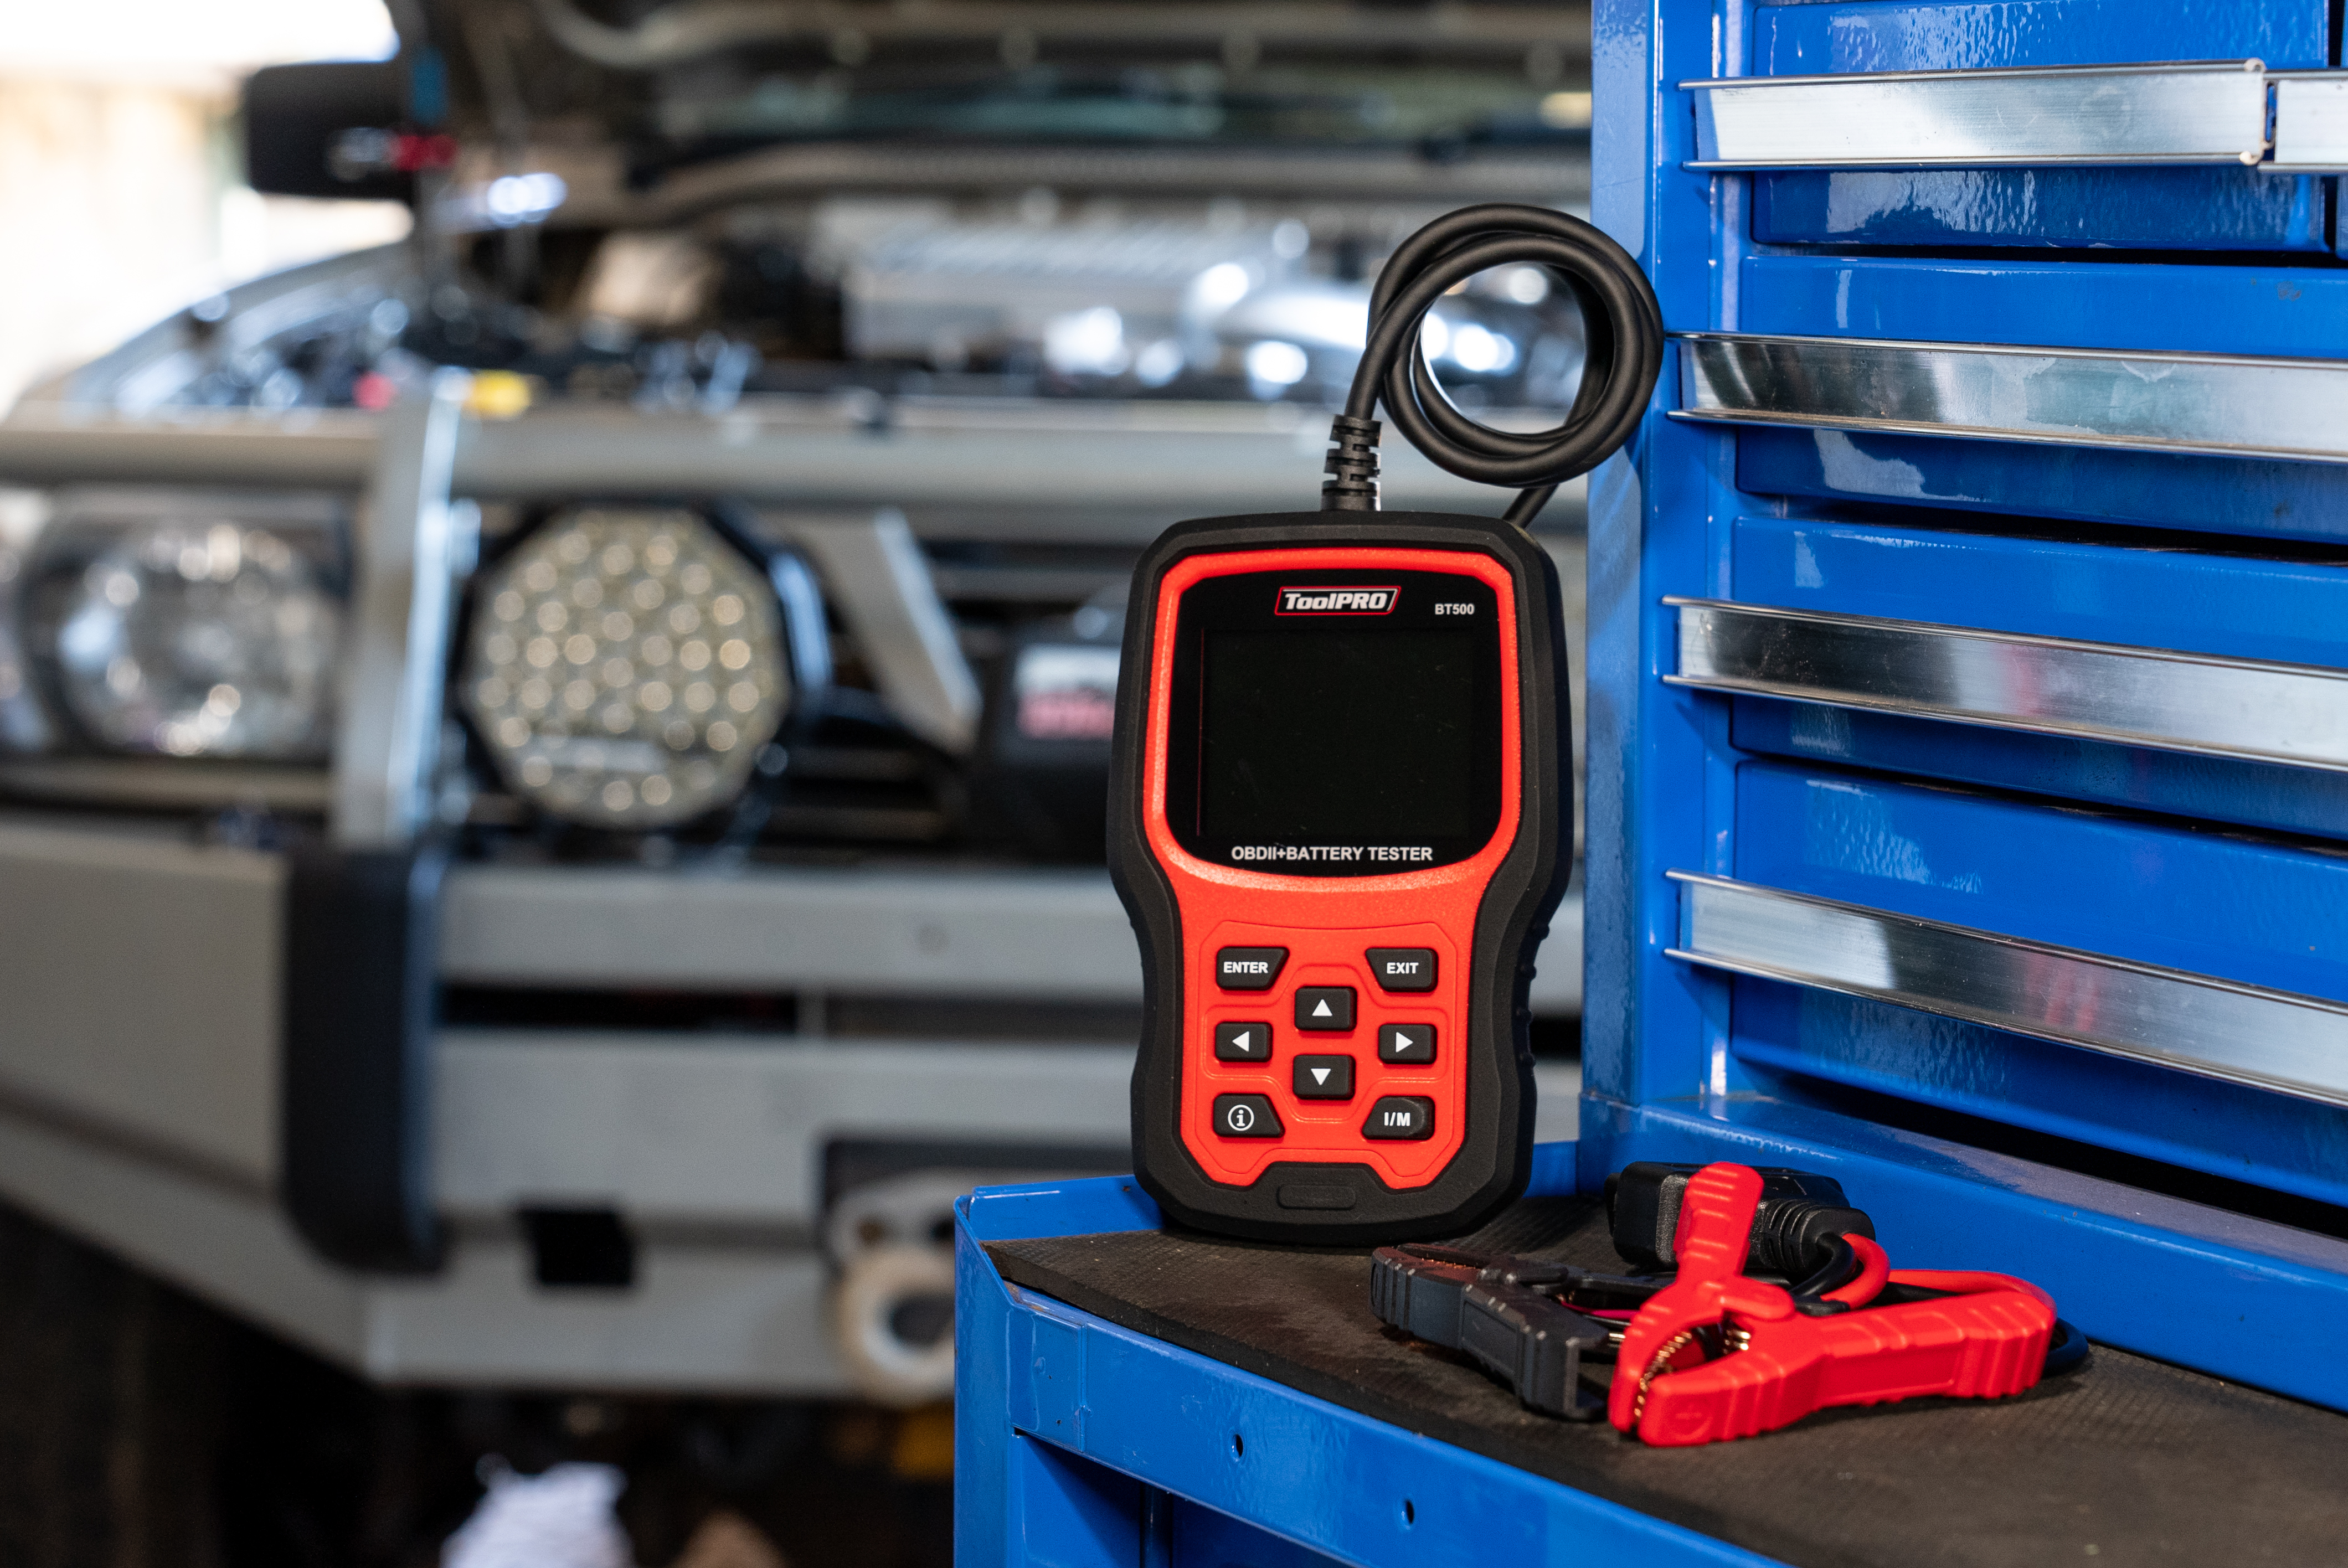
Items
Steps
Step 1:Where to plug in OBD2 scanner
Before plugging in your OBD2 scanner, ensure your vehicle is switched all the way off. Plug your OBD2 scanner into your vehicle diagnostic port. You should find the location for this printed in your vehicle owner’s manual. Usually, it is under the dash and more particularly below the steering wheel. Occasionally it will be inside the glove box, around the centre console, or behind a plastic trim.
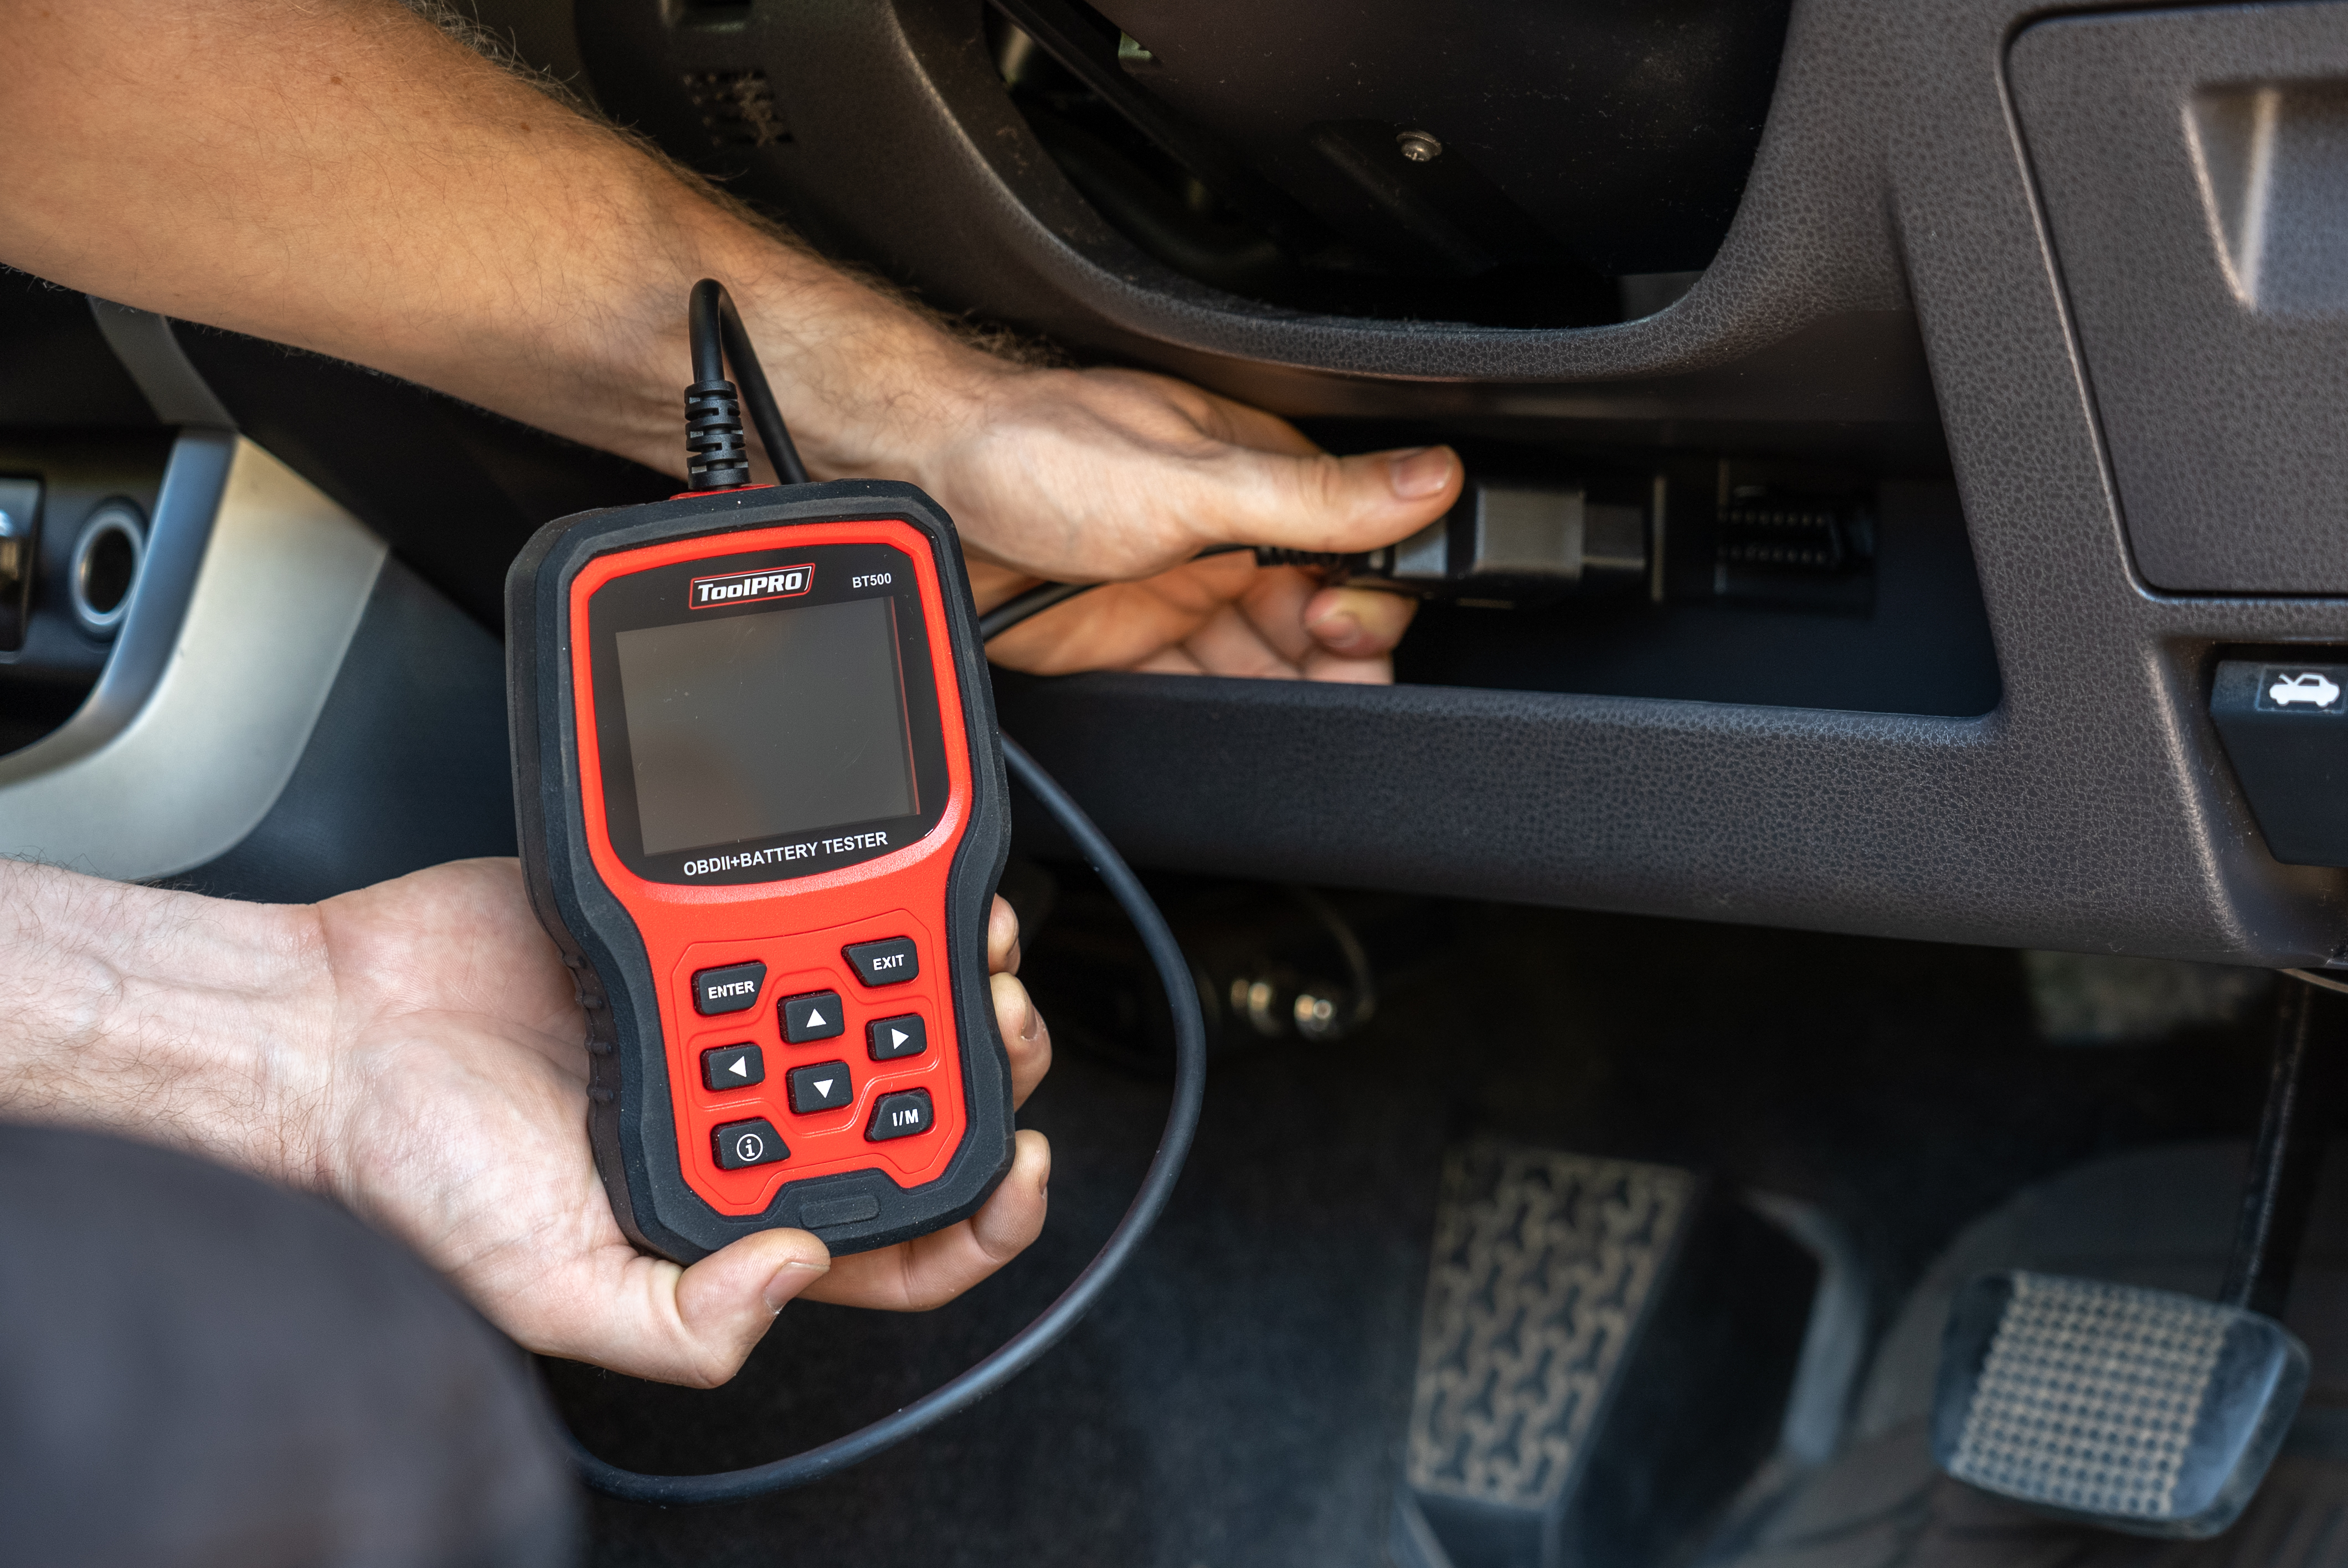
Step 2:Plug in your OBD2 Scanner
Plug in your diagnostic scanner. Because the OBD2 diagnostic port always has constant power; your diagnostic scanner will begin to boot up. This should only take a few seconds. At this point the scanner may prompt you to turn on the ignition.
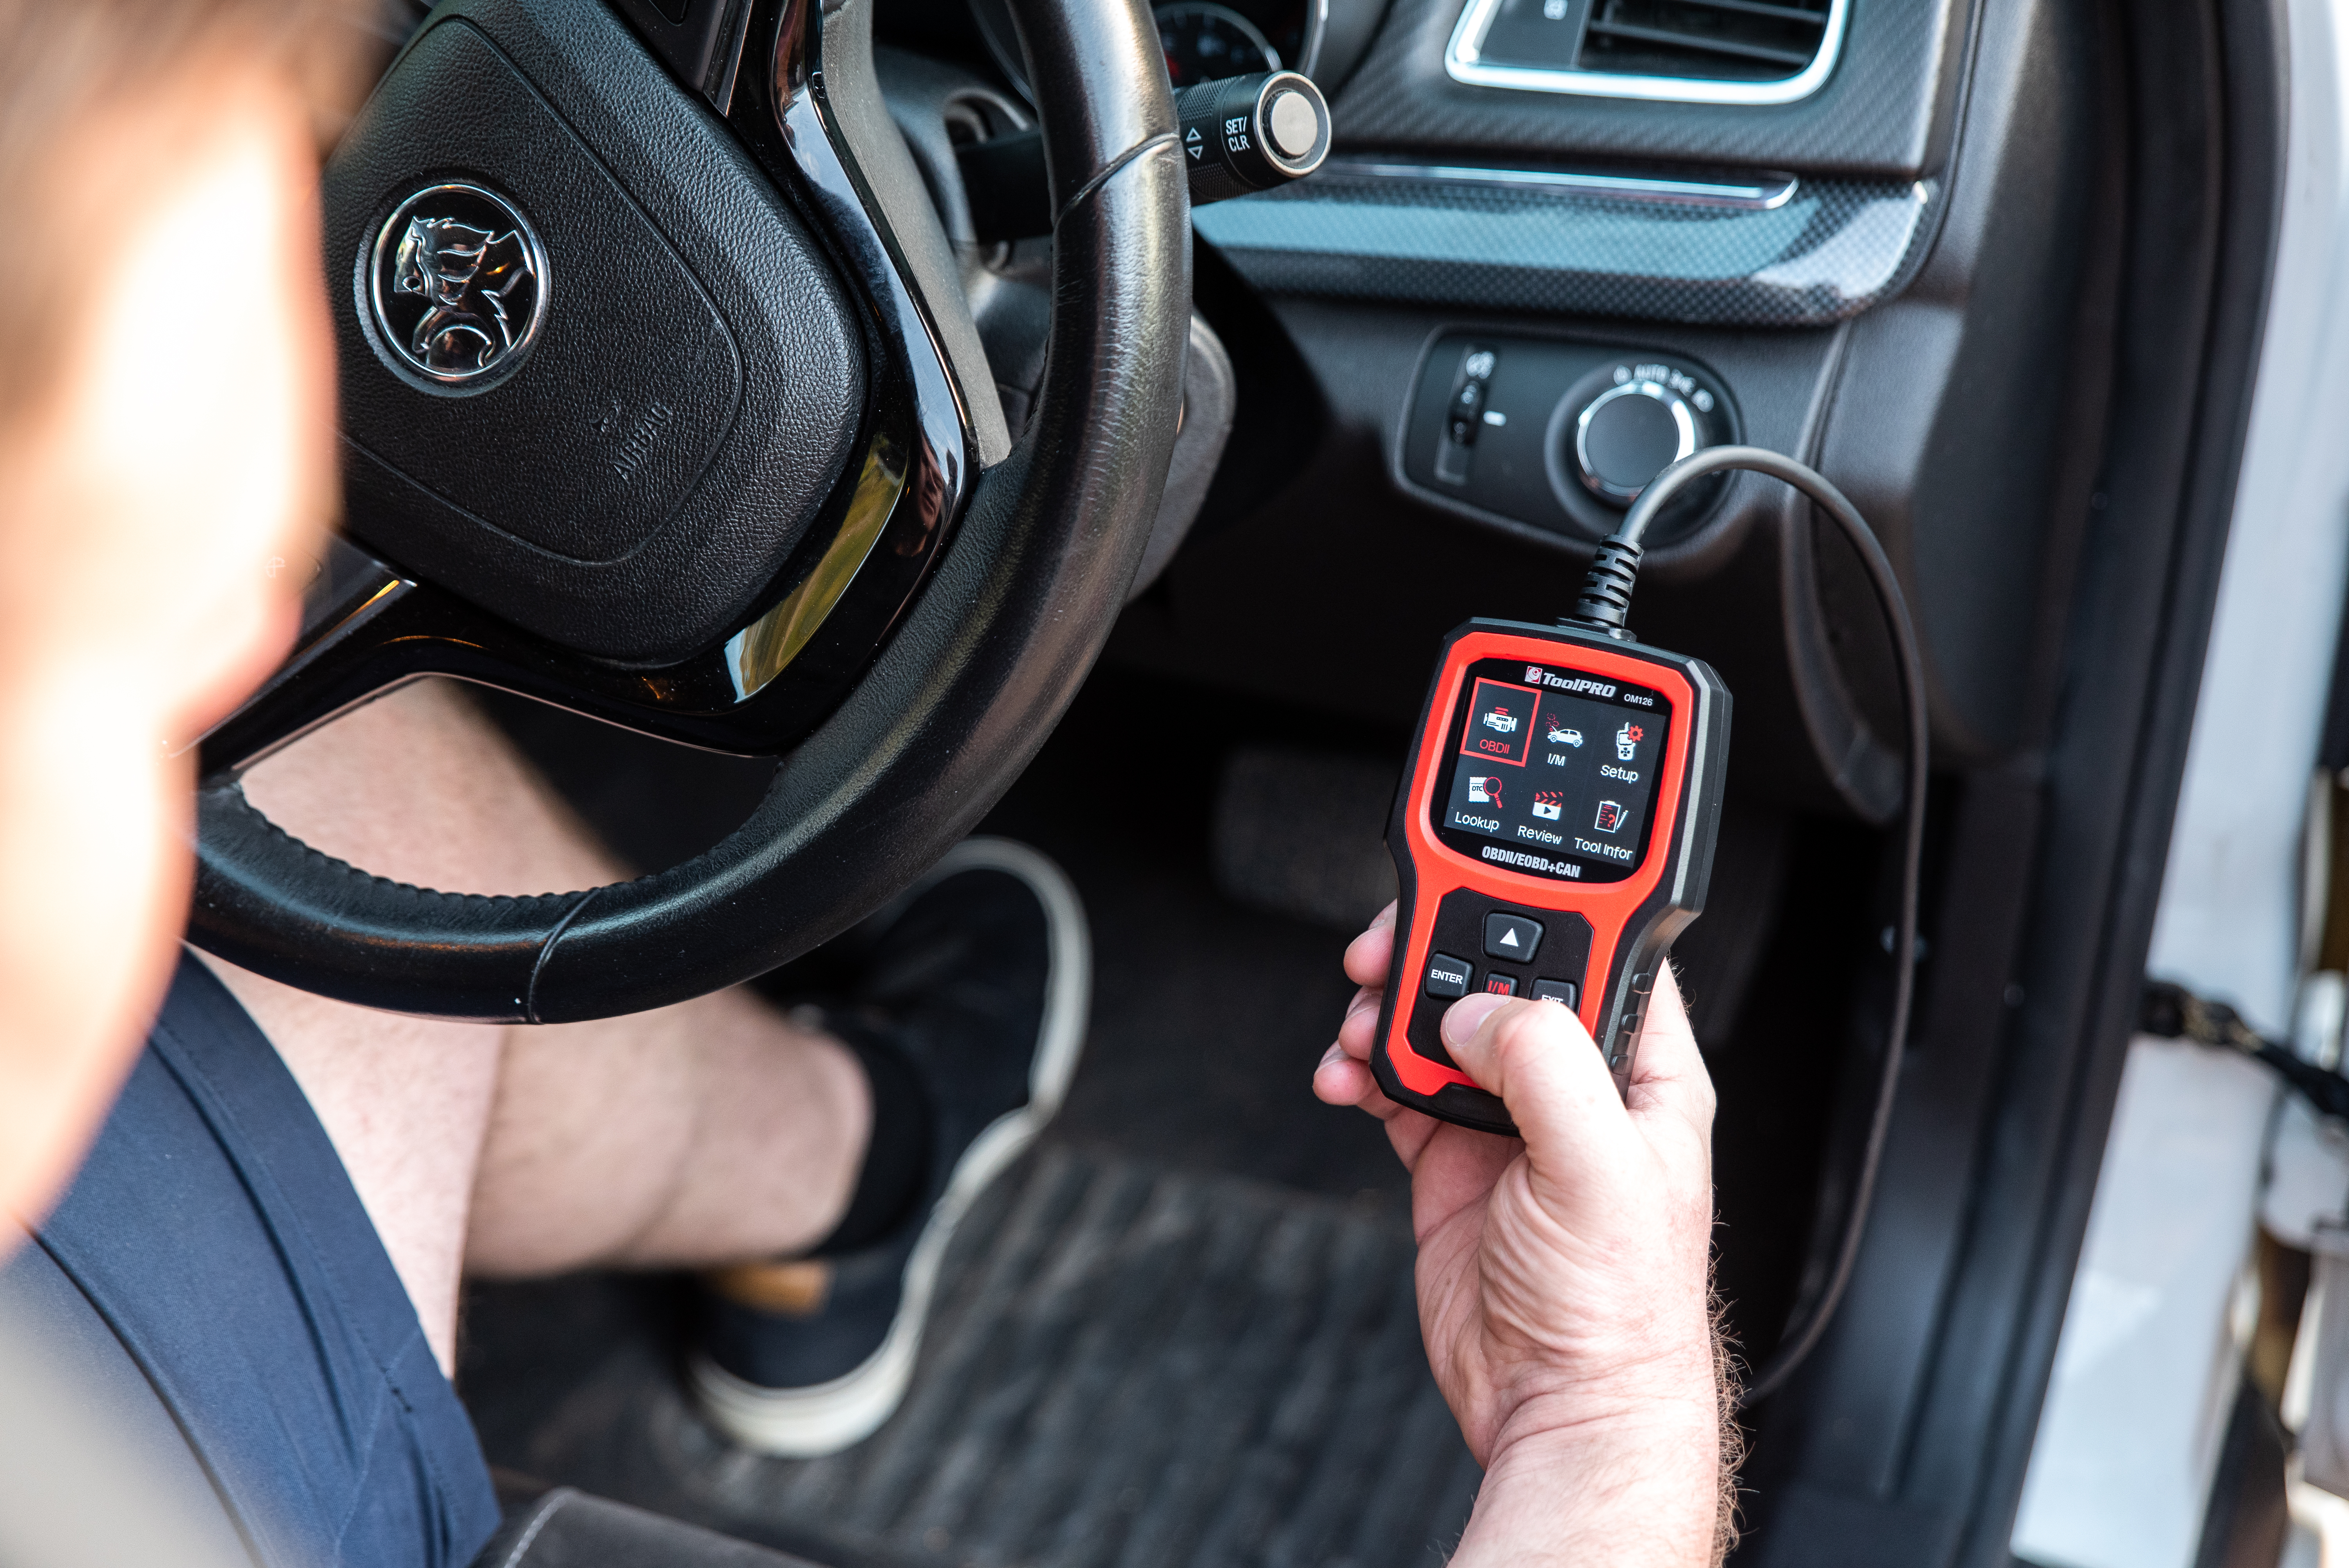
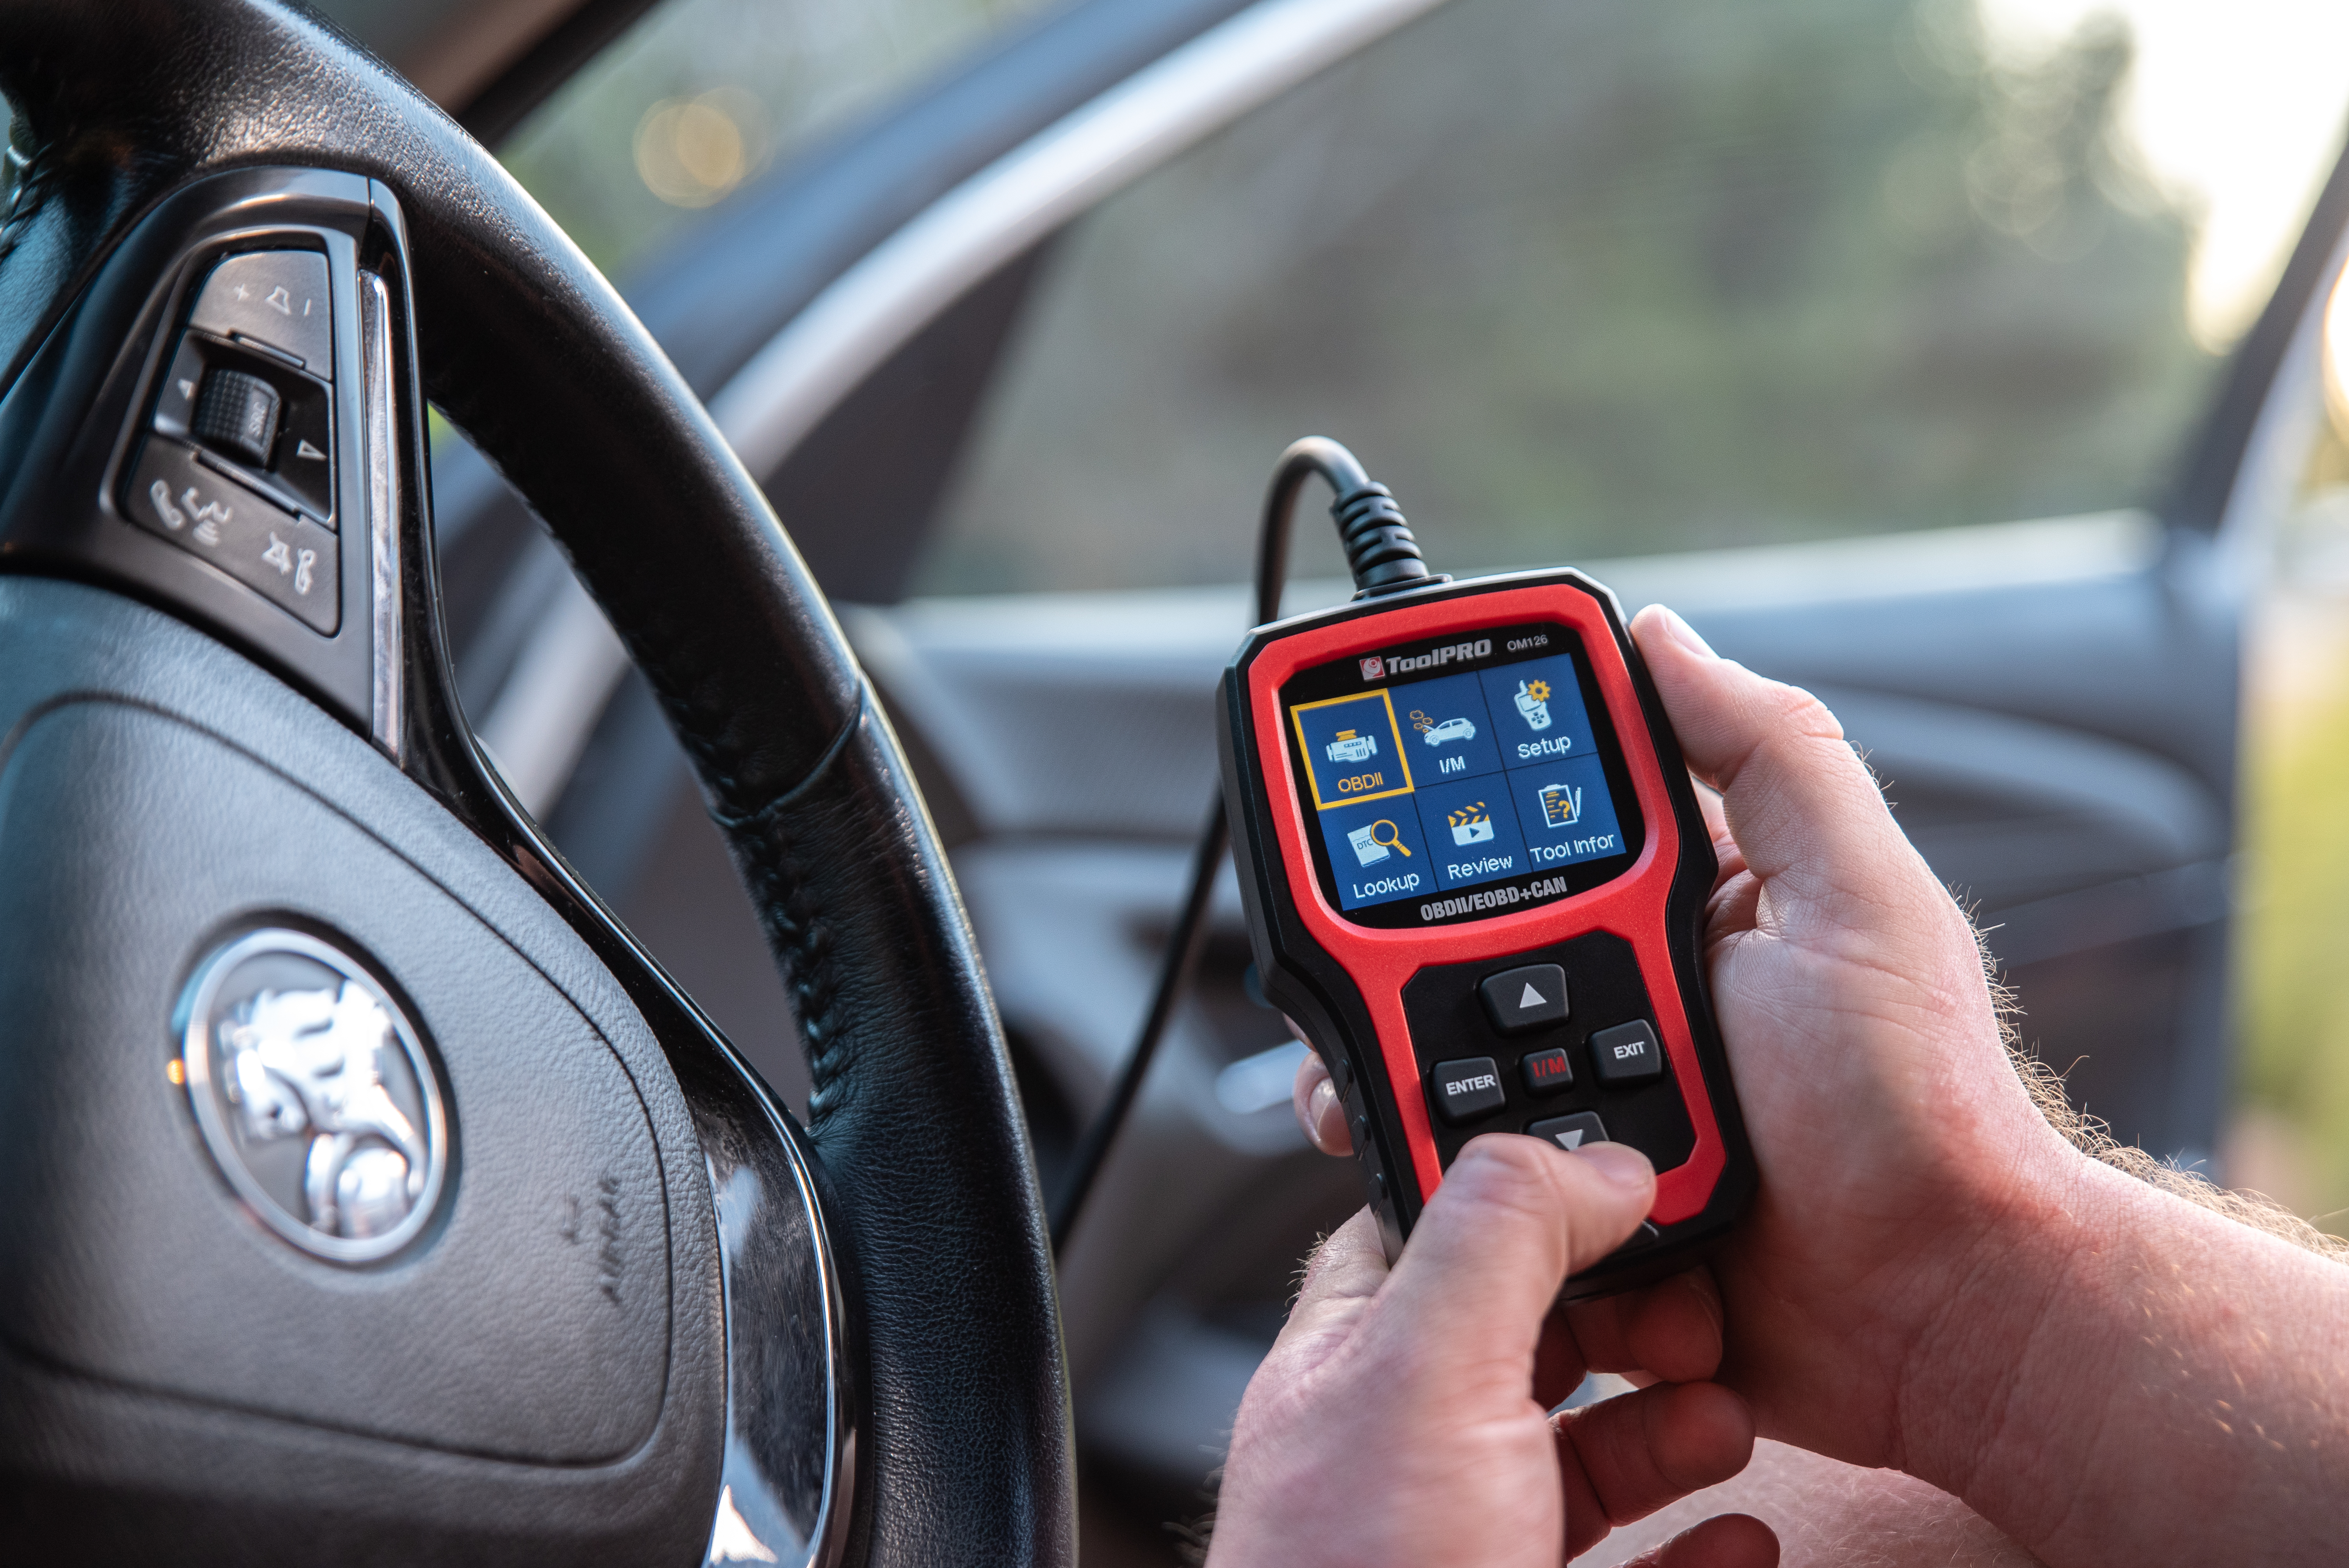
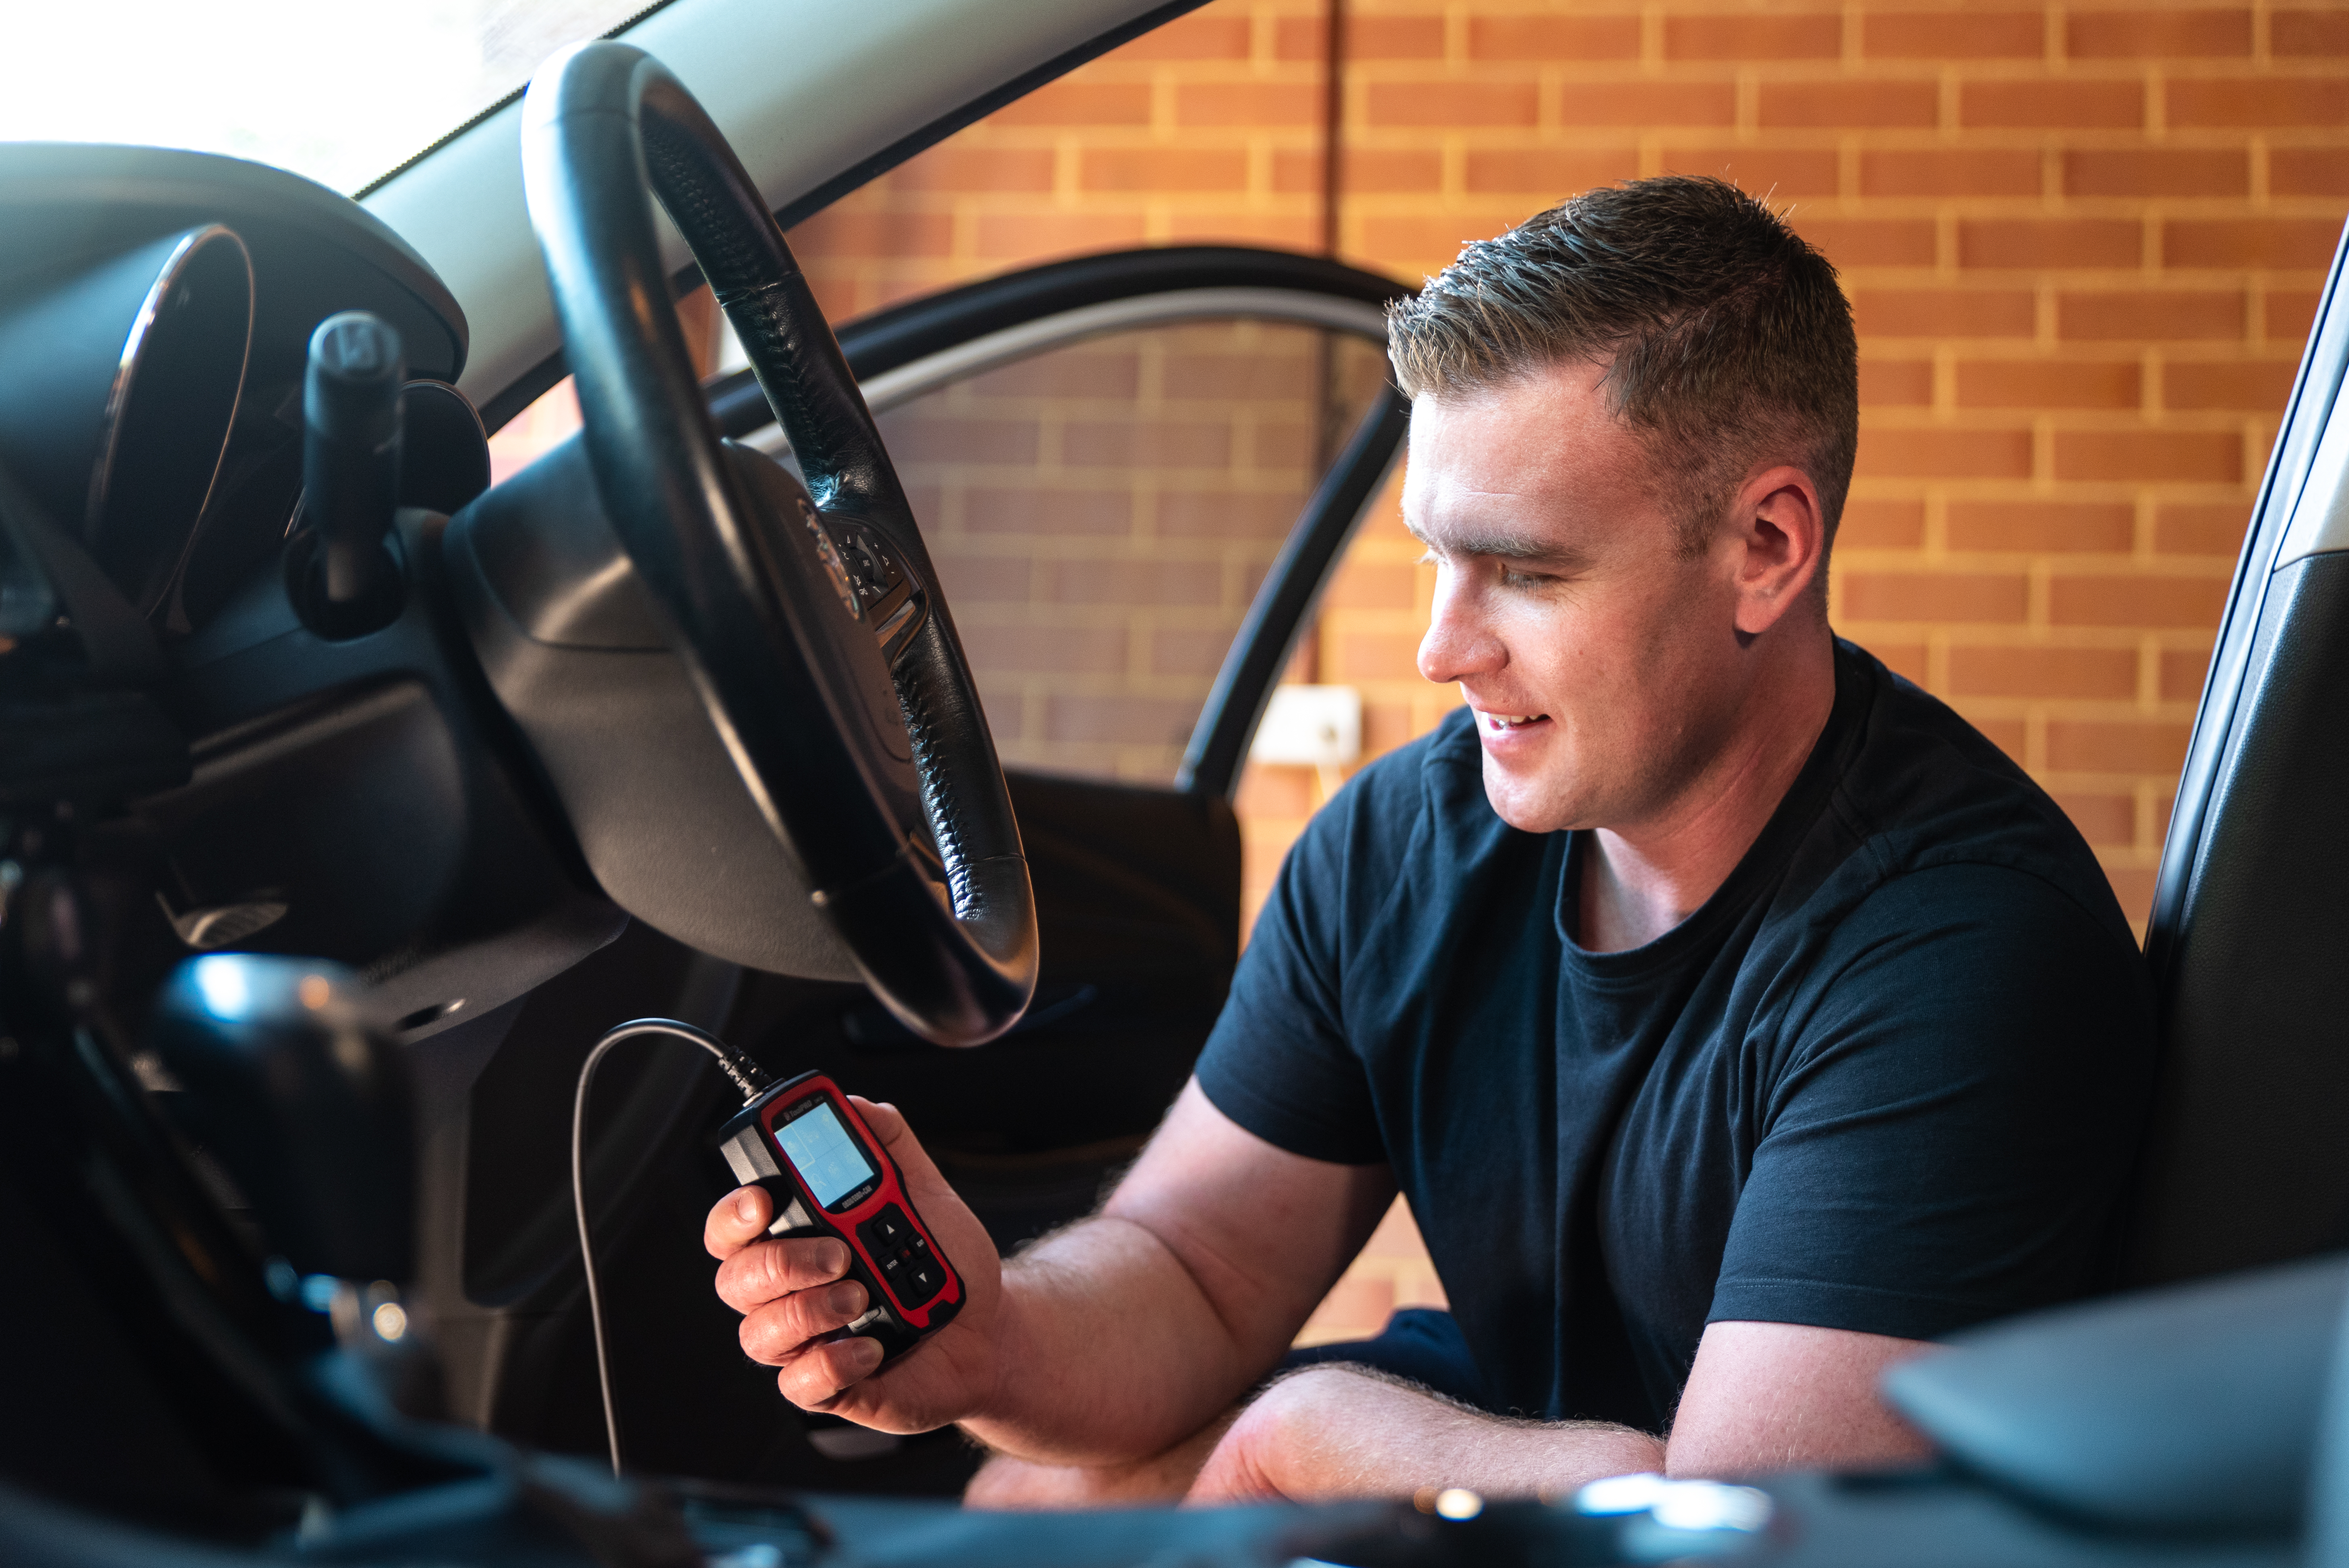
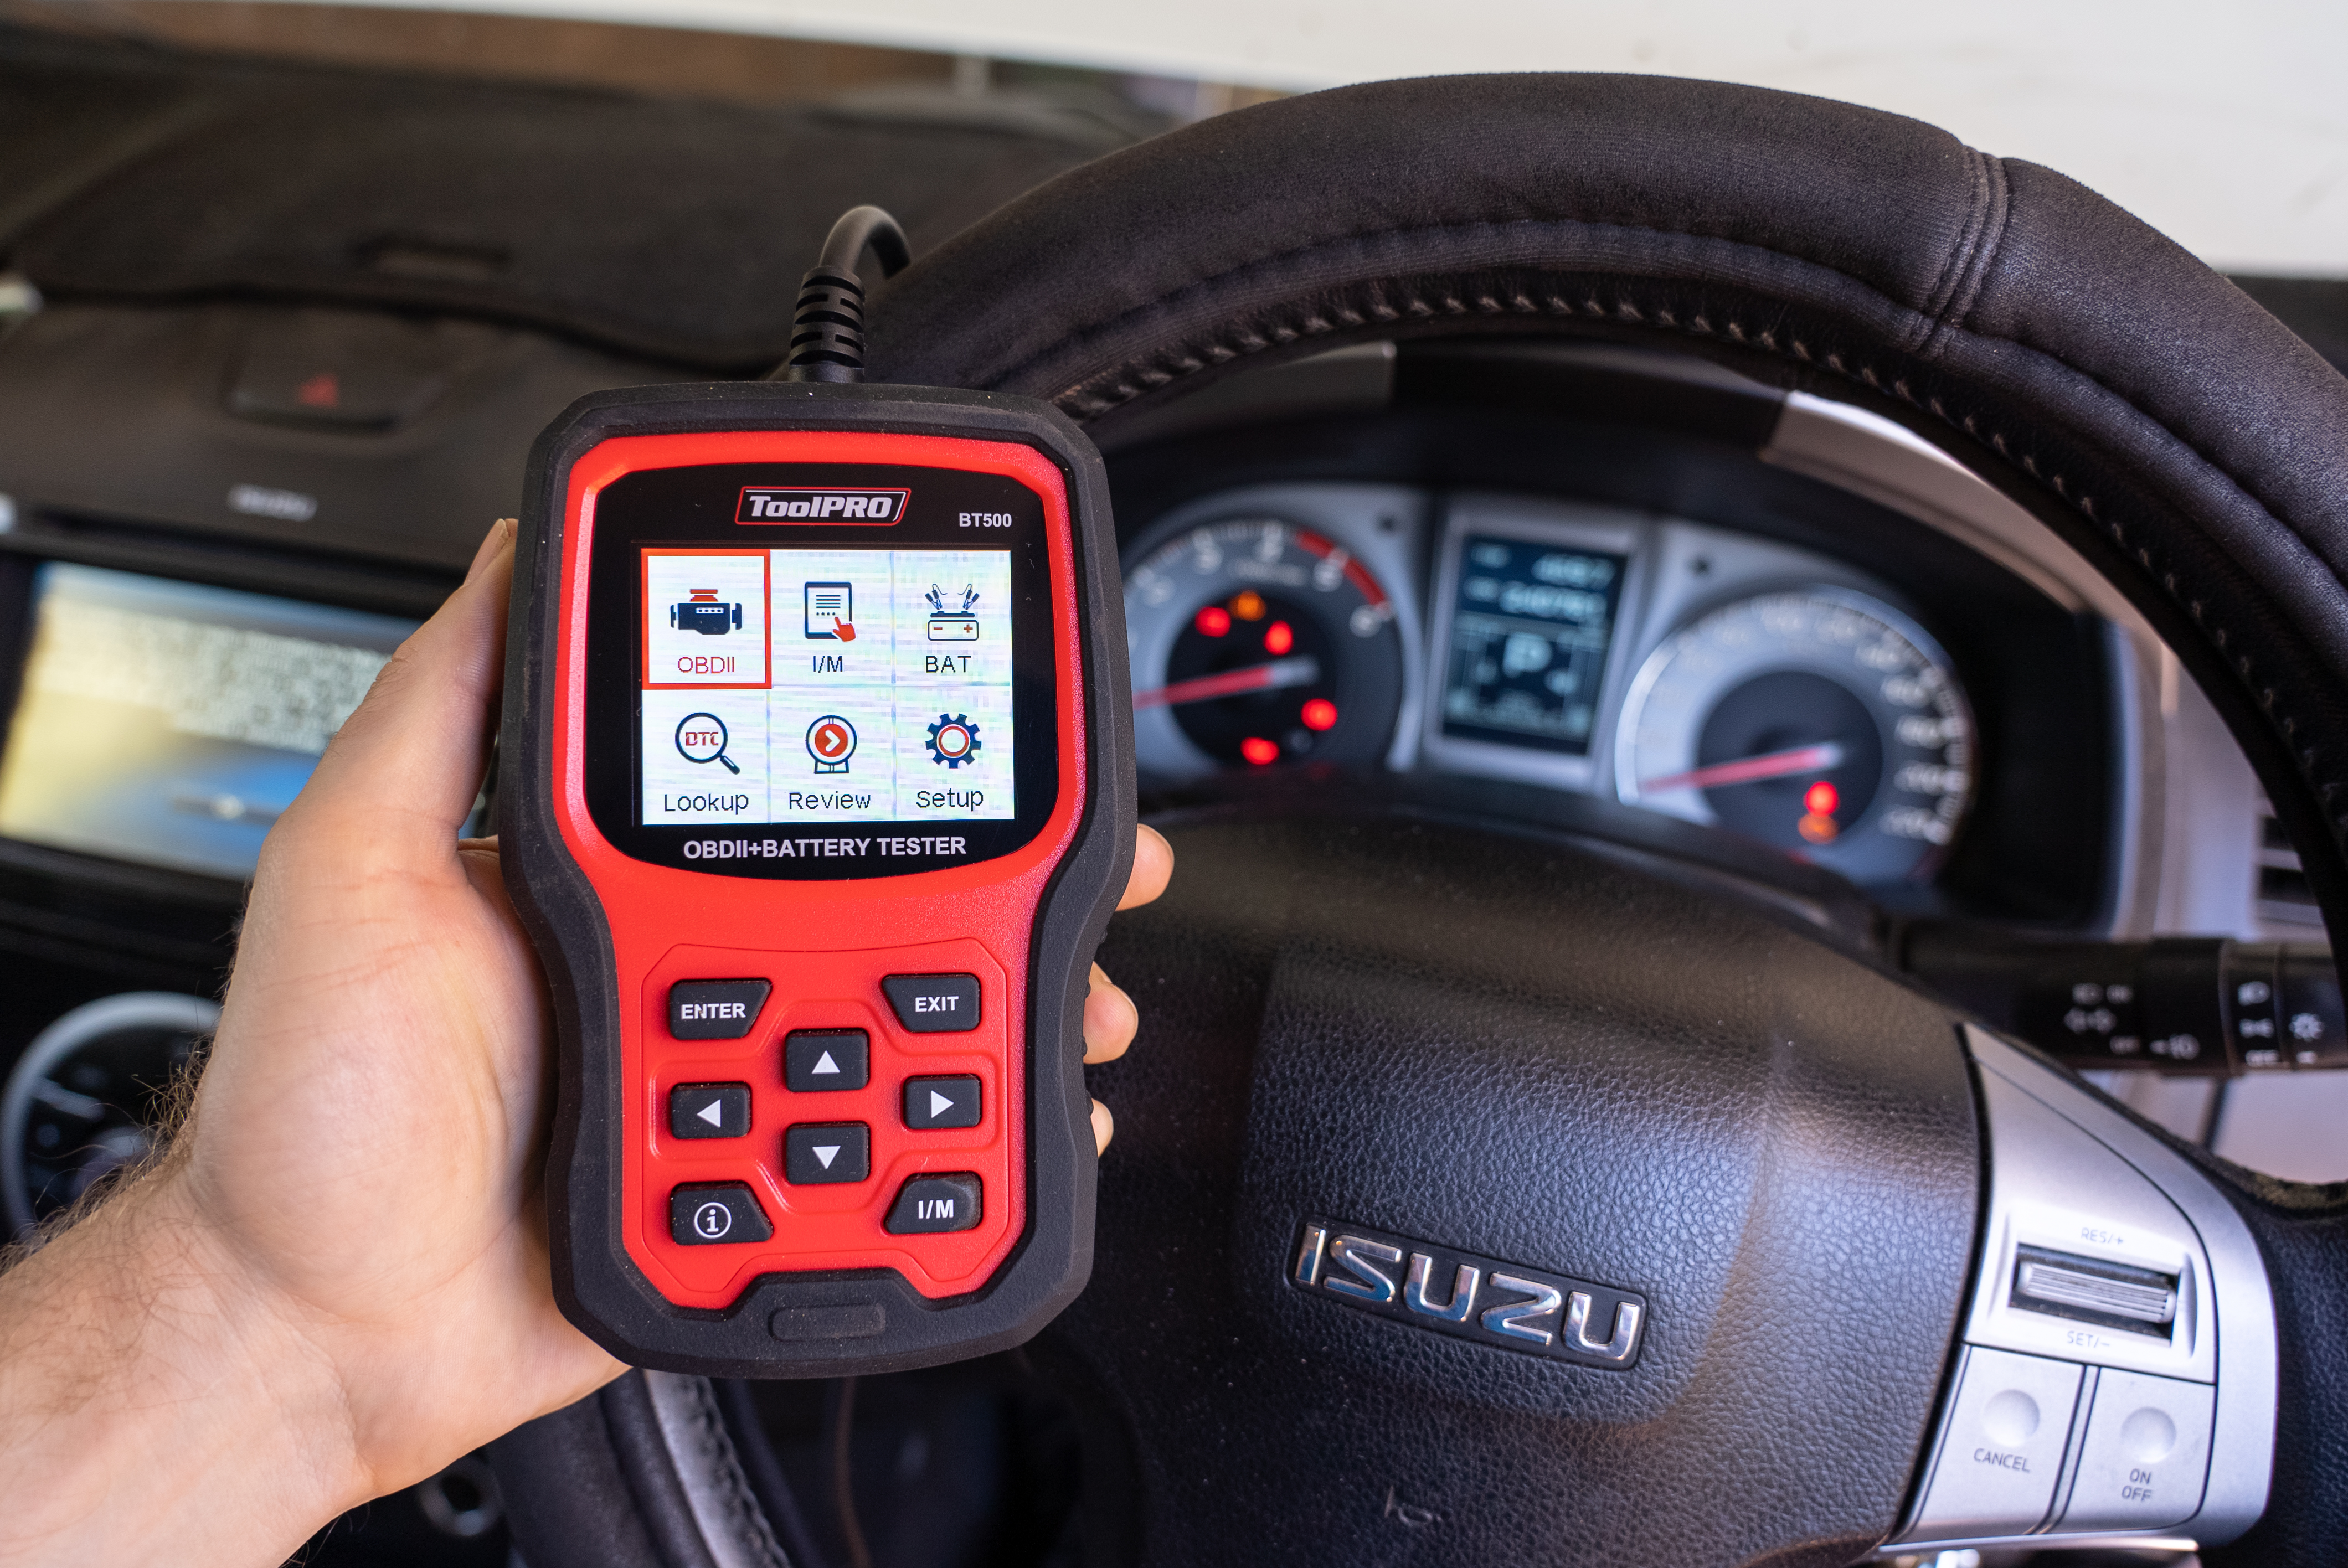
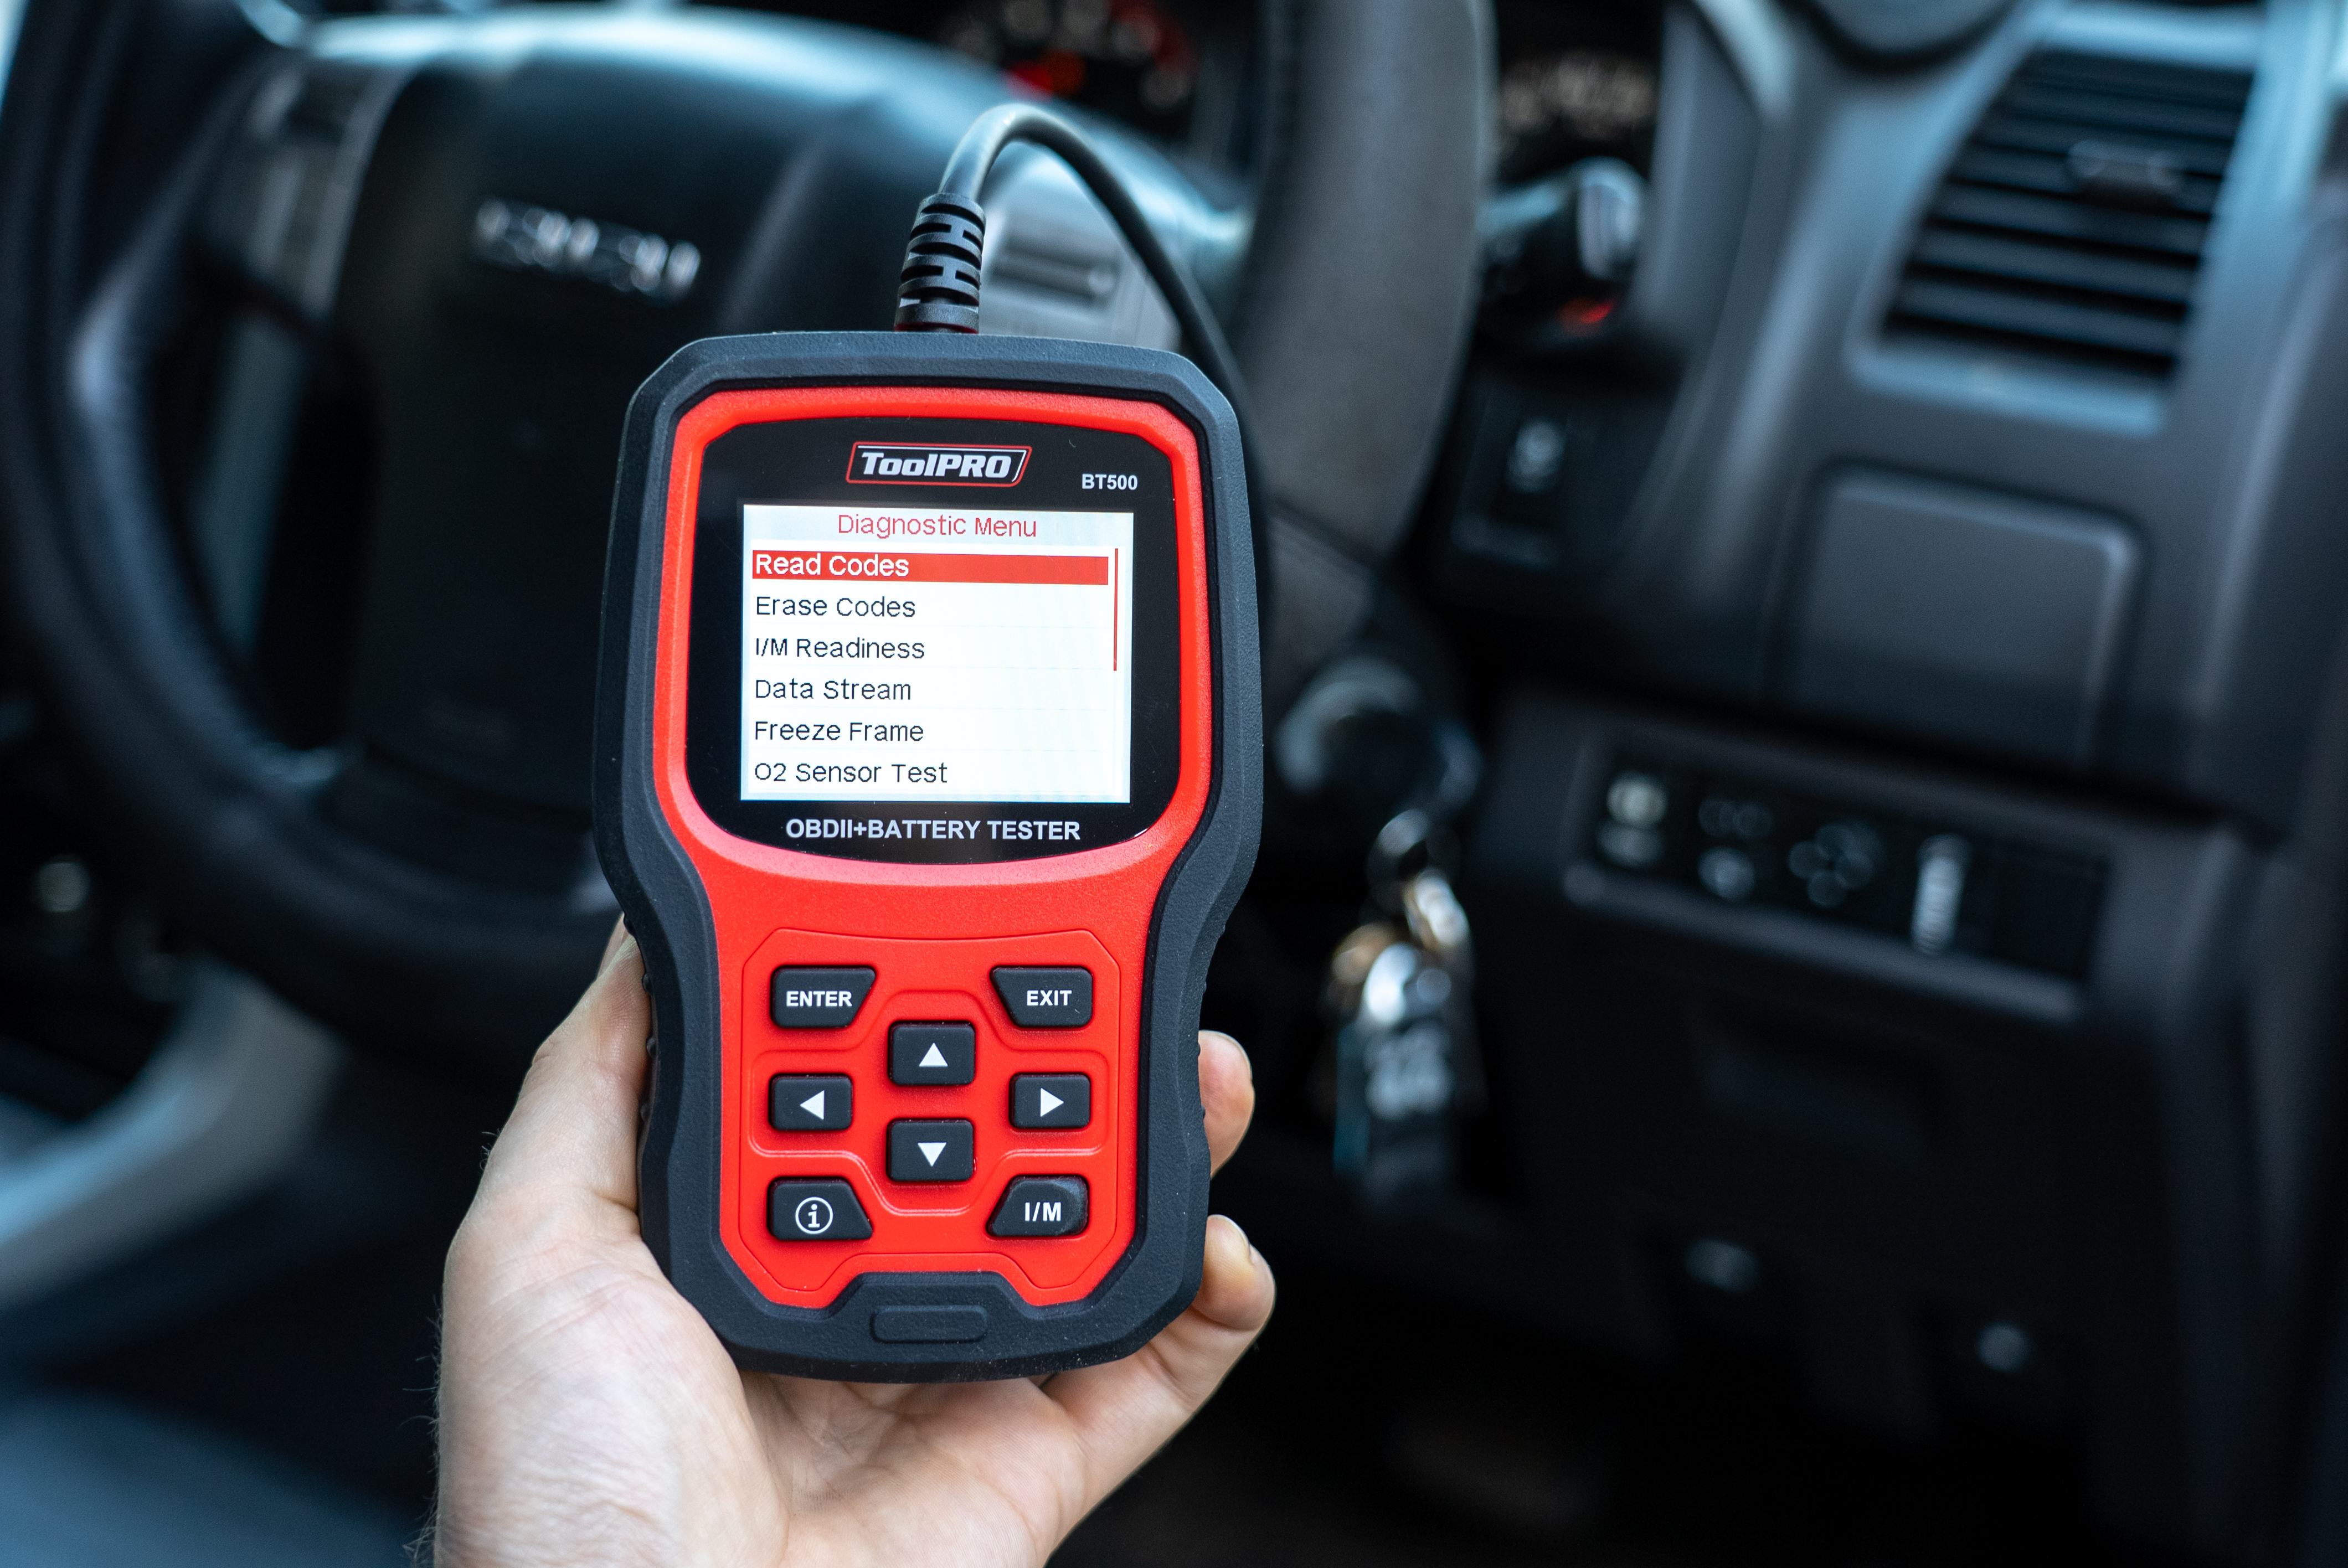
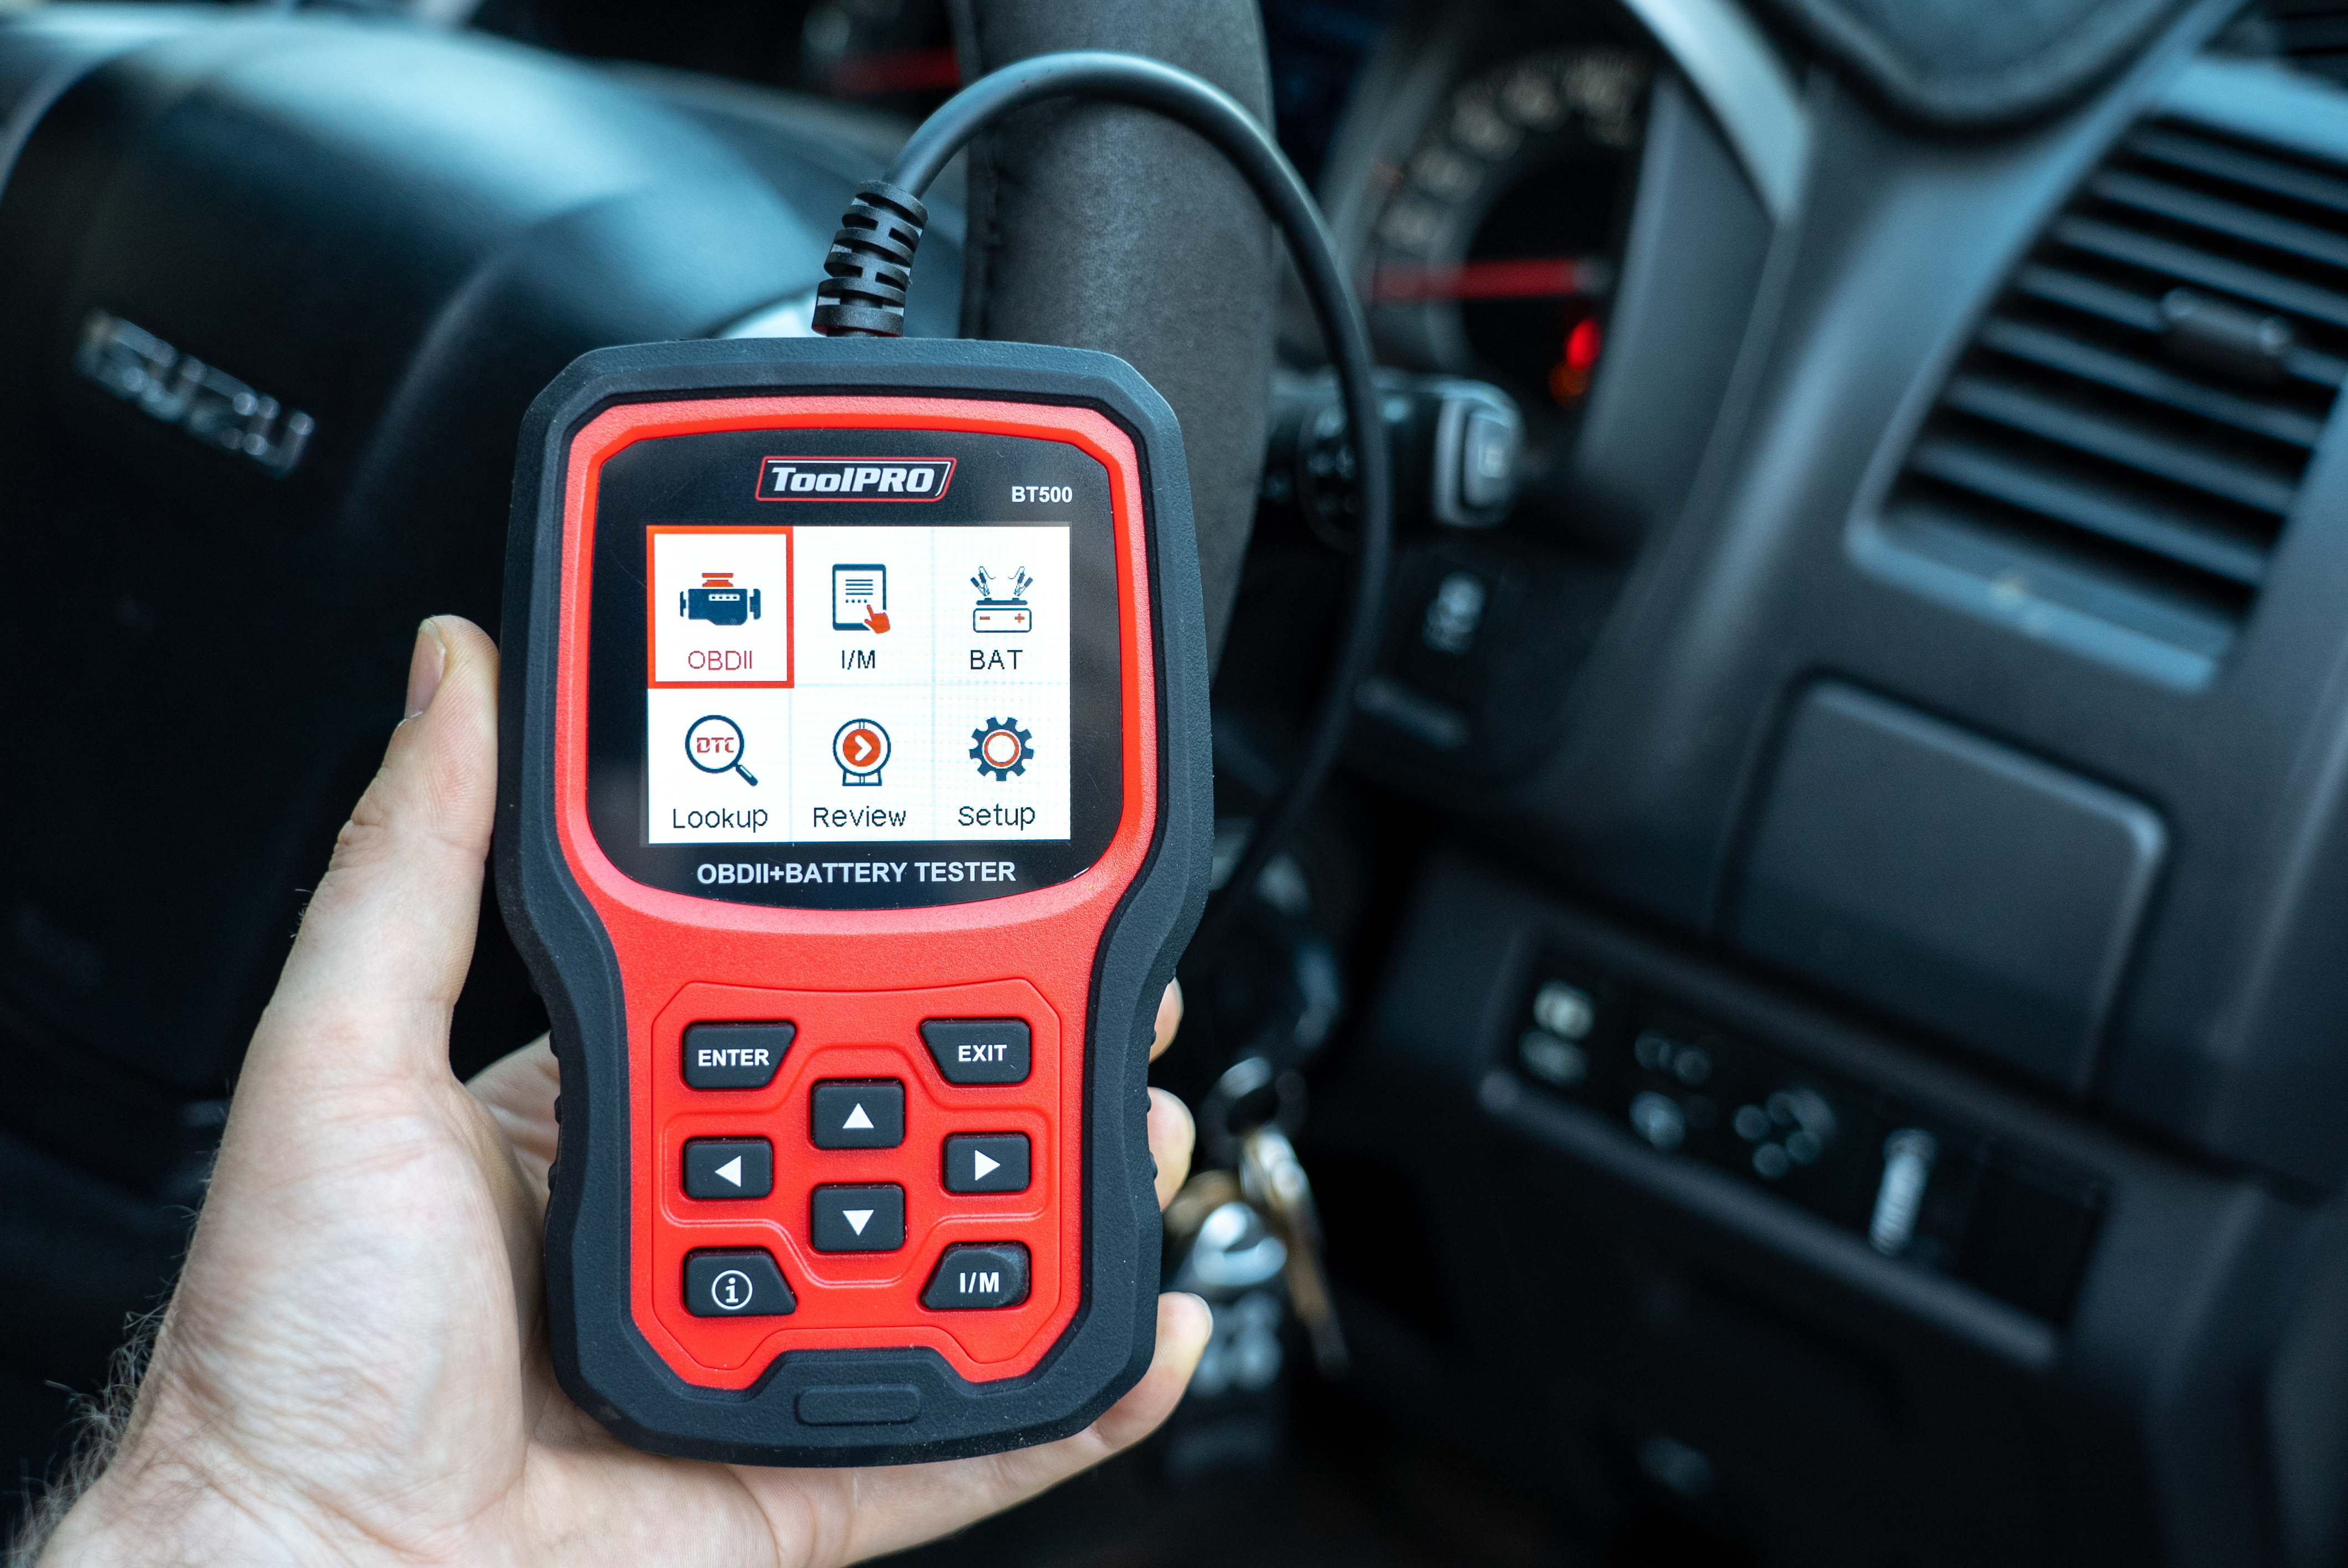
Step 3:How to use OBD2 Scanner
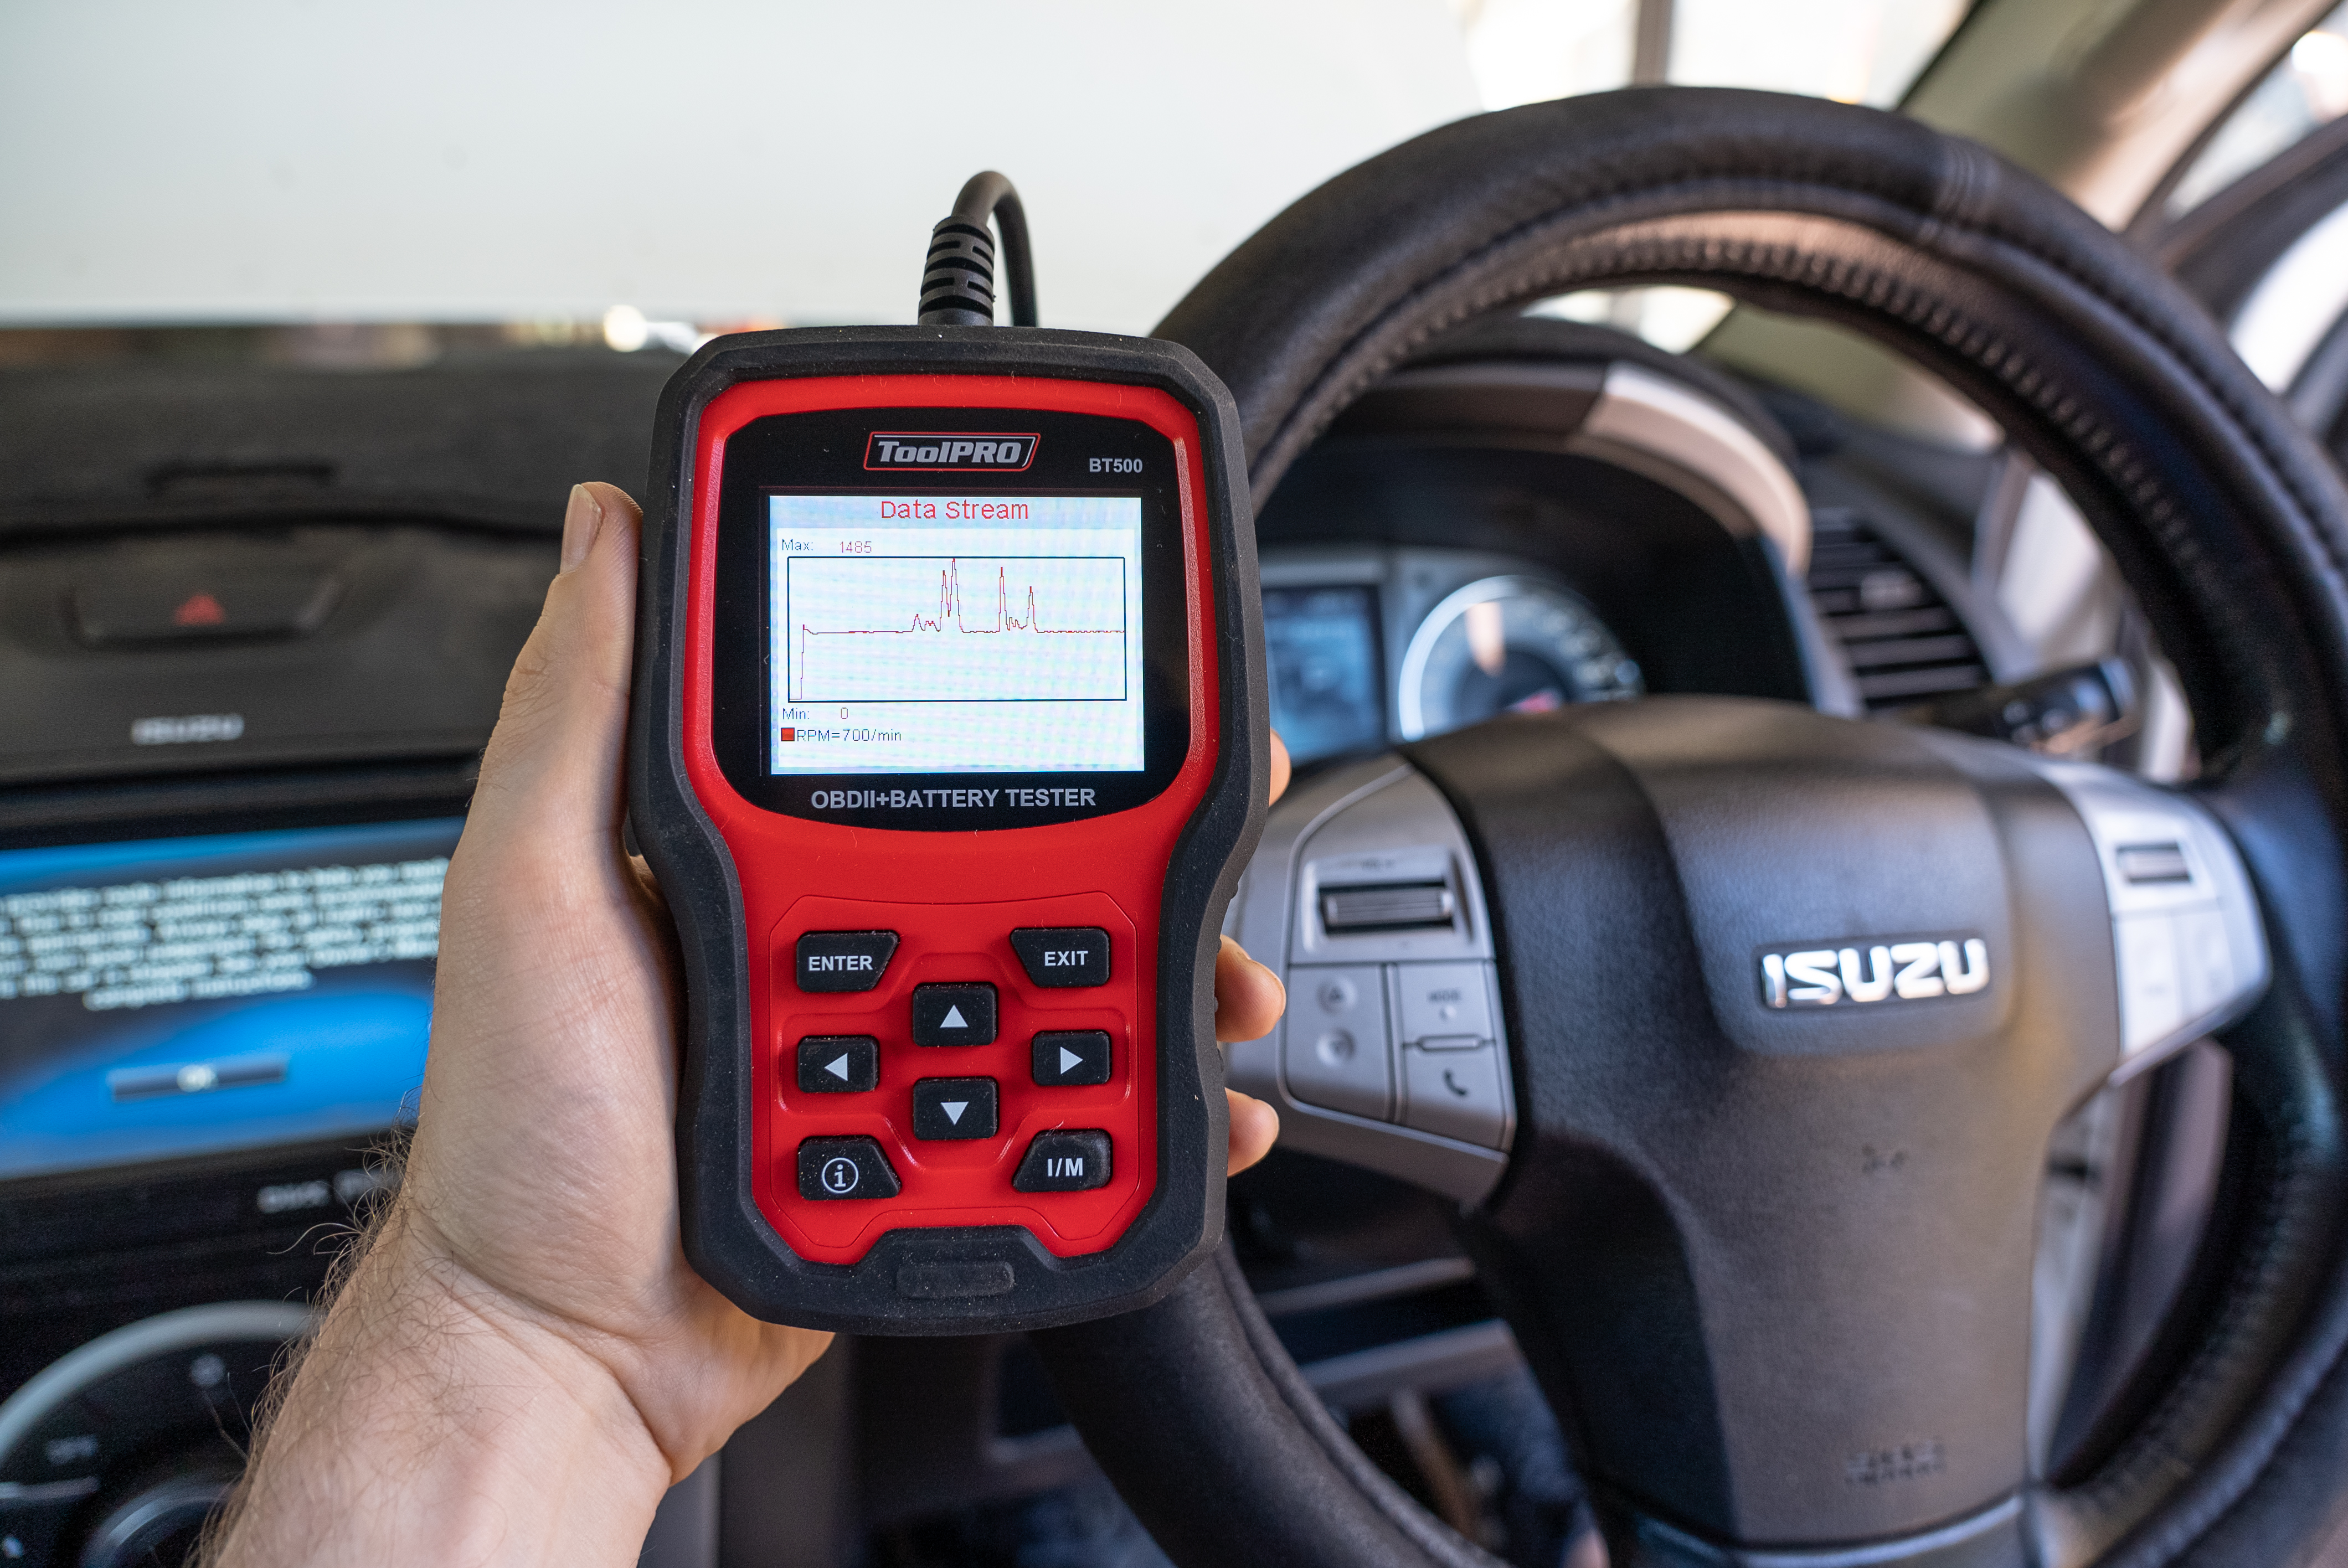
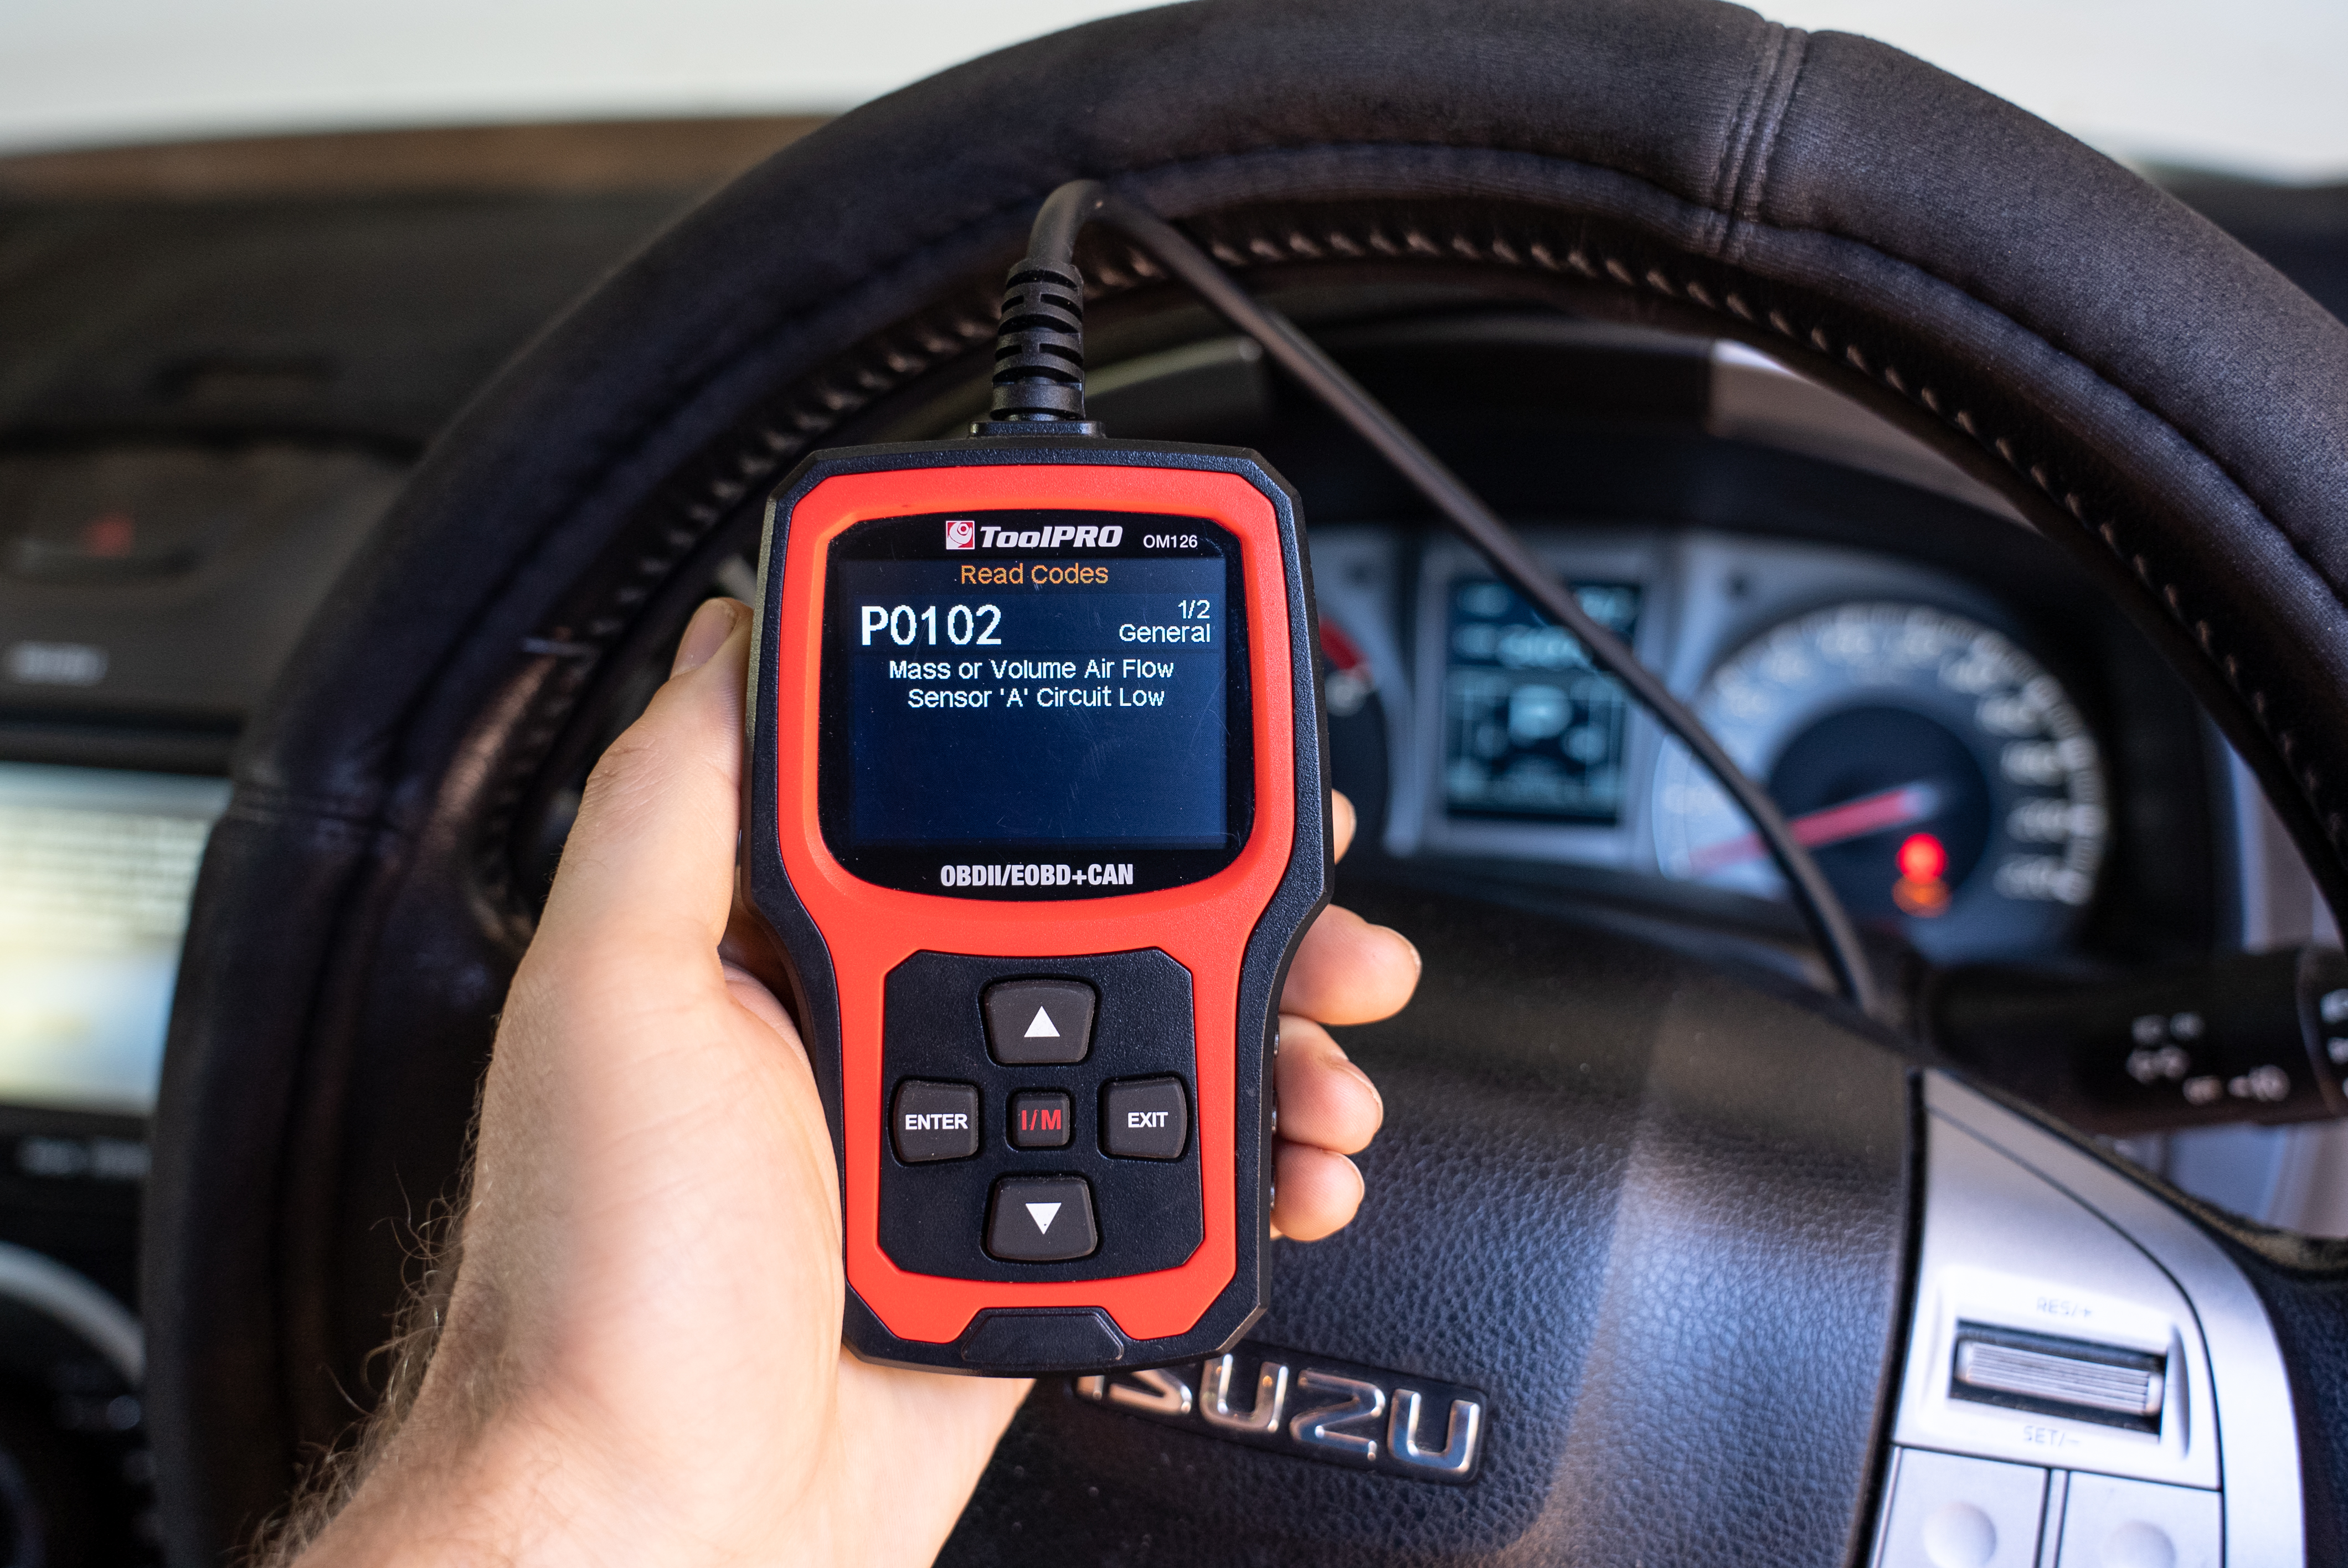
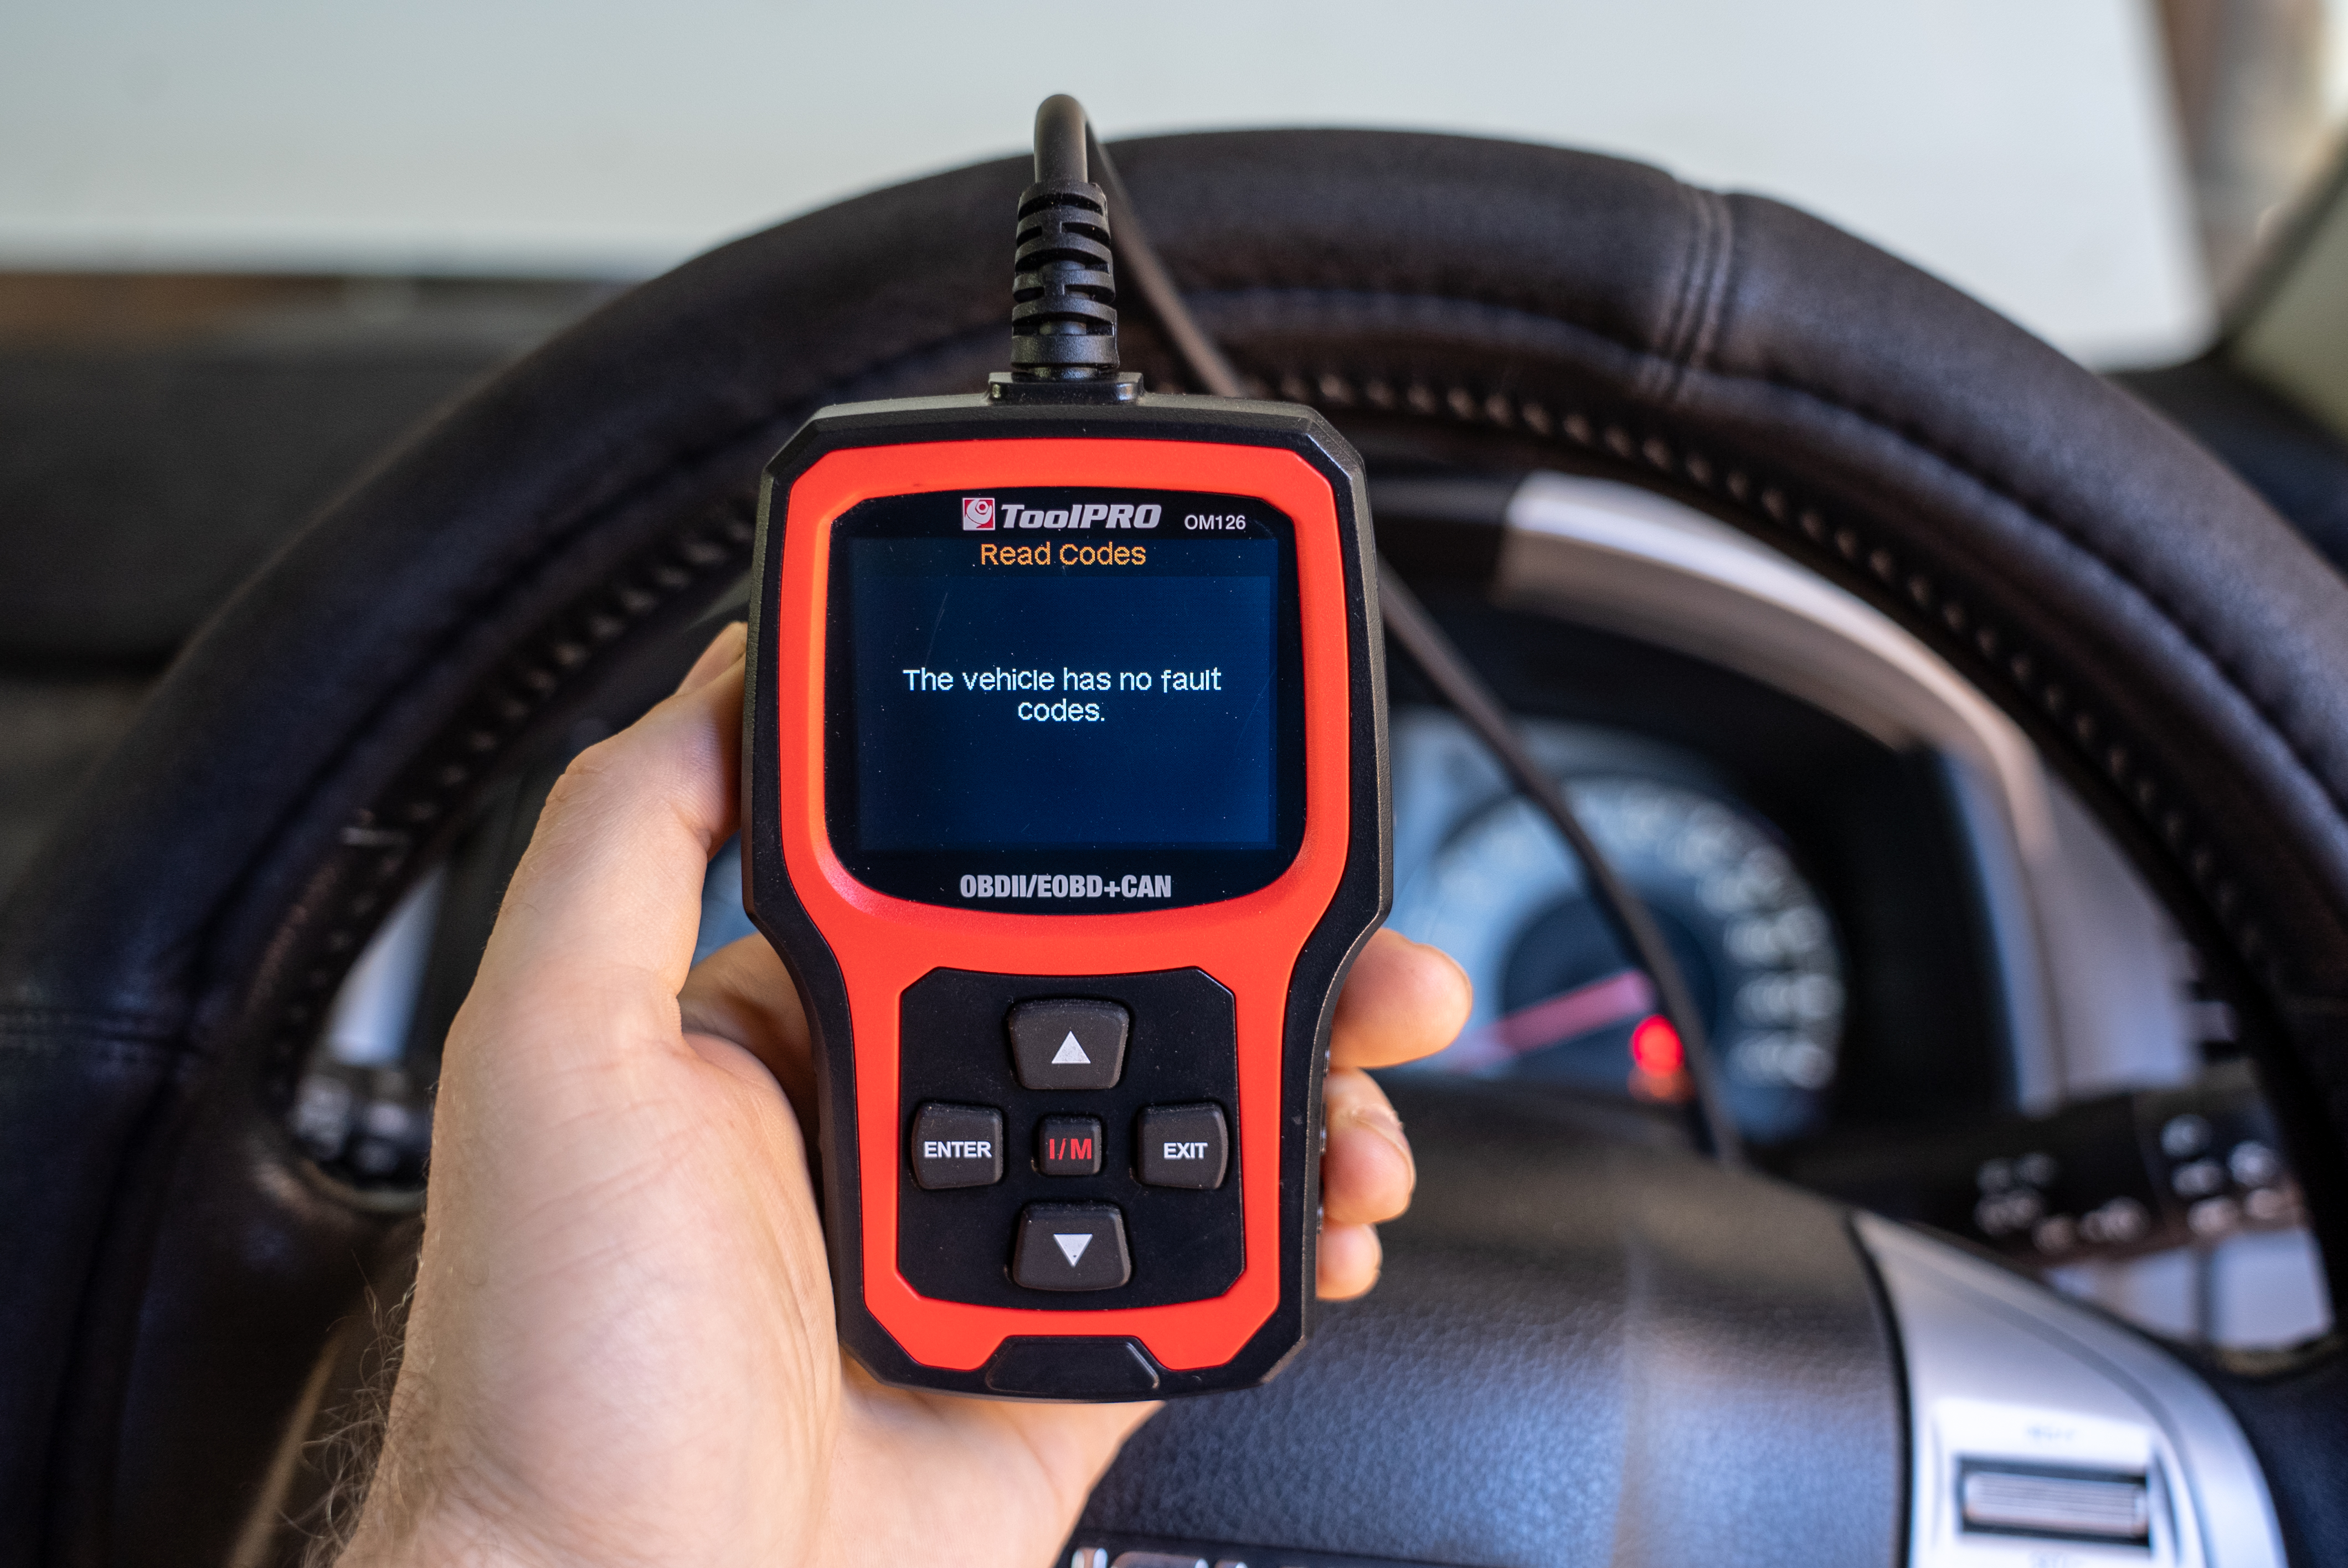
Your OBD2 scanner will present you with a menu. This of course will look different for each model, but typically you want to enter the OBD2 menu. Choose ‘Diagnostic Trouble Codes’ (DTC) if you need to find the reason for a check engine light. Typically, you will have to go through a few menu options and then wait a few moments for the OBD2 scanner to find any trouble codes. The result will vary between vehicles. You may get the code followed by a short description. Or you may just get a code. Write this down.
Step 4:How to find a diagnostic trouble code definition
If you hop back to the menu of your OBD2 scanner you will usually find a code lookup function. Select this and enter the code you received after the scan. The OBD2 scanner should show the definition of that code. If you get no result, you might try looking for code definitions in your vehicle service manual. Failing that, many diagnostic trouble code definitions can be looked up on Google.
Step 5:How to use obd2 scanner to fix engine light
Once you've cracked the code behind the check engine light, you’ll need to address the issue it has warned you of. It could be a simple twist to tighten the fuel cap or a speedy sensor clean-up. But if the issue's playing hard to fix, don't hesitate to call your mechanic. Once that problem is solved, it’s back to the OBD2 scanner to finish the job. Locate the code clearing function in the menu on your OBD2 scanner. Follow the prompts to reset any diagnostic trouble codes; then unplug your OBD2 scanner.
Step 6:Job Done!
Start your car up and watch that the check engine light doesn’t return. If it does, you’ll need to repeat the process for how to use an OBD2 scanner from step two; and run the diagnostic scan again to identify whether the same issue persists or it’s something else entirely.
Tips & FAQs
What OBD2 scanner do I need and what is the best OBD2 diagnostic tool?
Diagnostic scanners can be broadly placed into three different categories. Diagnostic Readers, Diagnostic Scanners, and Workshop Scanners. A diagnostic reader will allow you to read and usually clear diagnostic codes from your car’s computer, with very little functionality beyond that. A diagnostic scanner will allow you to read and clear diagnostic trouble codes, view live engine data, and perform more advanced vehicle diagnostic functions. The workshop scanner is a large tablet device or piece of computer software with various linking cables for a wider range of vehicles. It provides advanced functionality for the most troublesome faults and trickiest vehicles. Generally, it’s only professional workshops who can afford these.
Where do I plug in the OBD2 Scanner?
The OBD2 scanner must be plugged into the OBD2 port. The exact location can vary depending on the make and model of your car. Some of the most common locations to find your OBD2 port include under the dashboard, below the steering column, near the driver’s seat, in the glovebox, or behind a plastic trim. H2: What vehicles use OBD2? In Australia and New Zealand, and vehicle manufactured since 2006 should be equipped with an OBD2 diagnostic port. If your car was manufactured in the USA such as Jeep, you probably have OBD2 if it was manufactured after 1996. This is true for petrol and diesel vehicles, but electric vehicles are a little more hit and miss.
Can I check fuel pressure with OBD2 scanners?
Yes! At least on most cars. This is how to check fuel pressure with OBD2
- 1. Follow steps one to three from earlier in this article
- 2. At the menu, locate the live data option and select this
- 3. Find the fuel pressure value, or fuel pressure sensor in the menu
- 4. Start your car, and fuel pressure value will be presented on your diagnostic scanner
When did OBD2 start?
OBD2 started in 1996 where it became mandatory for all vehicles manufactured in the USA. This means that some vehicles in Australia and New Zealand, particularly Jeep vehicles are equipped with OBD2. However, OBD2 started becoming the standard in Australia and New Zealand only in 2006. Most vehicles in Australia and New Zealand manufactured after this date will be equipped with OBD2.
*Important information* - Click here to read more about our DIY Advice Terms and Conditions.