How to Replace Trailer Wheel Bearings
Overview
Why are trailer bearings important?
Trailer wheel bearings are expected to hold the weight of your load, and manage the heat and friction generated at highway speeds. If your trailer wheel bearings are too loose, too tight, or the grease has dried, leaked or become contaminated; trailer wheel bearing failure will occur causing the wheel to separate from the trailer completely.How long do wheel bearings last?
With proper care and maintenance, wheel bearings can last 100,000 kilometres or more. Overloading your trailer will reduce the life of wheel bearings, and water ingress will also shorten their life. Grease can dry, leak and separate with age and if not renewed, this will quickly destroy wheel bearings. Even parking up for long periods can shorten the life of wheel bearings. So how long do wheel bearings last? It all depends.Signs of trailer wheel bearing failure
While there are a few types of trailer bearings, most of them share very common designs. Even though different bearings may be required for each trailer, they are usually readily available. Maintaining and changing trailer wheel bearings is much the same between different trailers. Common signs of trailer wheel bearing failure include clunking wheels if the trailer is rocked, oily residue on the wheels, a rumbling noise when the wheel is spun, or excessive heat after a good long drive.How to check trailer wheel bearings?
To check trailer wheel bearings, start with a visual inspection. Look at the front and rear of the wheel for signs of grease leaking. Next, raise the wheel off the ground and support it with an axle stand. Spin the wheel, it should be quiet with no rumbling sound. Then grab the wheel at the 6 and 12 o’clock positions and attempt to rock the wheel. There should be no movement at all.Choosing the right trailer bearings for your vehicle
To figure out what size trailer bearings you need, have a flick through the owner’s manual for your trailer. If you don’t have an owner’s manual, the most certain way to find the right trailer bearing is to remove the bearings, clean them up, and find the part number stamped on each bearing. Let’s go through the procedure for how to replace trailer bearings now.Items
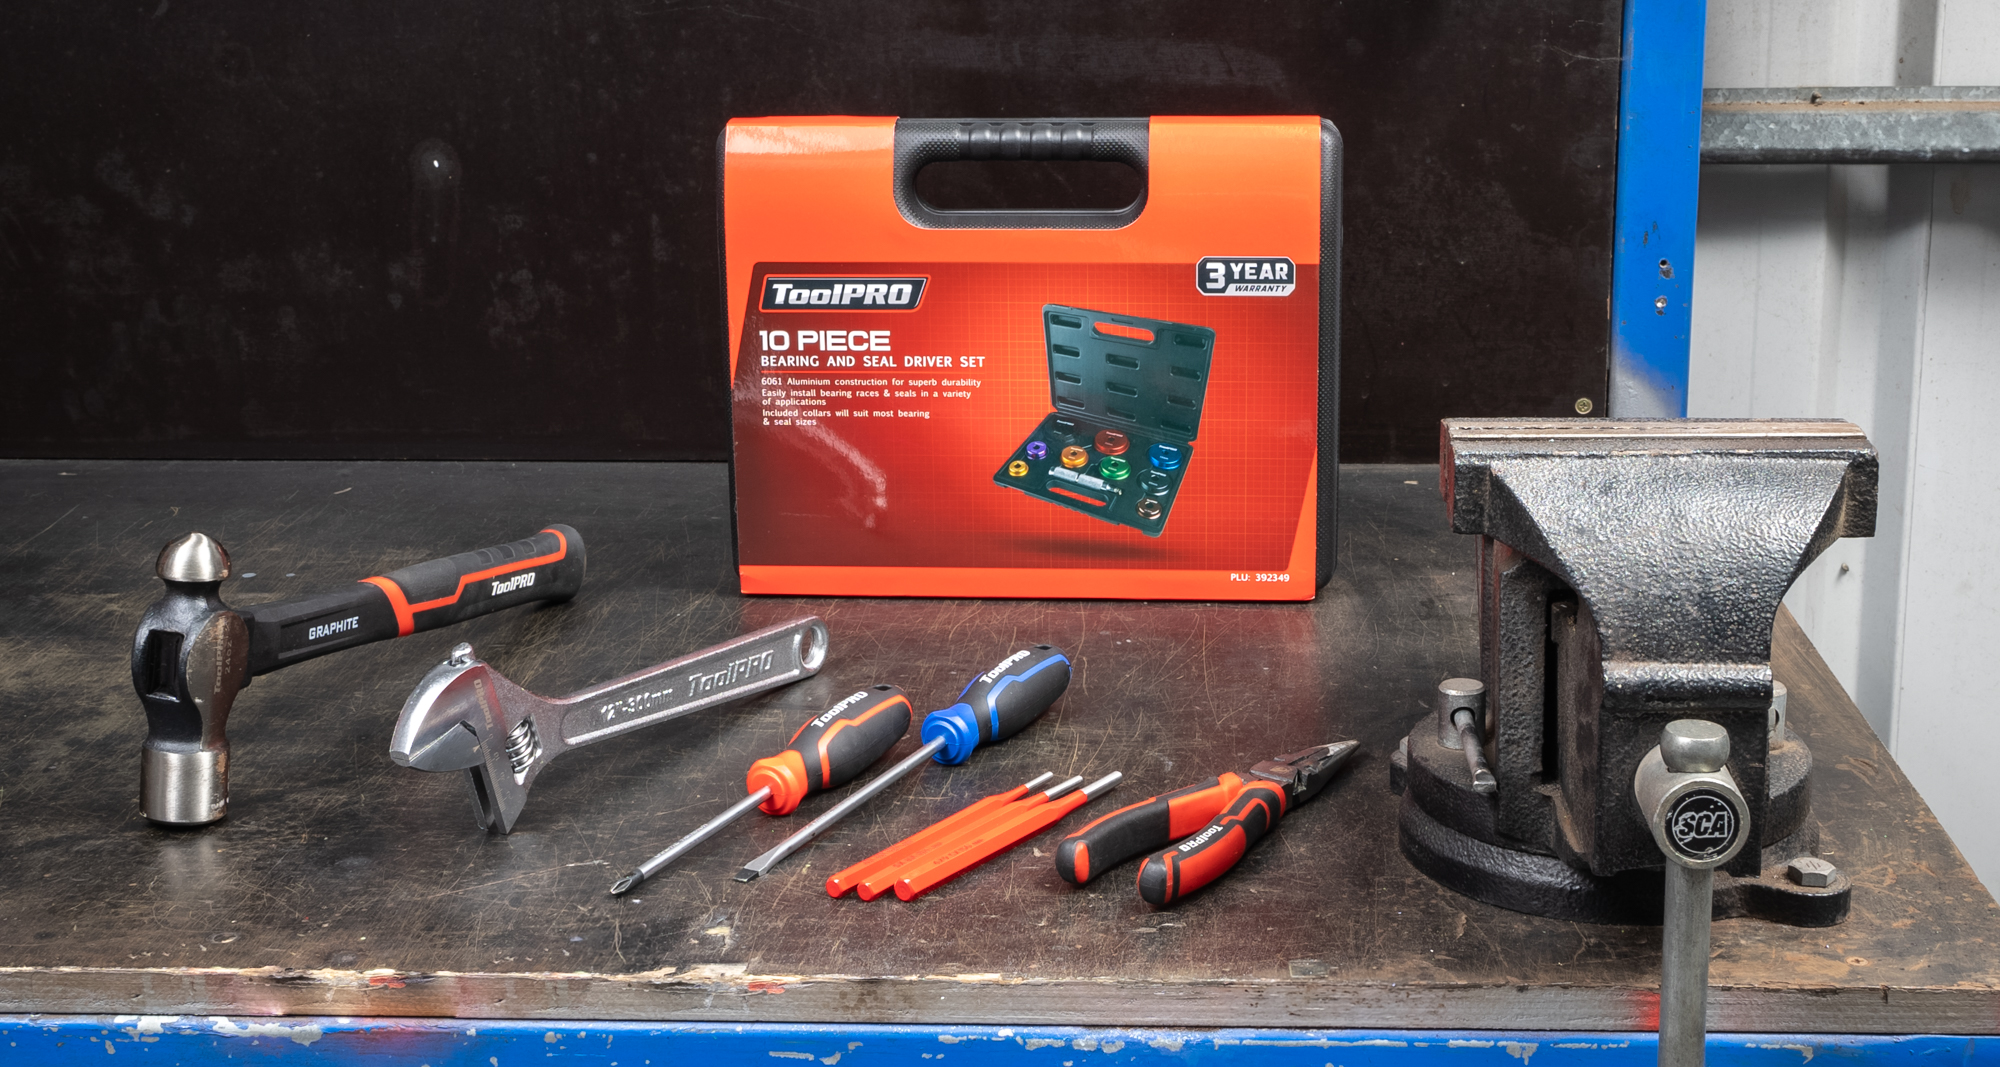
Most of the tools you need to replace trailer wheel bearings can be found in a your basic tool kit, only a few more specific items (including fresh grease and new wheel bearings) will be required.
Safety glasses and disposable gloves
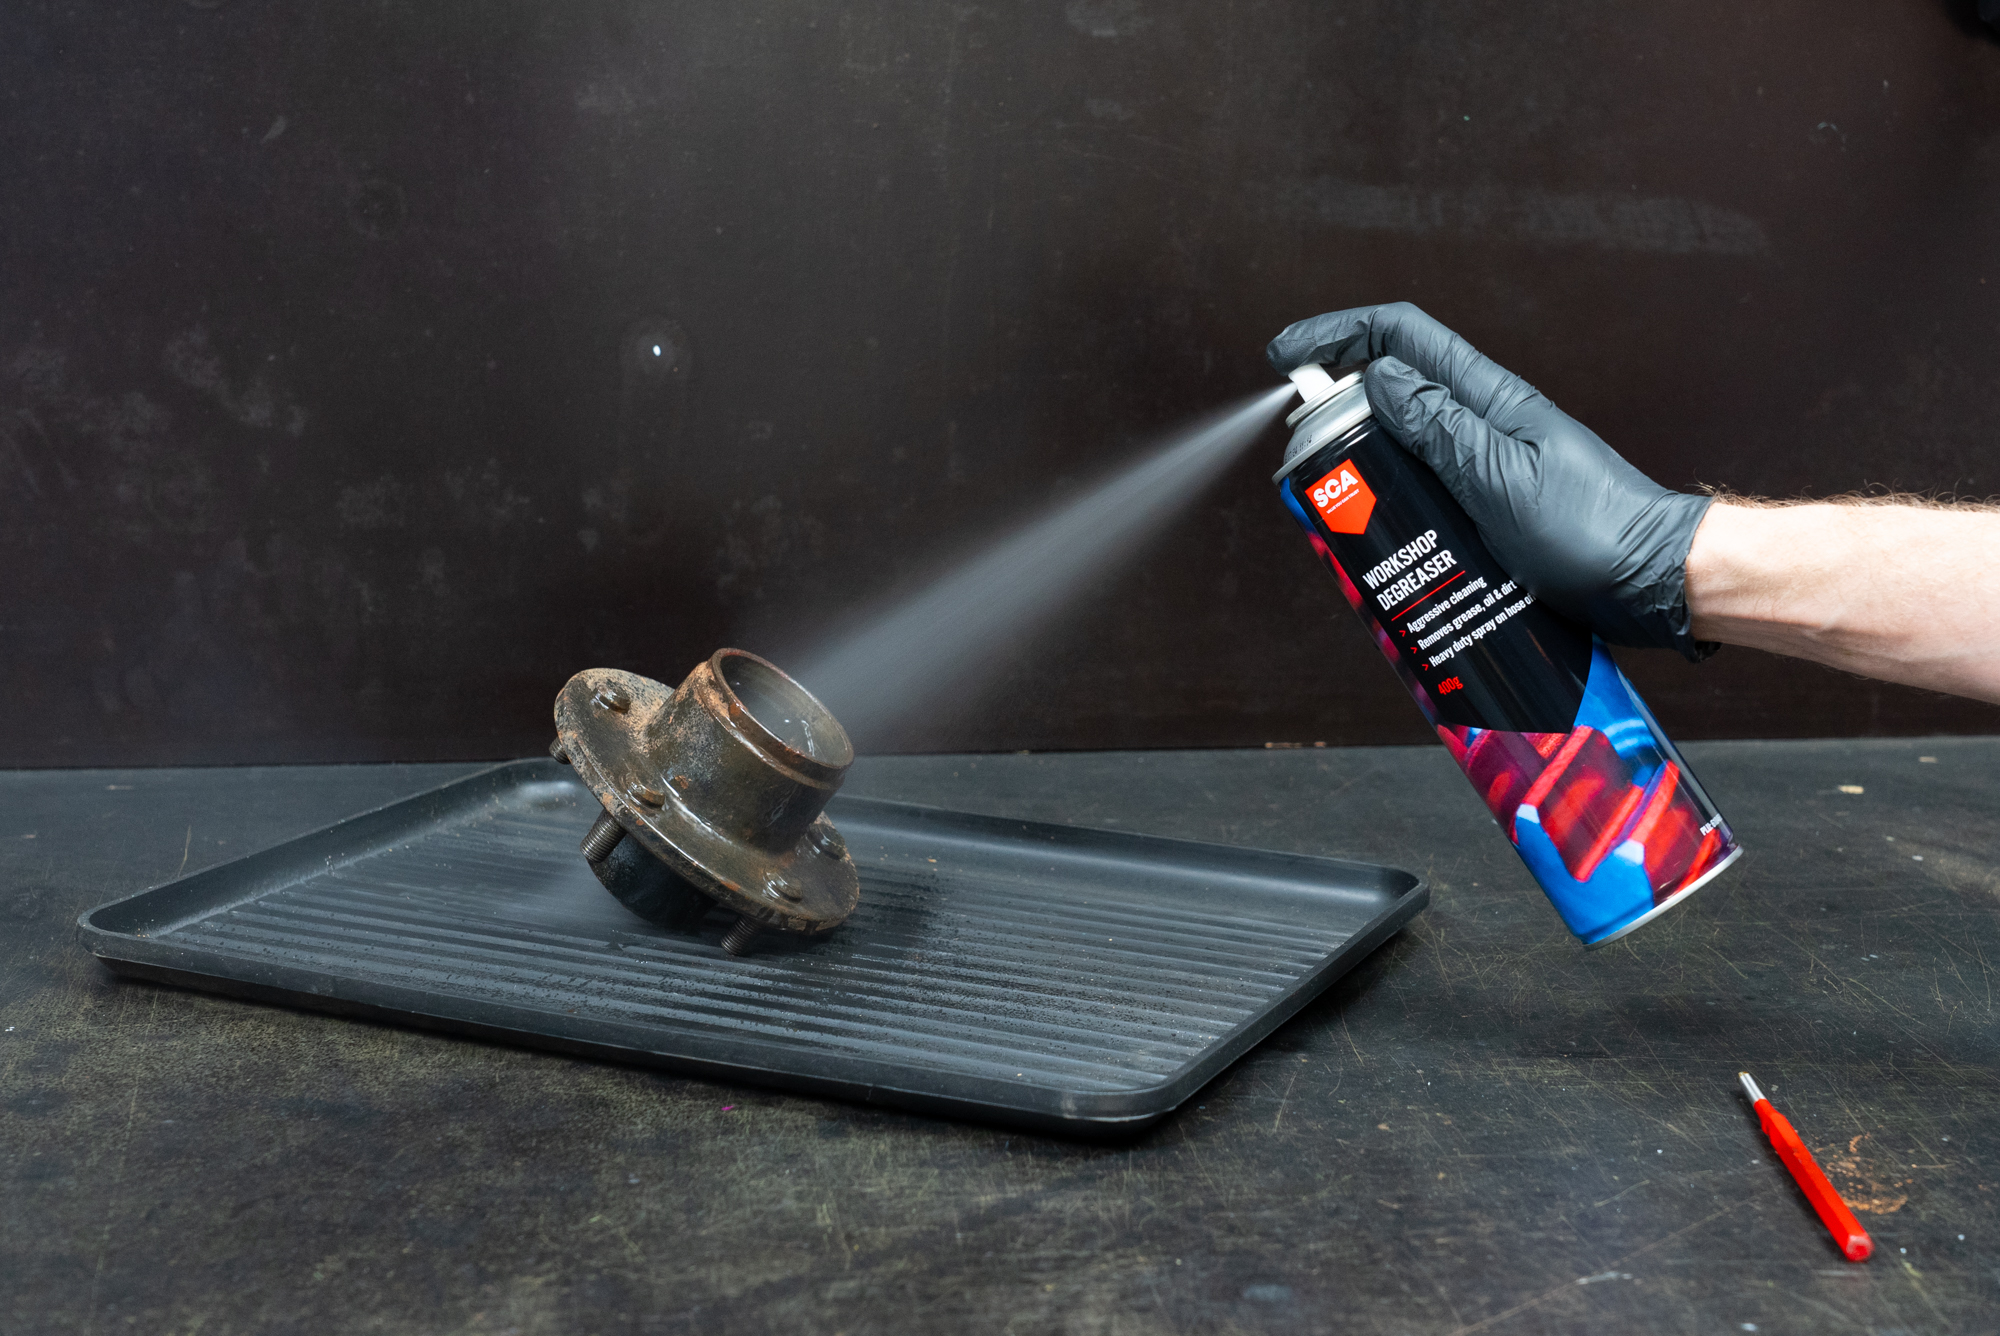
Rags and degreaser
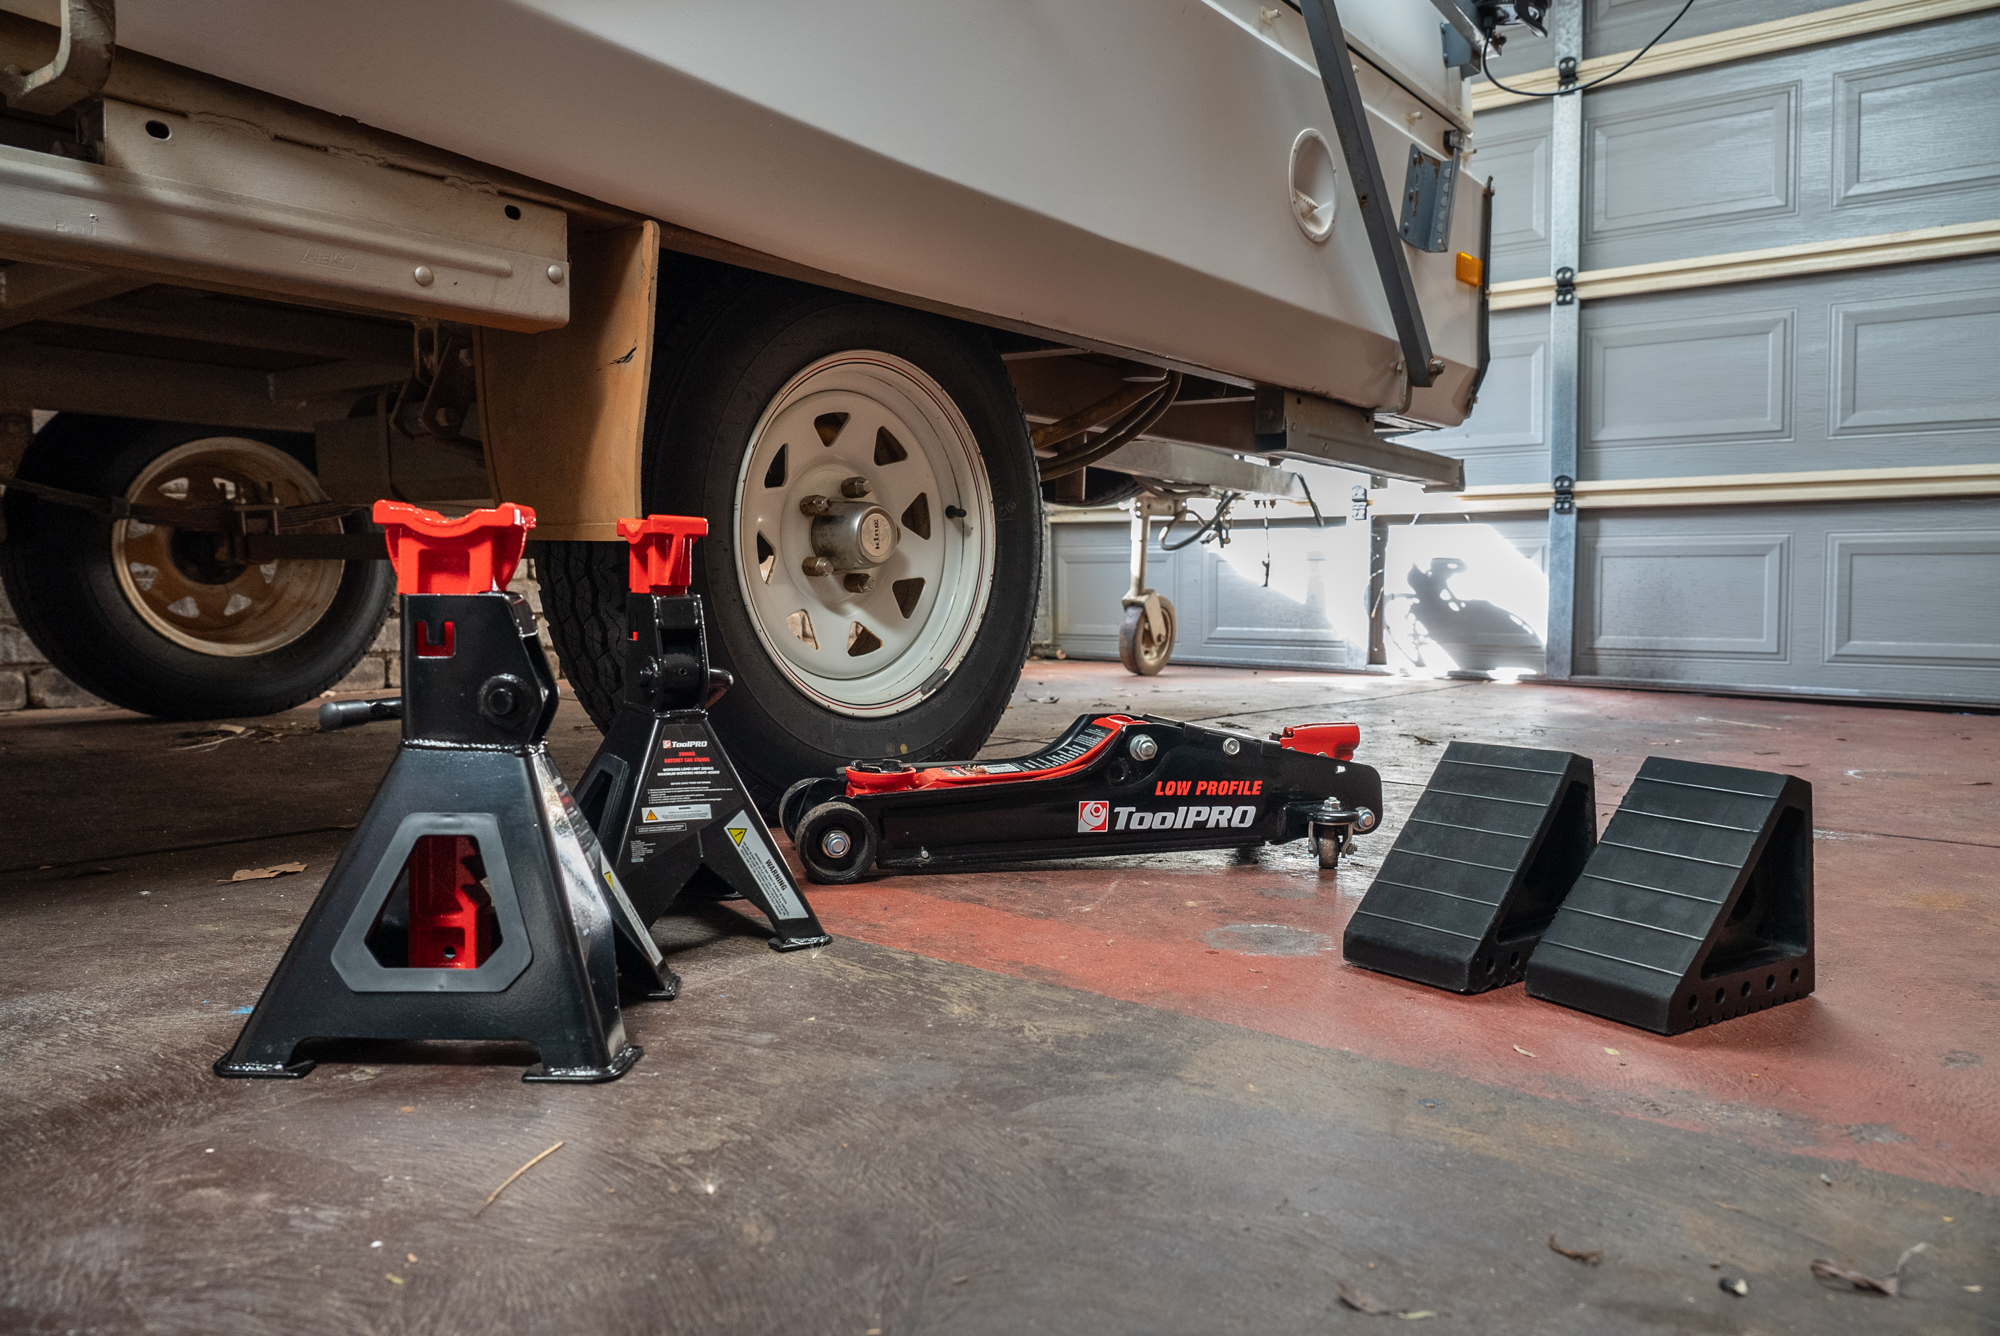
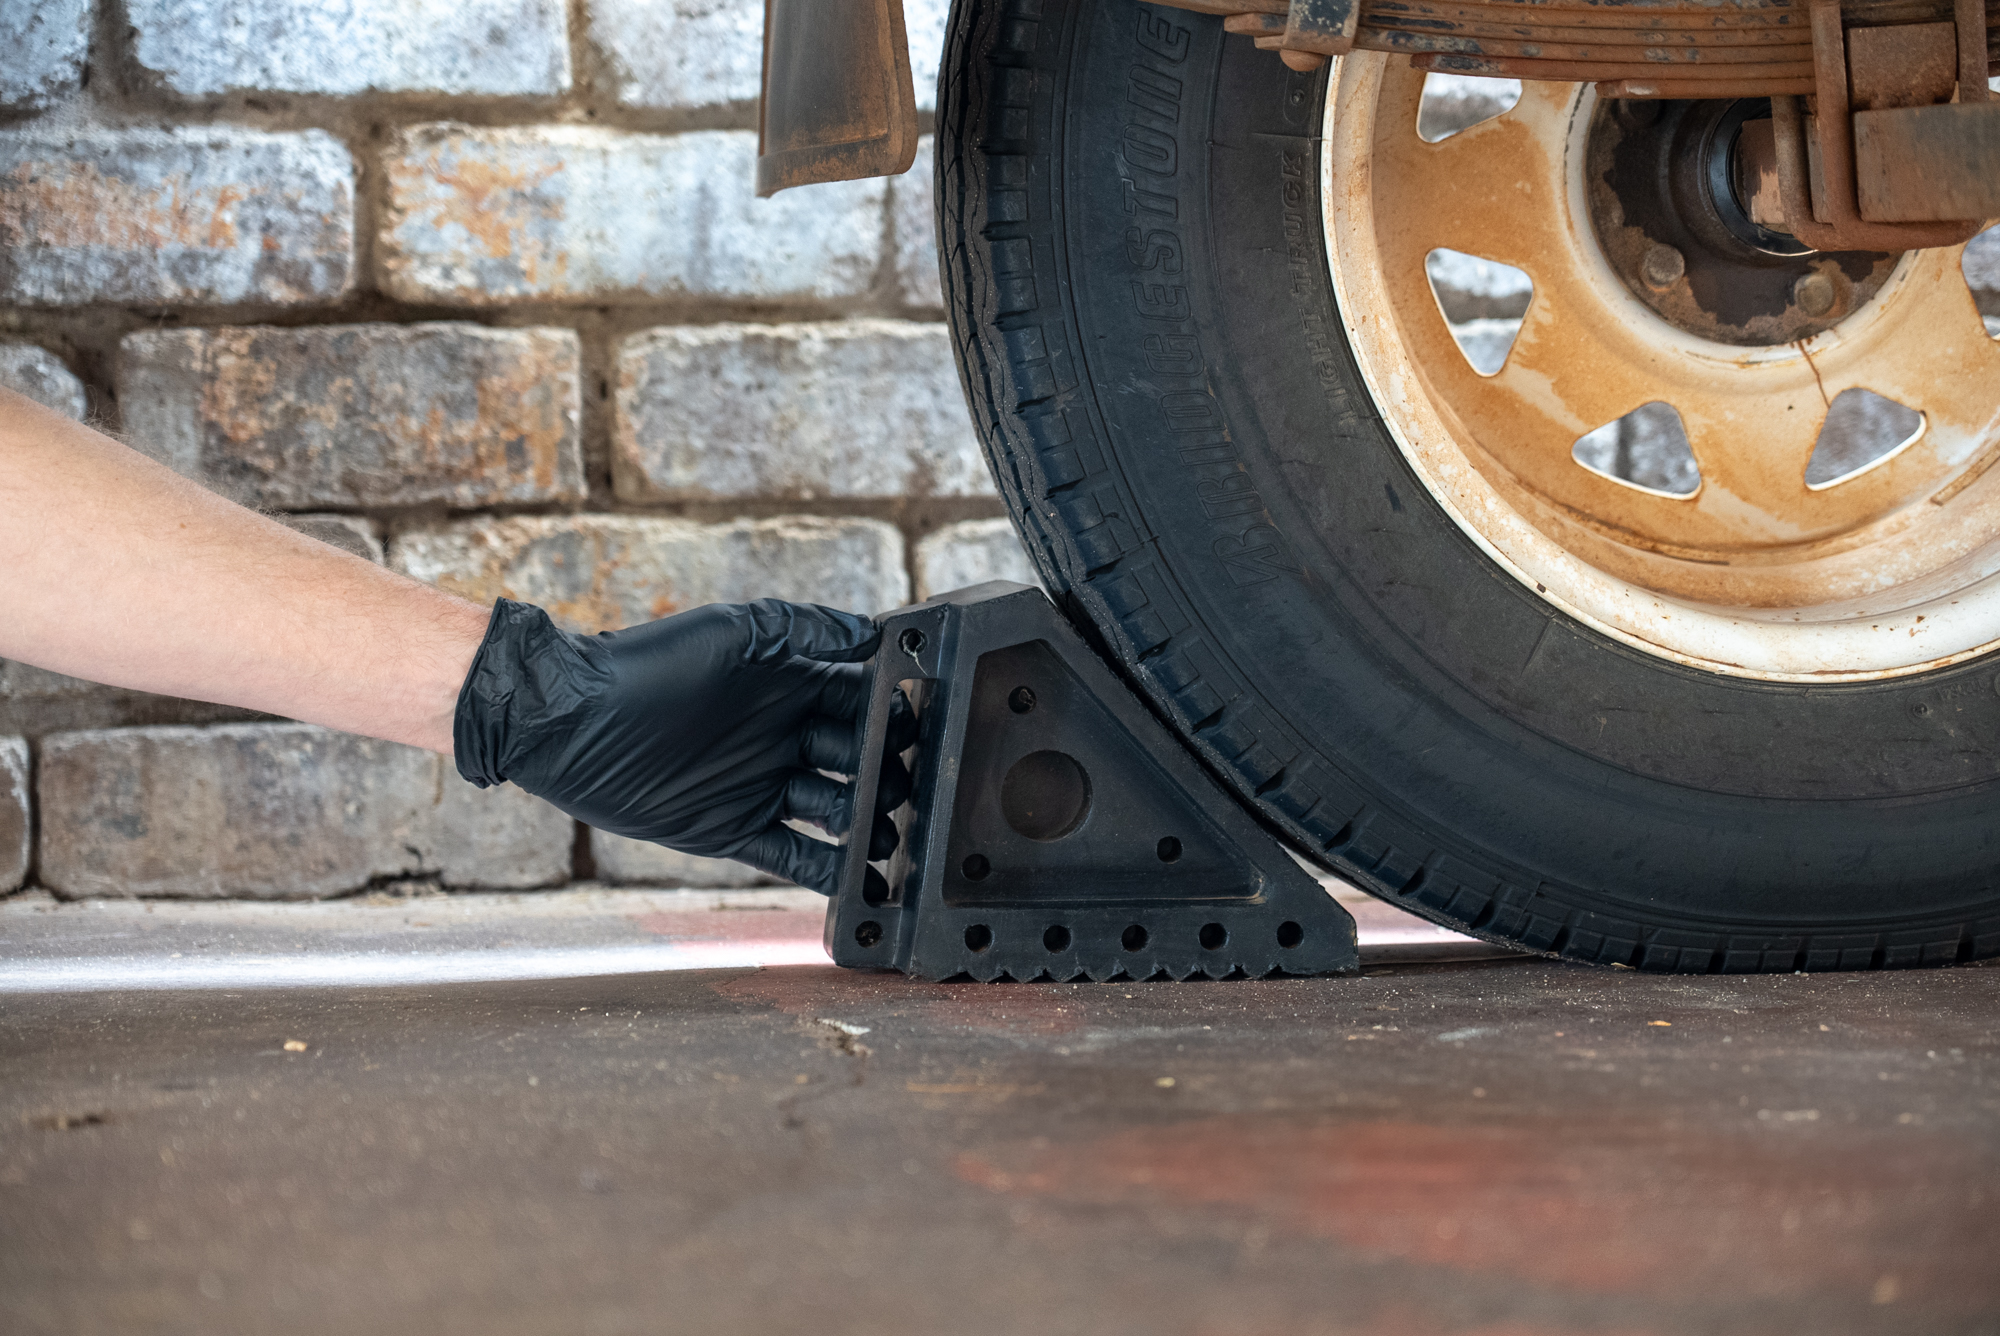
Wheel chocks, trolley jack and axle stands
Bench vice – this makes servicing wheel hubs and bearings far easier
Hammer
Screwdrivers – optional on some trailers
Adjustable spanner
A punch set
Long nose pliers
A bearing race and seal driver set
Bearing grease
A bearing kit – this comes with everything you need to replace the old bearings
Steps
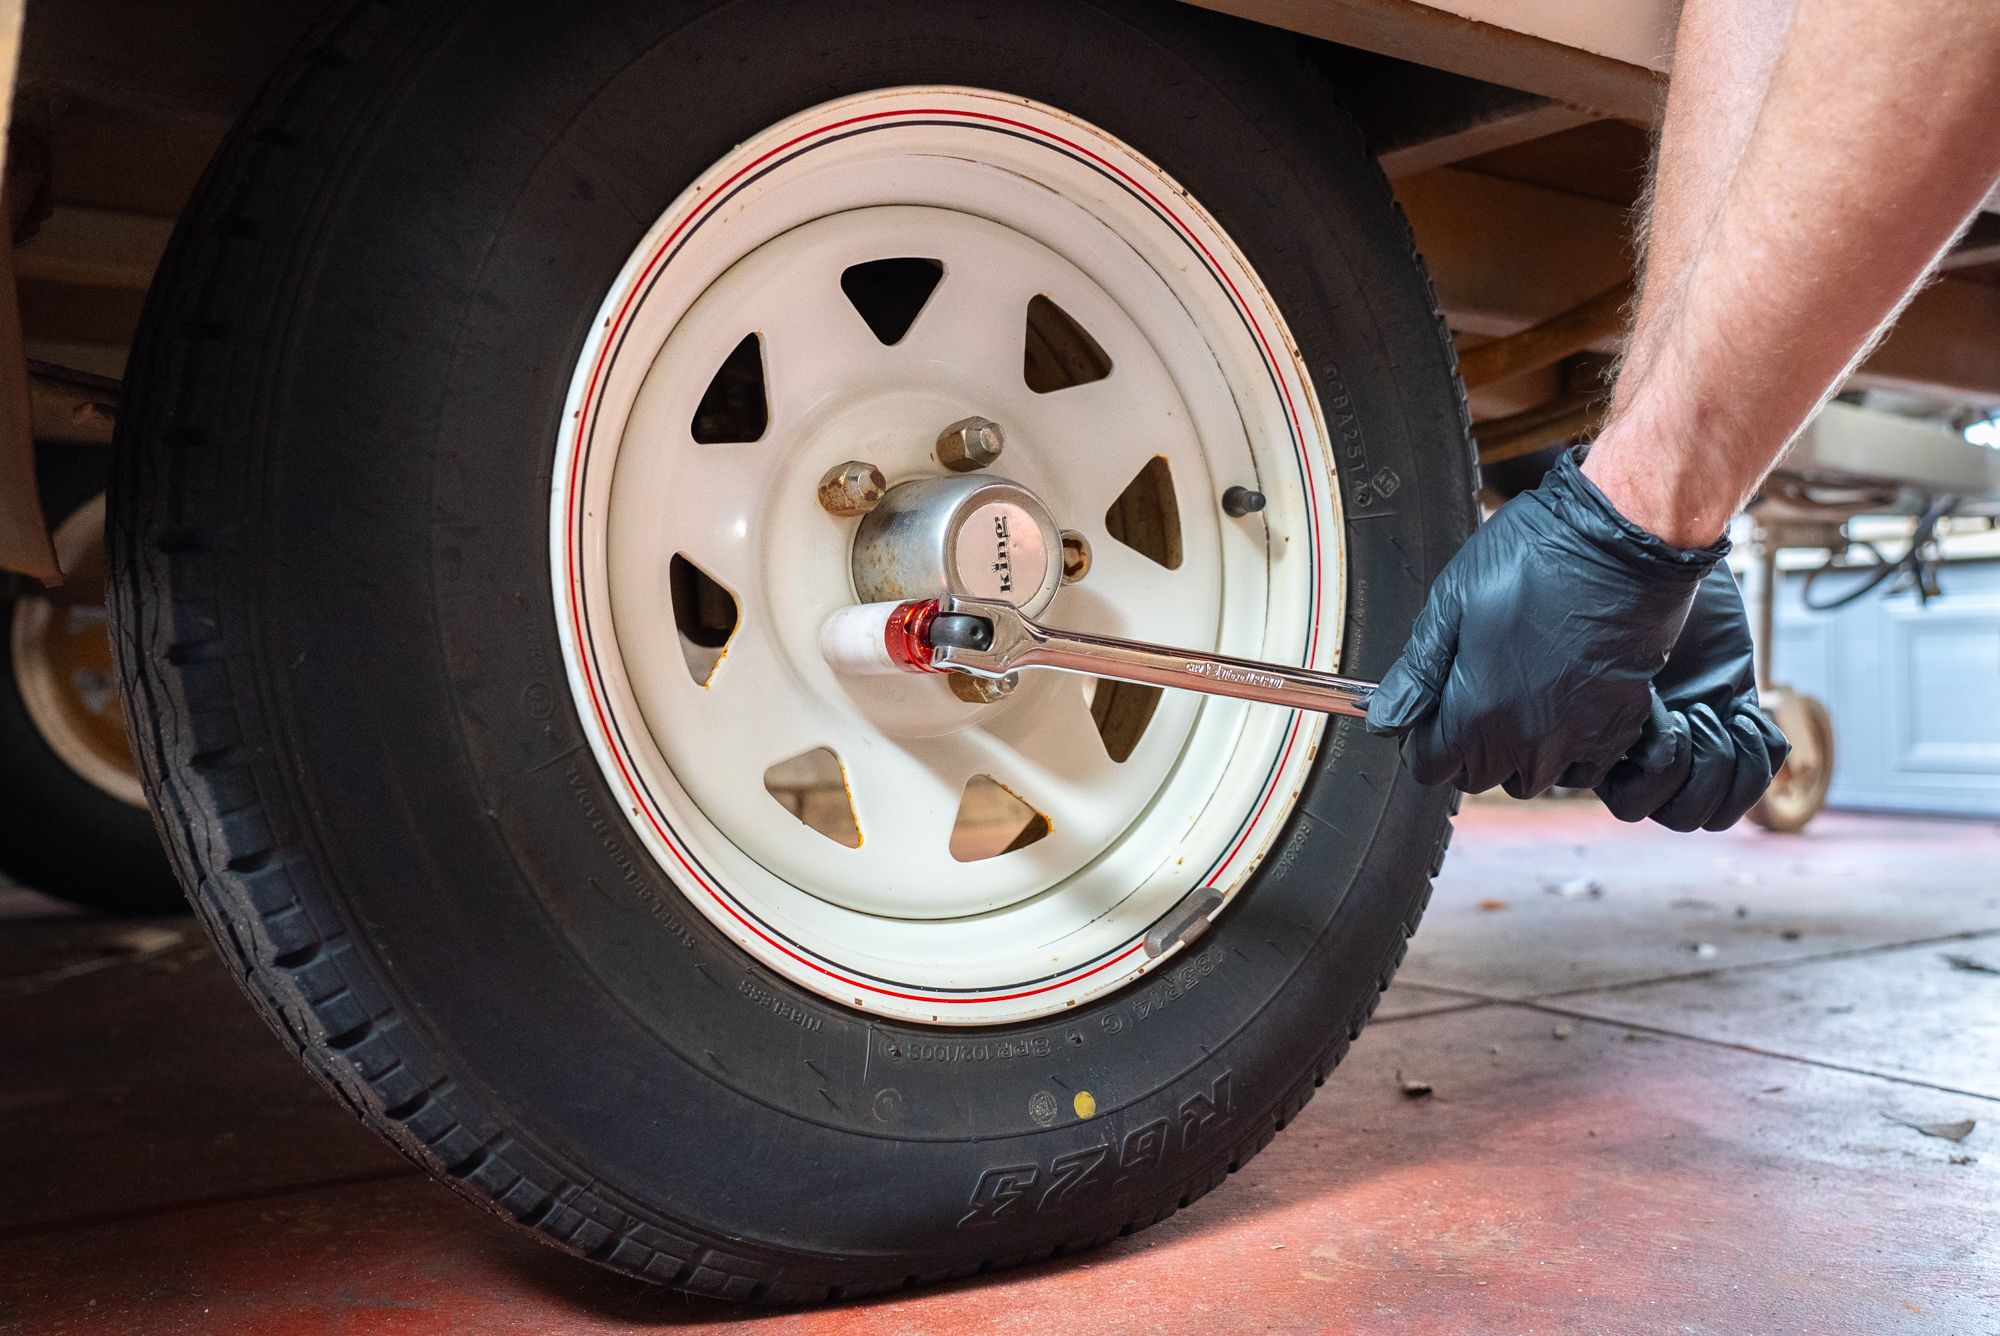
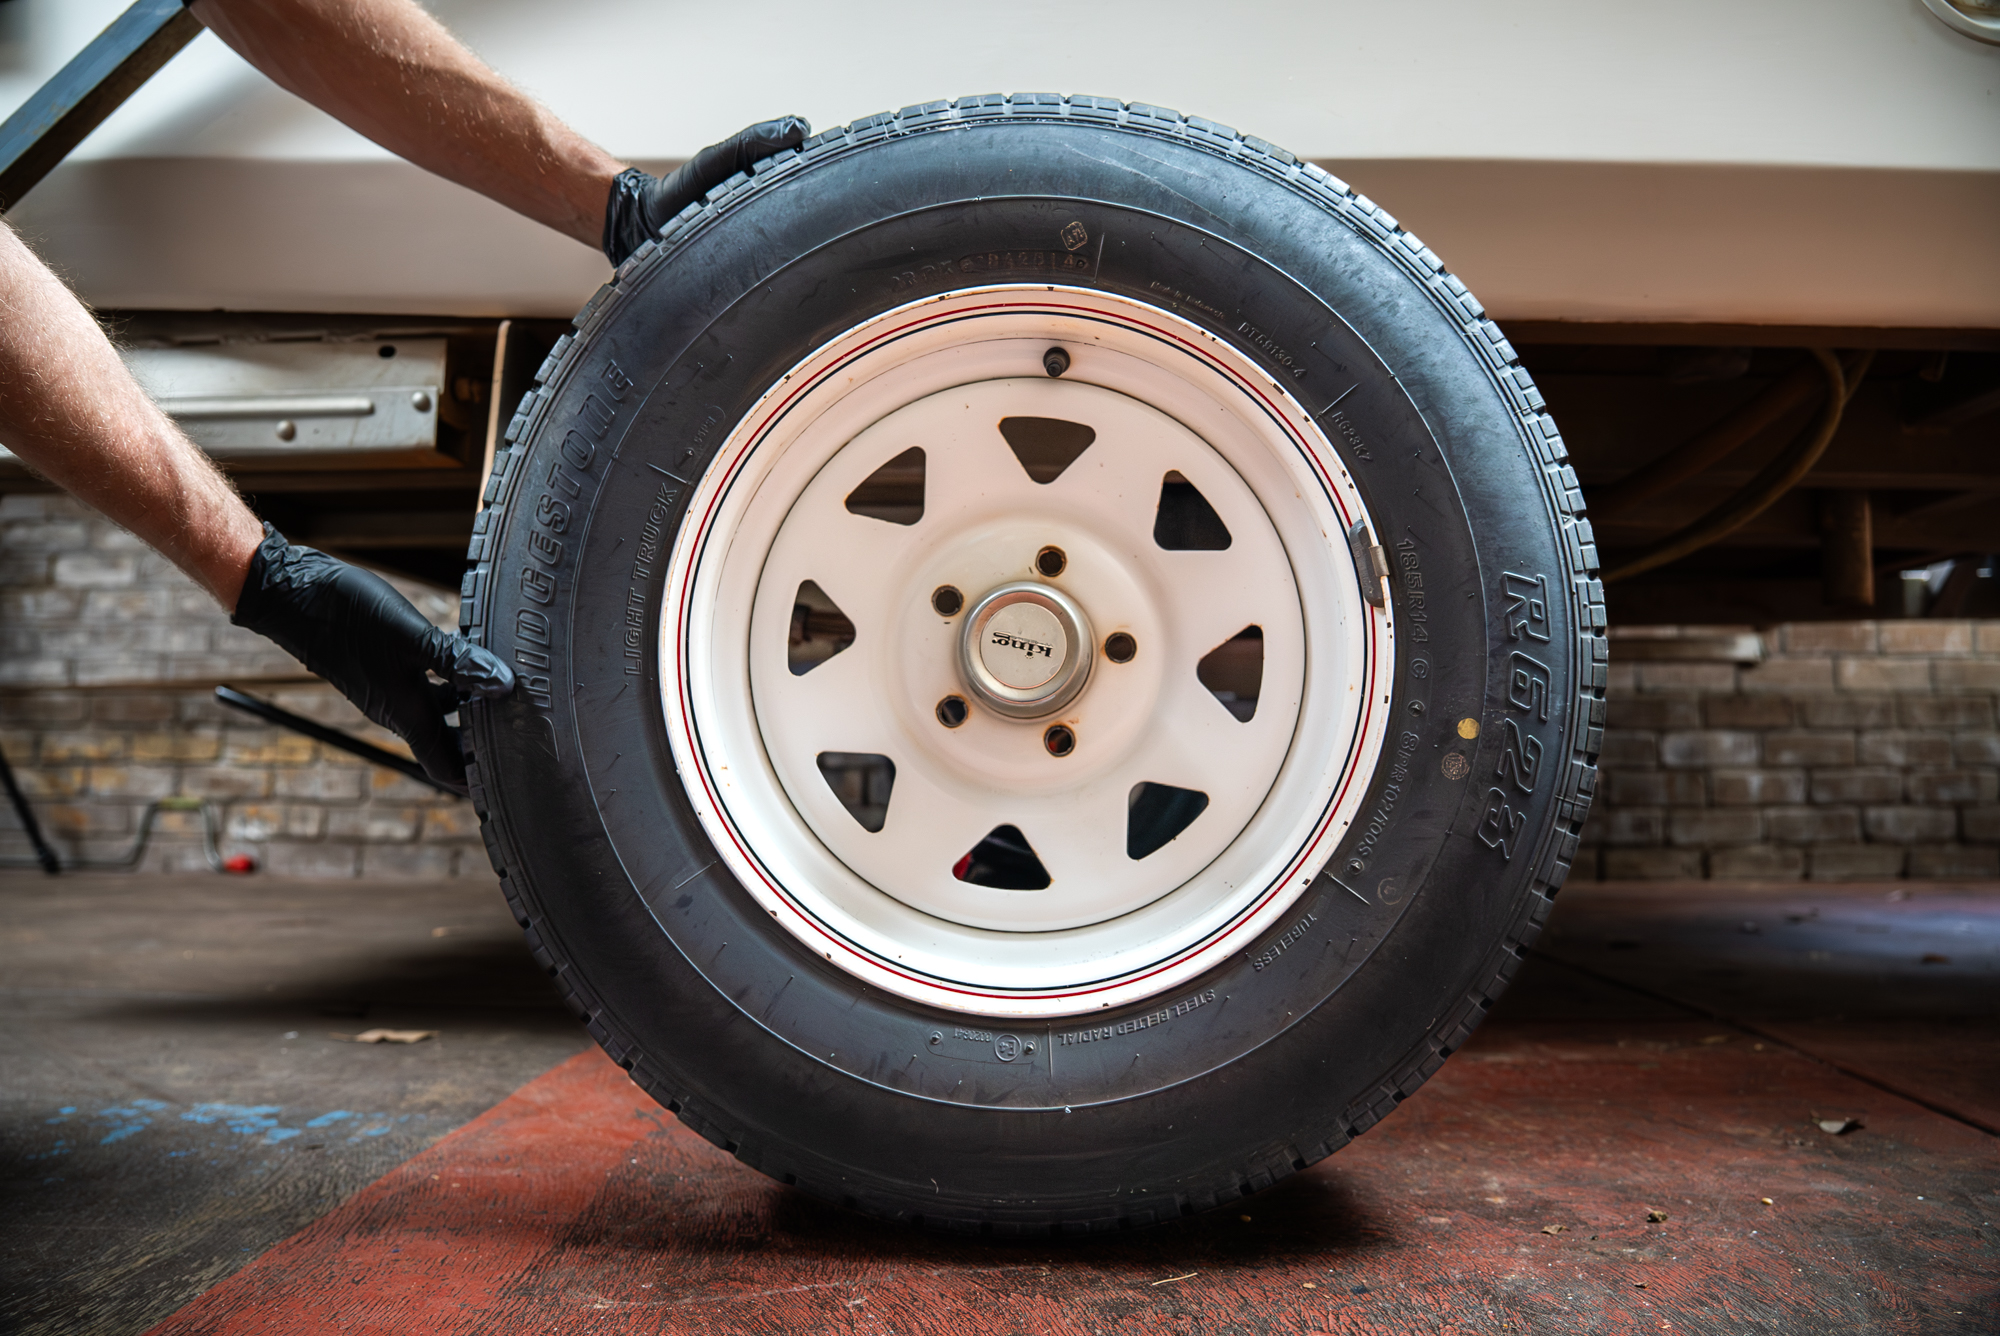
Remove the wheel
If your trailer has a park brake, apply it. Chock one wheel, then loosen the wheel nuts on the other. Raise the trailer with your jack, support it with an axle stand, and remove your wheel
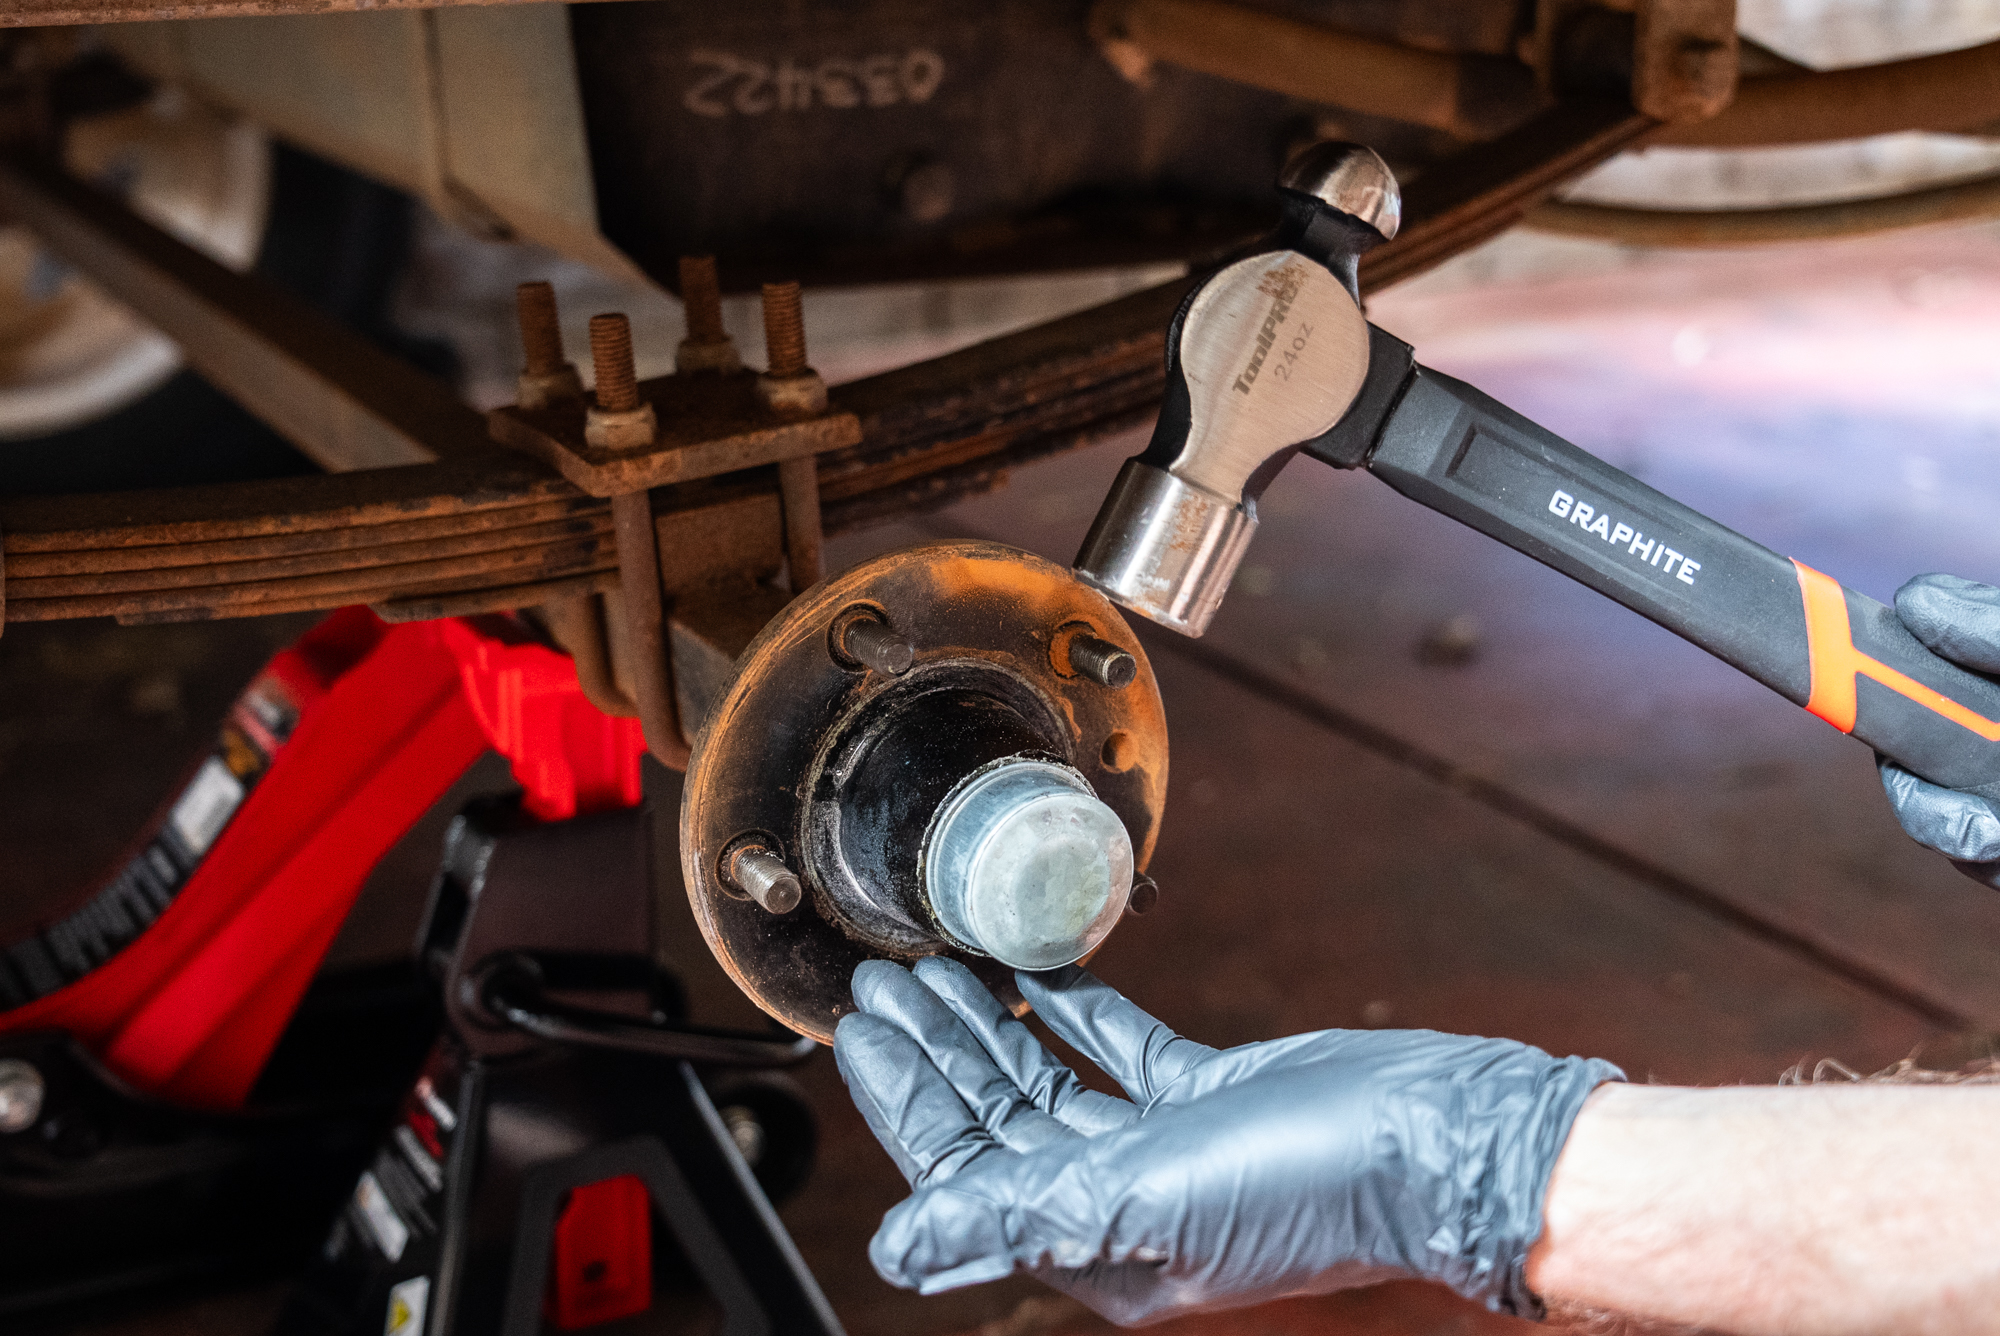
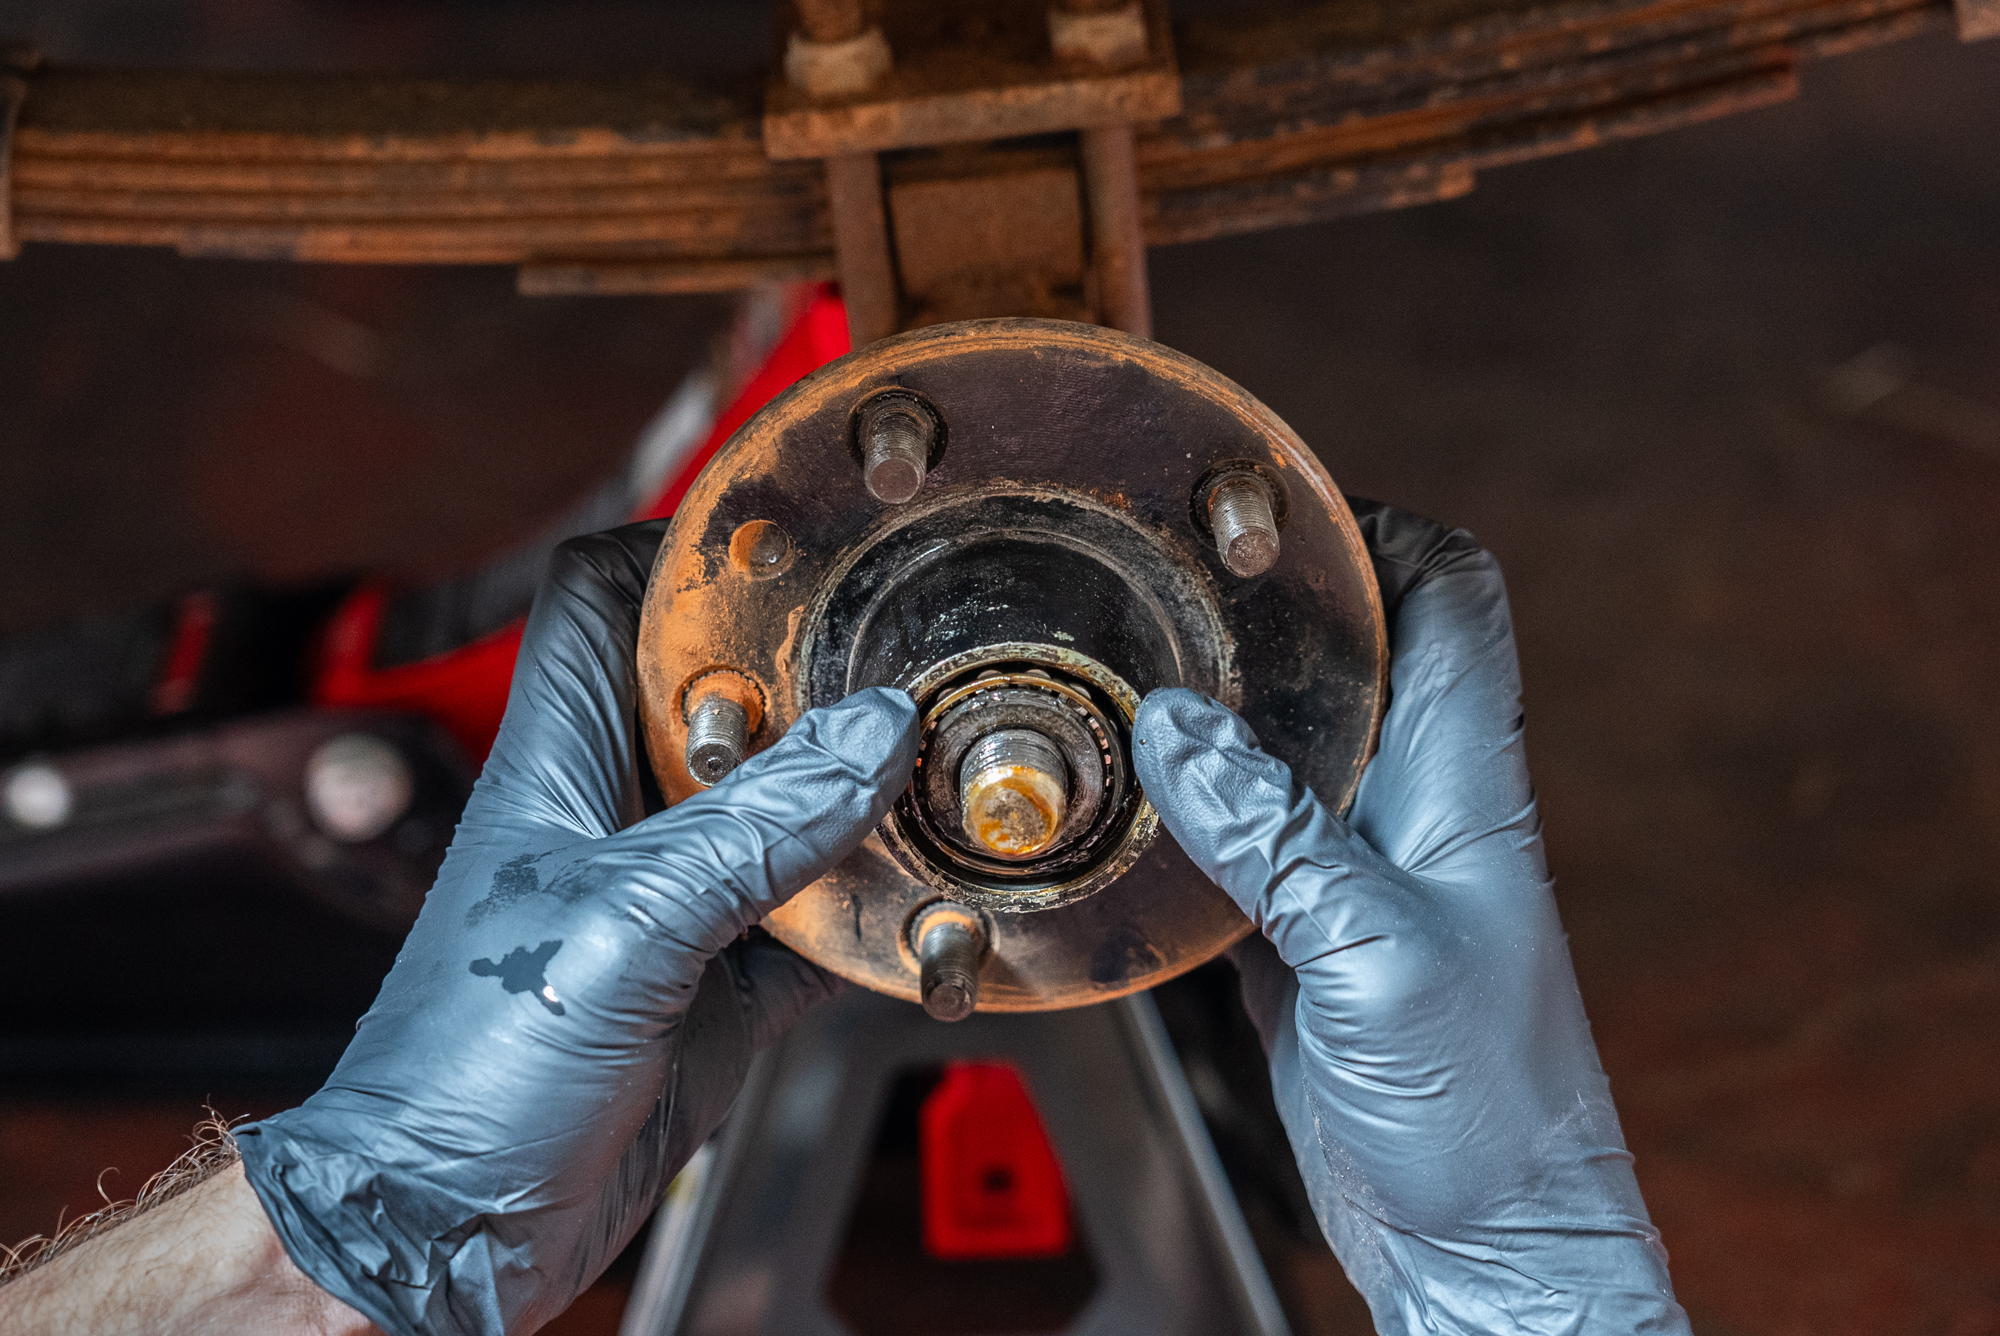
Remove the hub
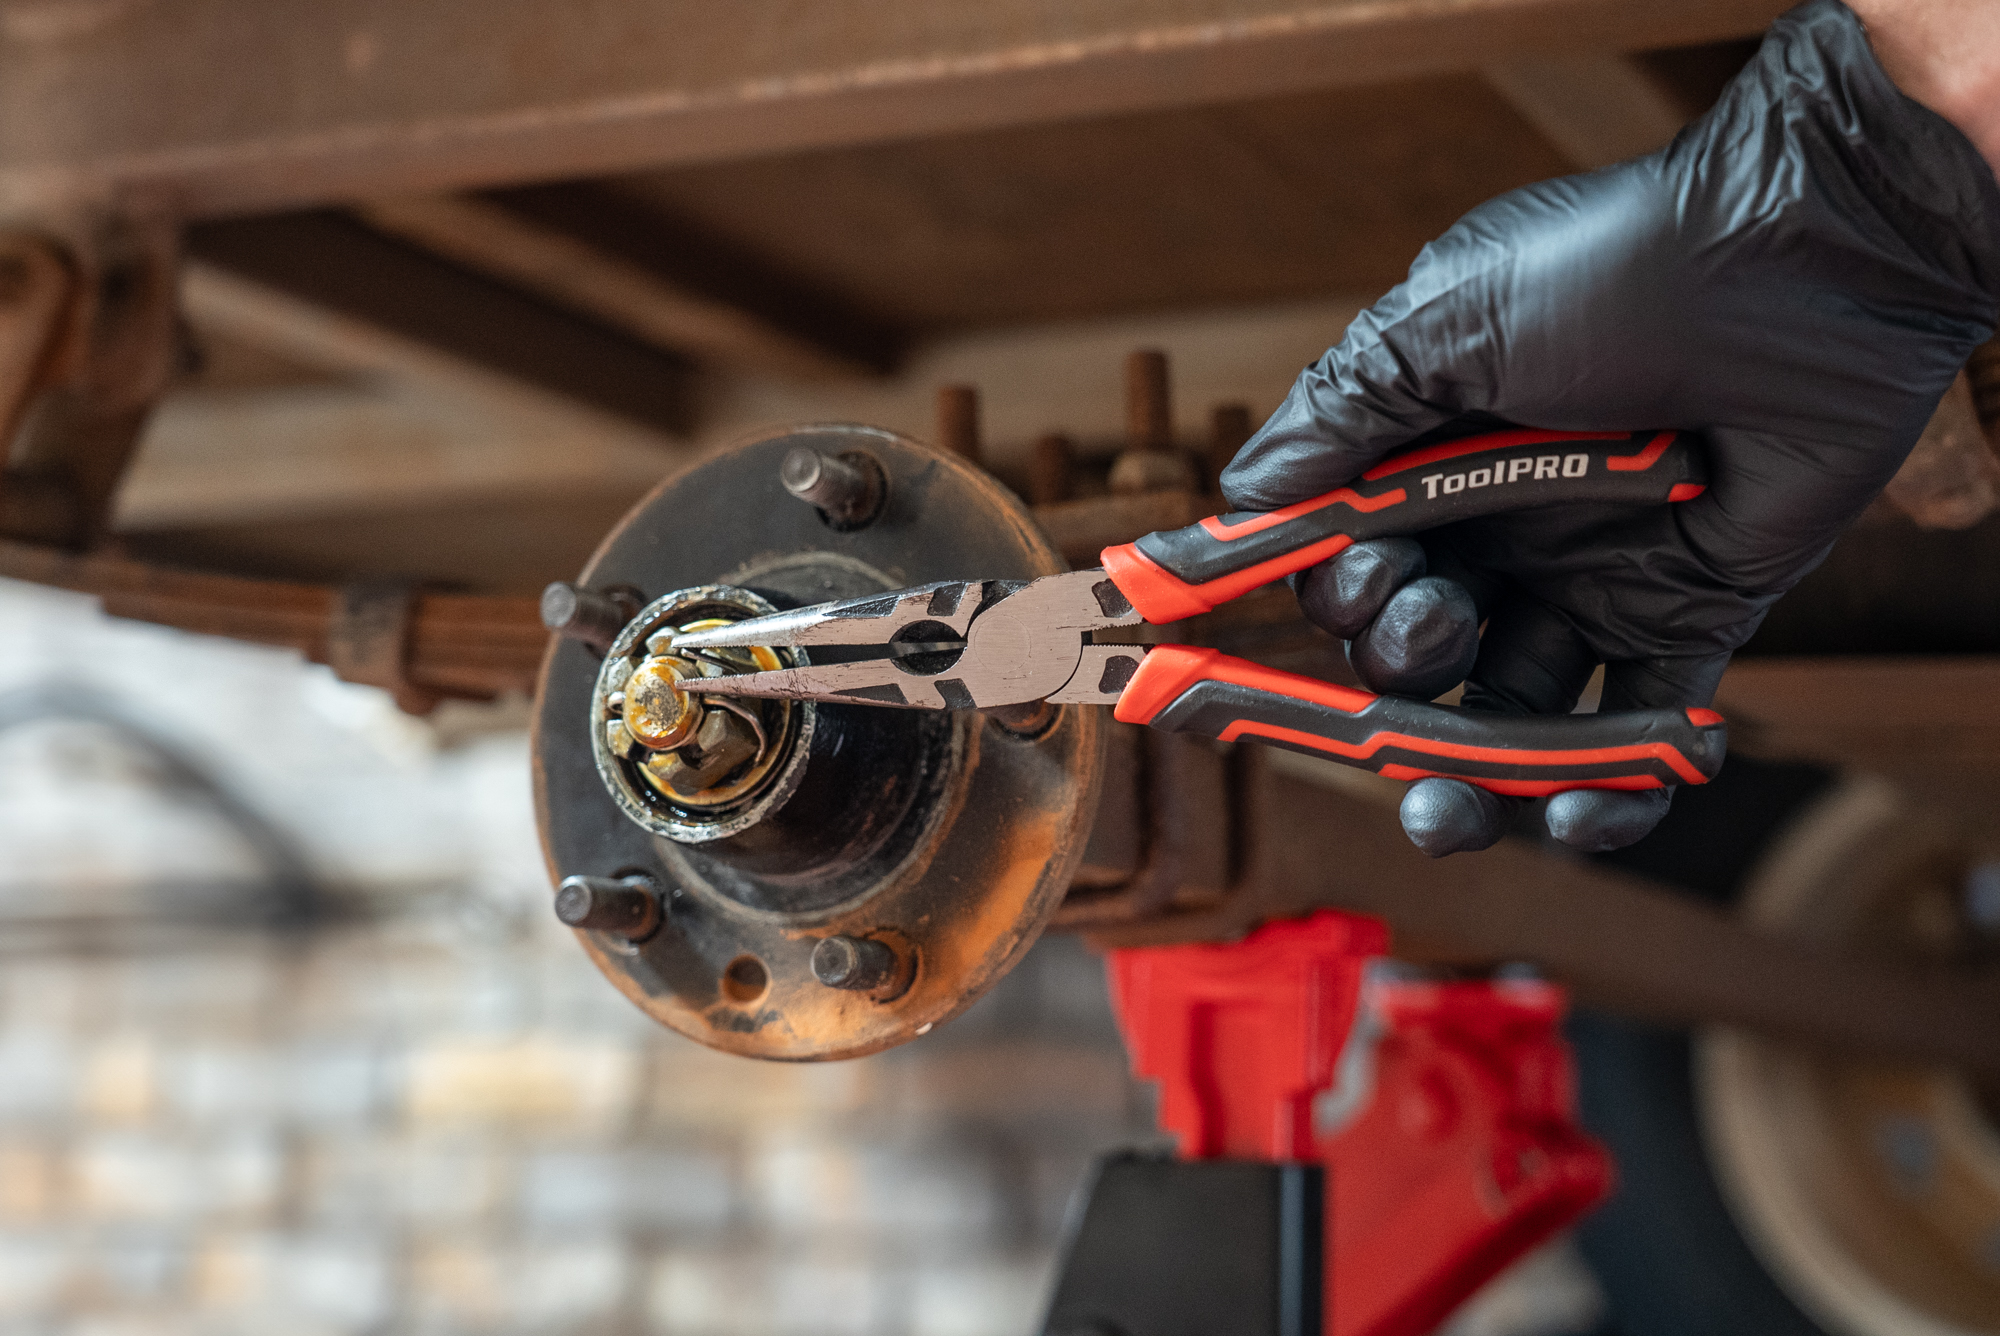
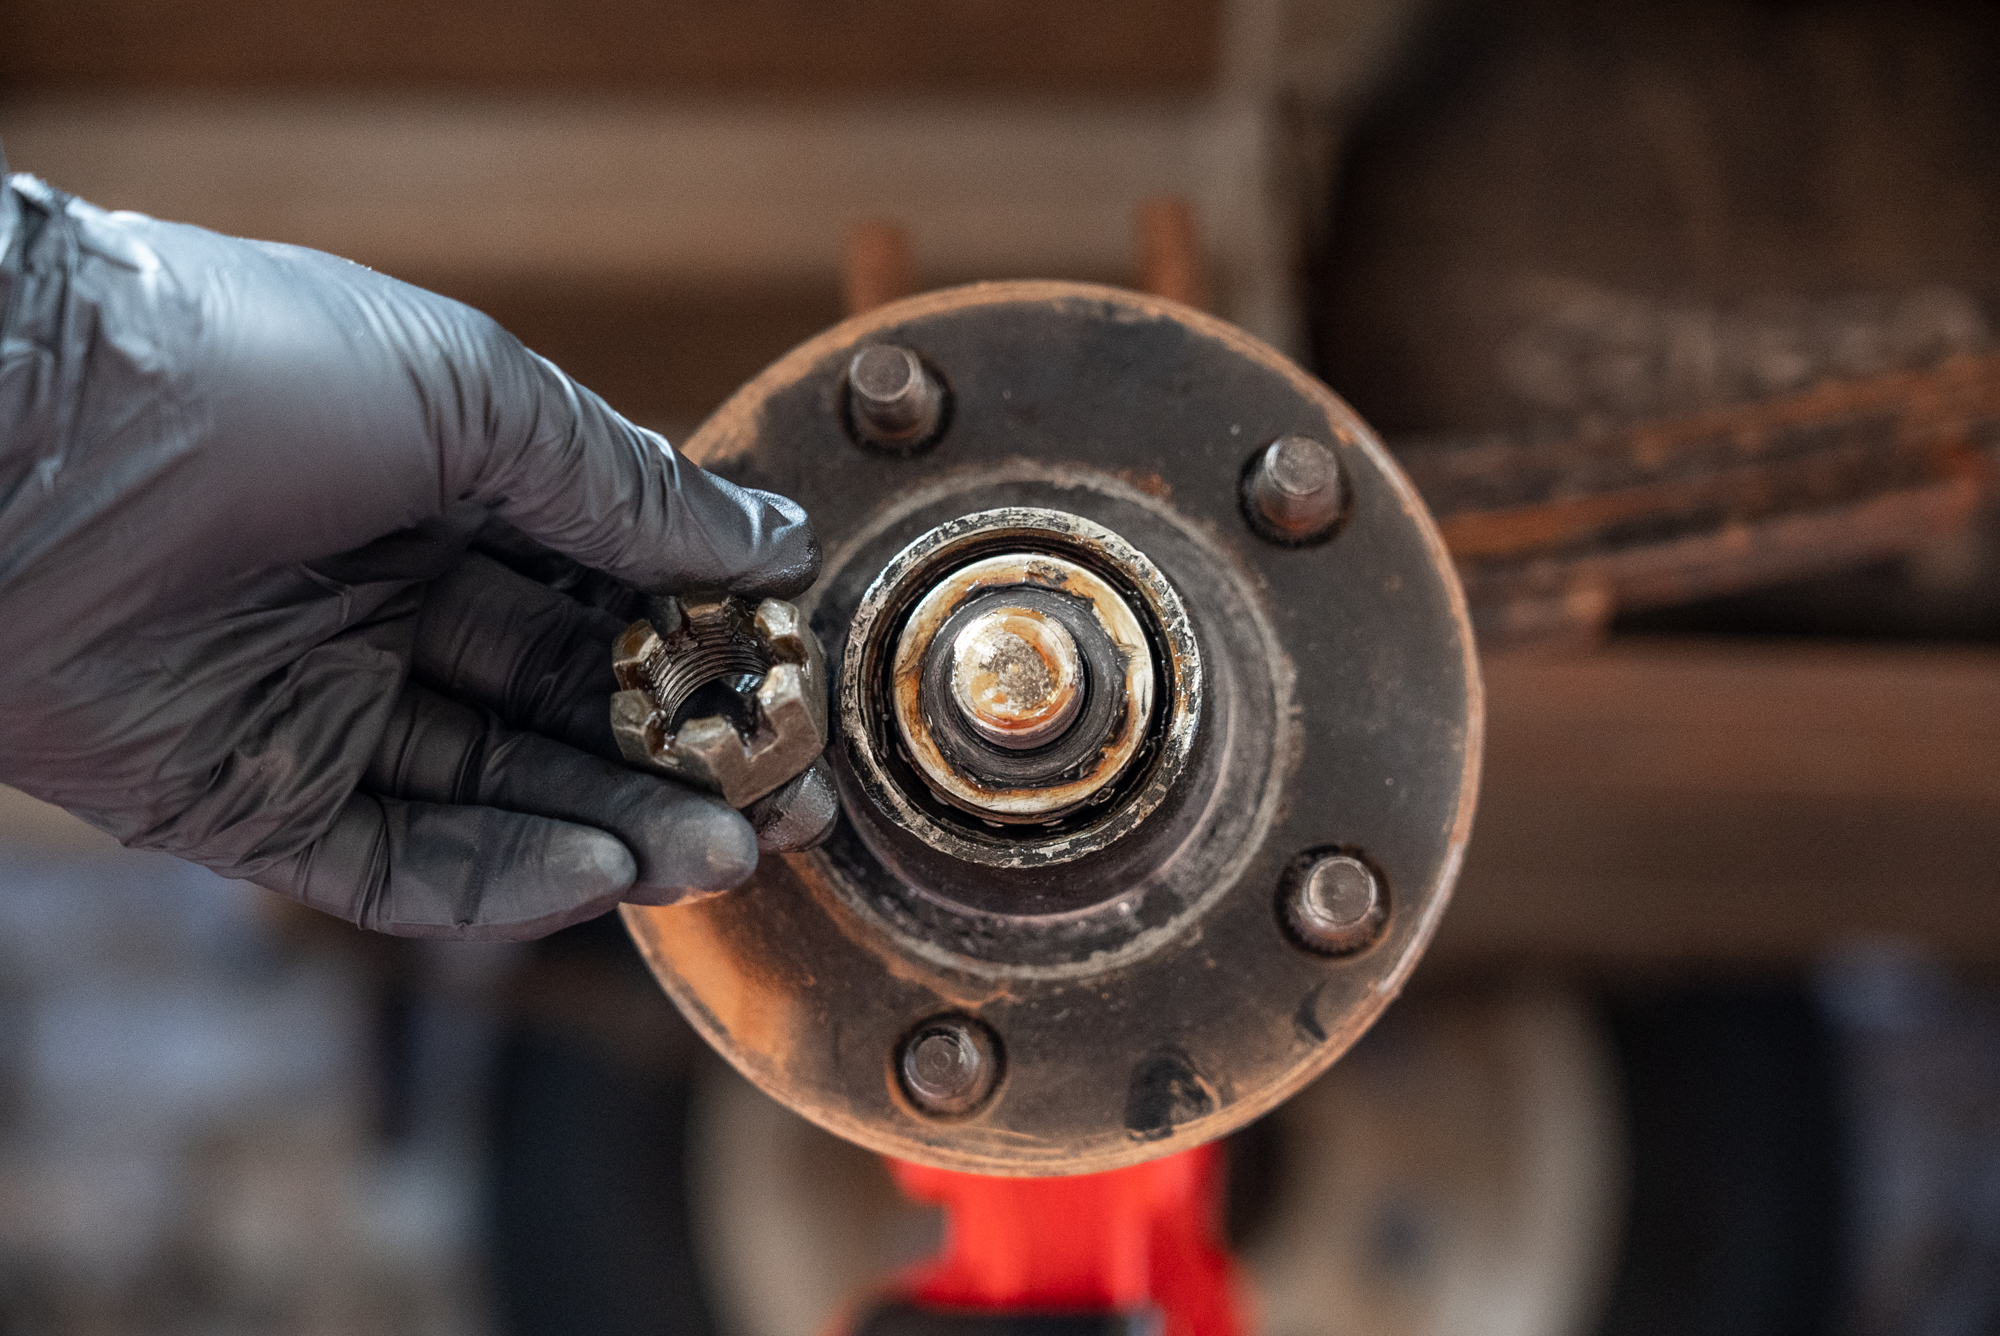
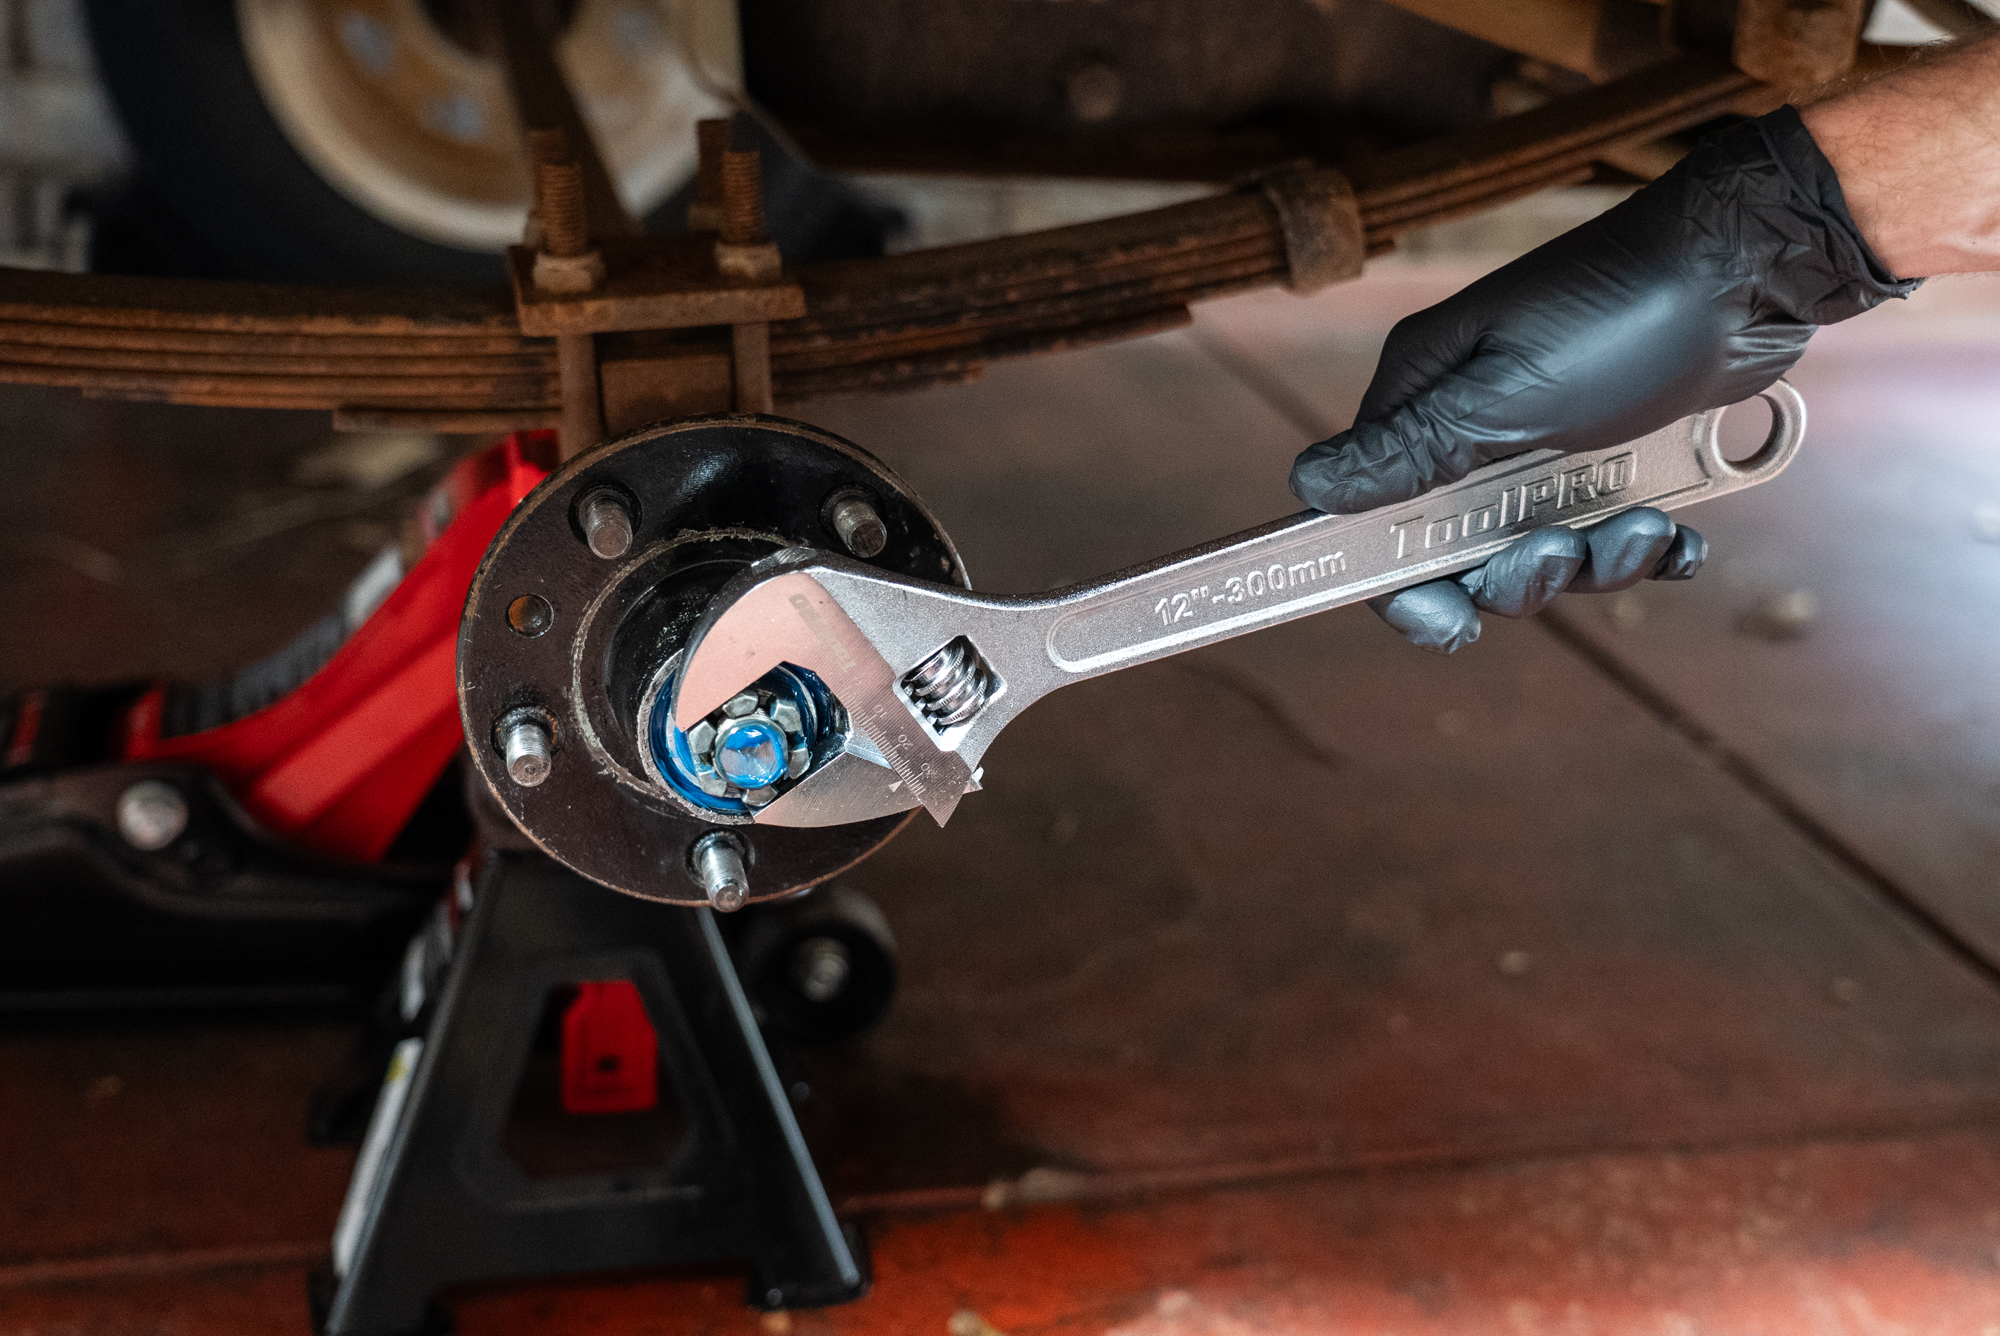
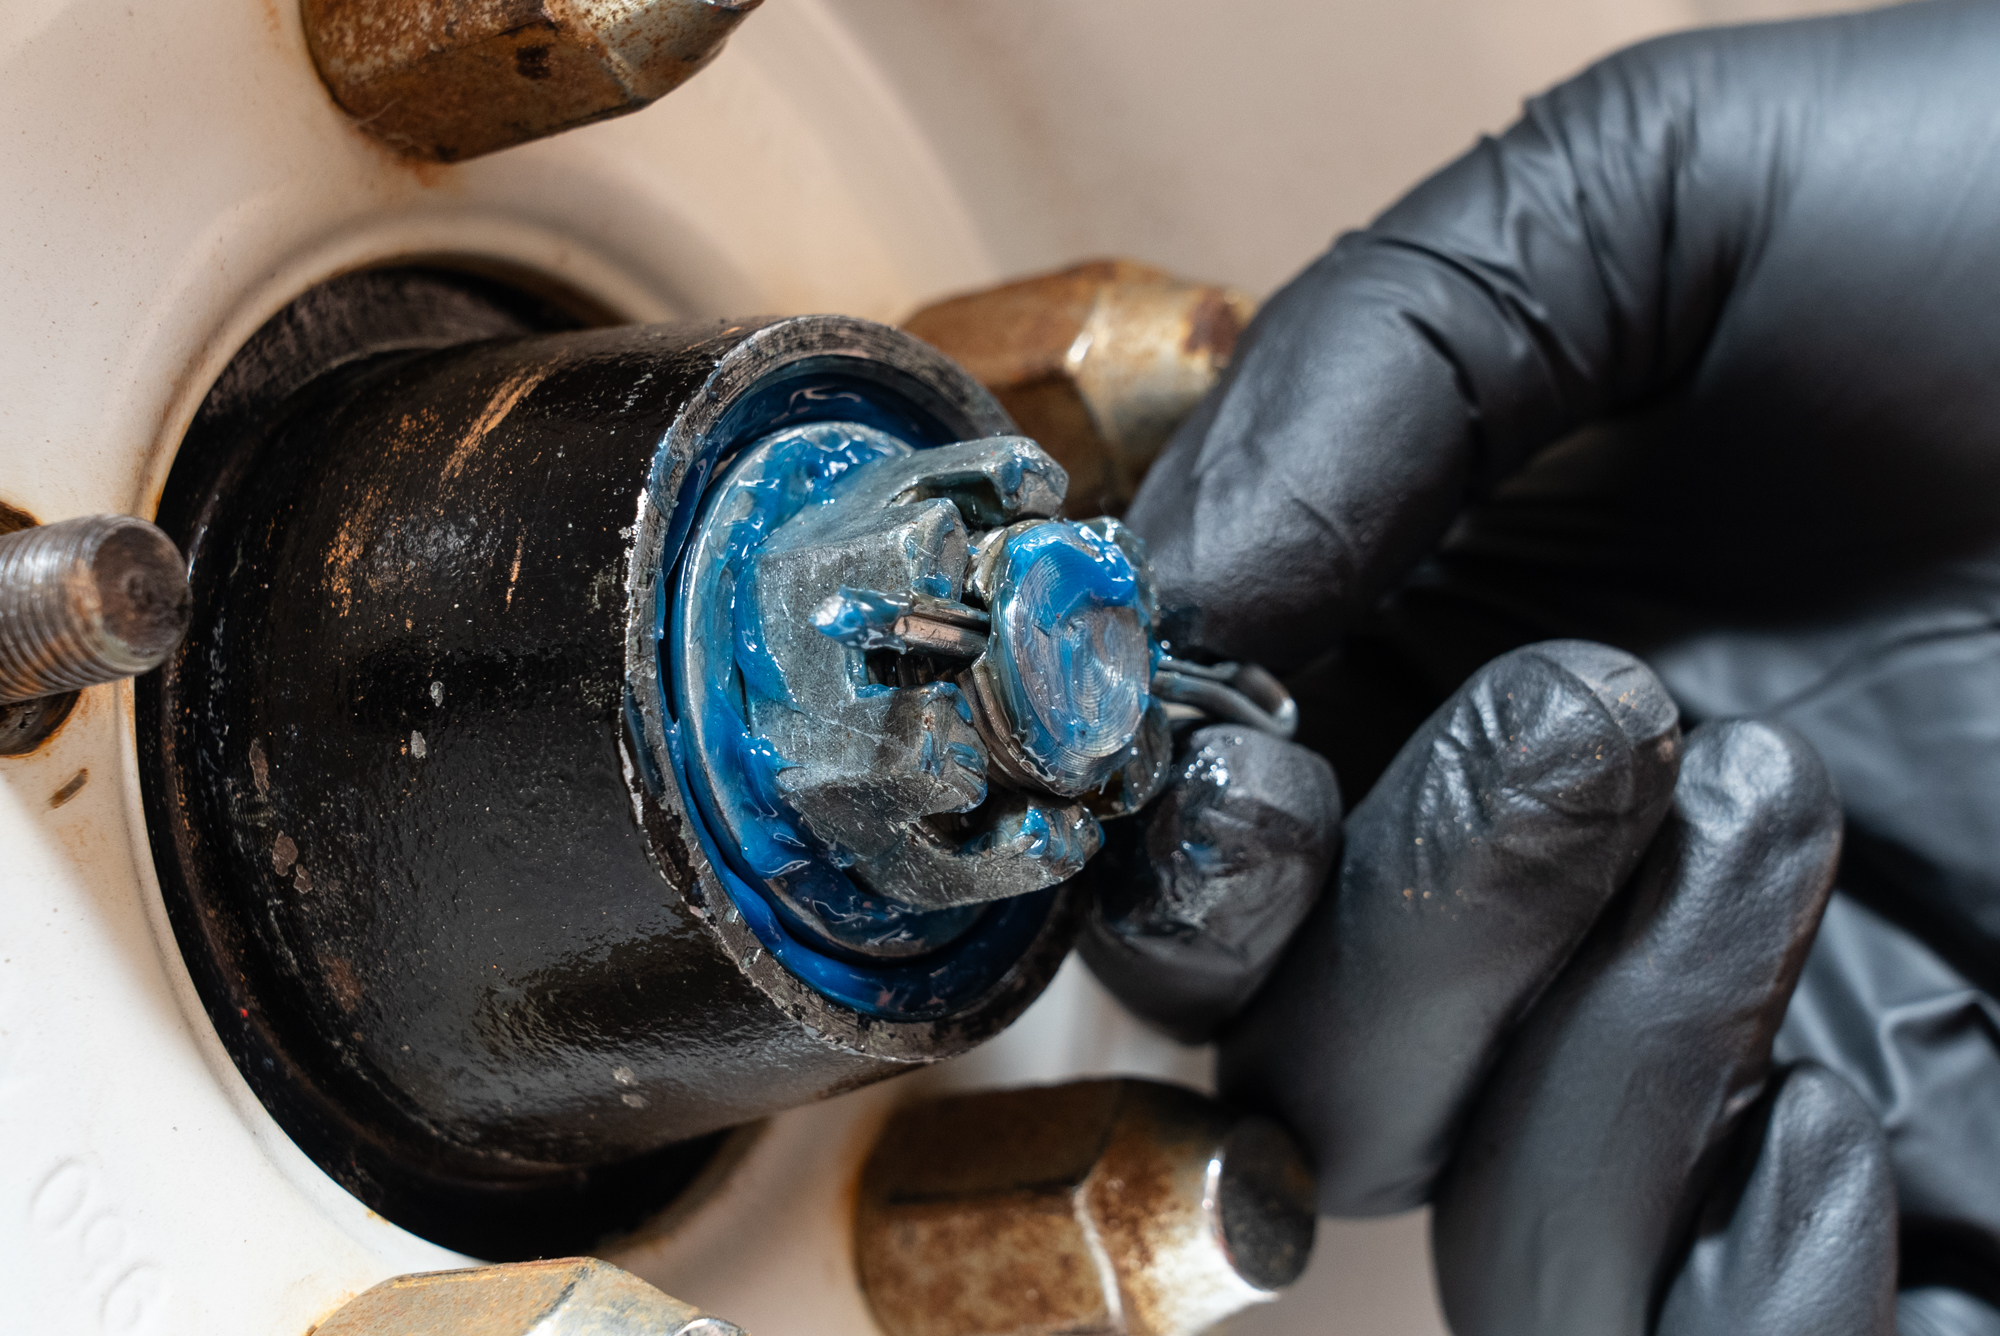
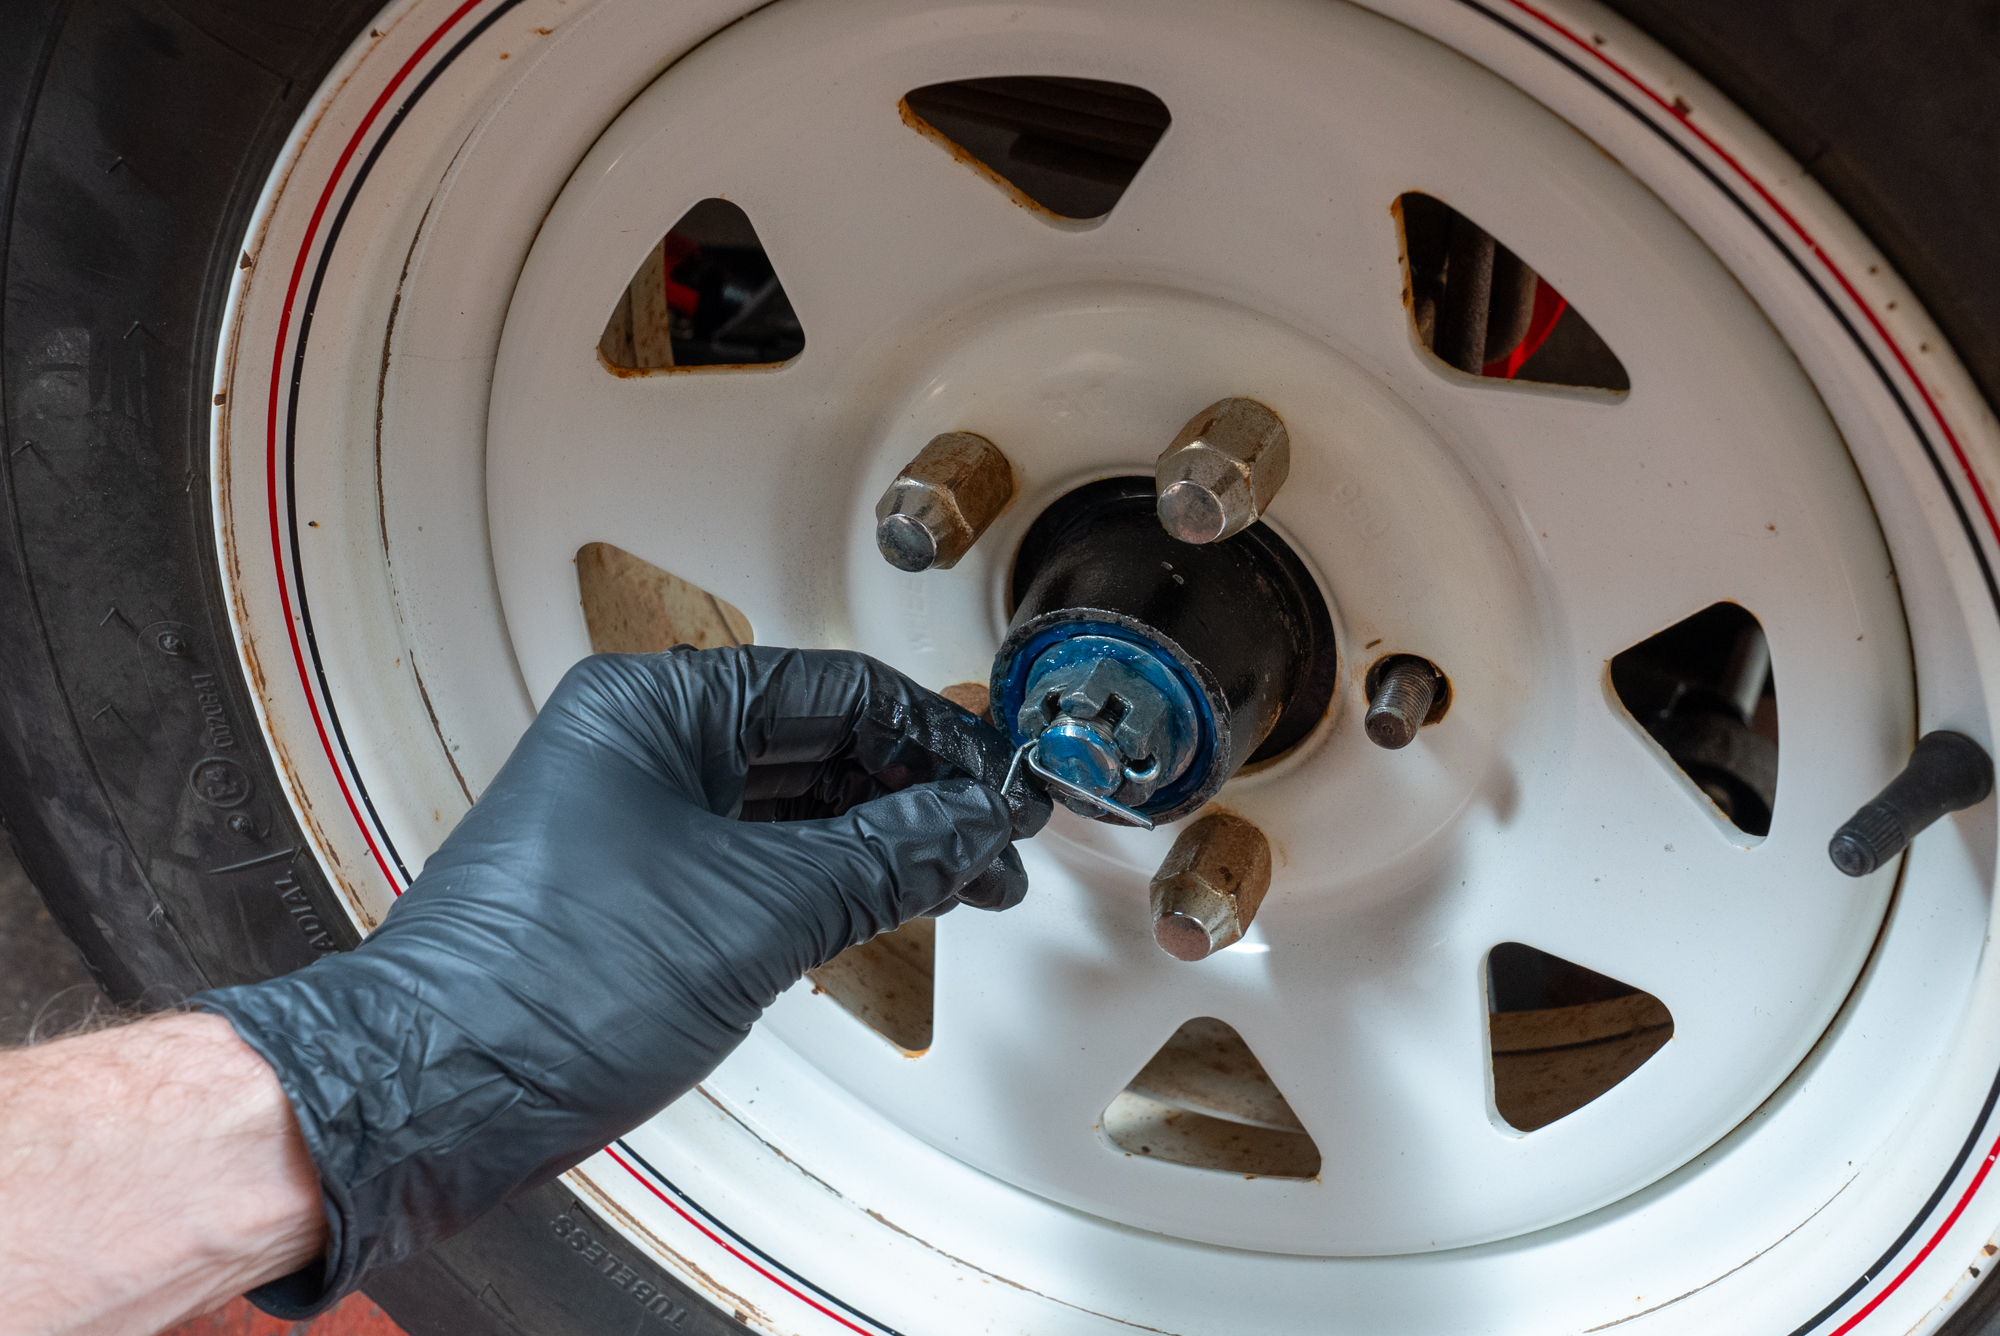
First remove the dust cap. You can tap it gently with a hammer while rotating the hub until it comes free; or try prying it with a screwdriver as well. Once the dust cap is off you’ll find a large castle nut with a split pin through it. Use your pliers to straighten and remove the split pin, then the castle nut will come away easily.
Behind the castle nut you will find a washer and possibly other parts, so take careful note of how everything is assembled.
Finally, to separate the hub from the axle; place your fingers around the edges of the hub with your thumbs over the centre. This will stop the outer bearing from shooting across the floor. With a good pull and some wriggling, the hub will come free from your trailer.
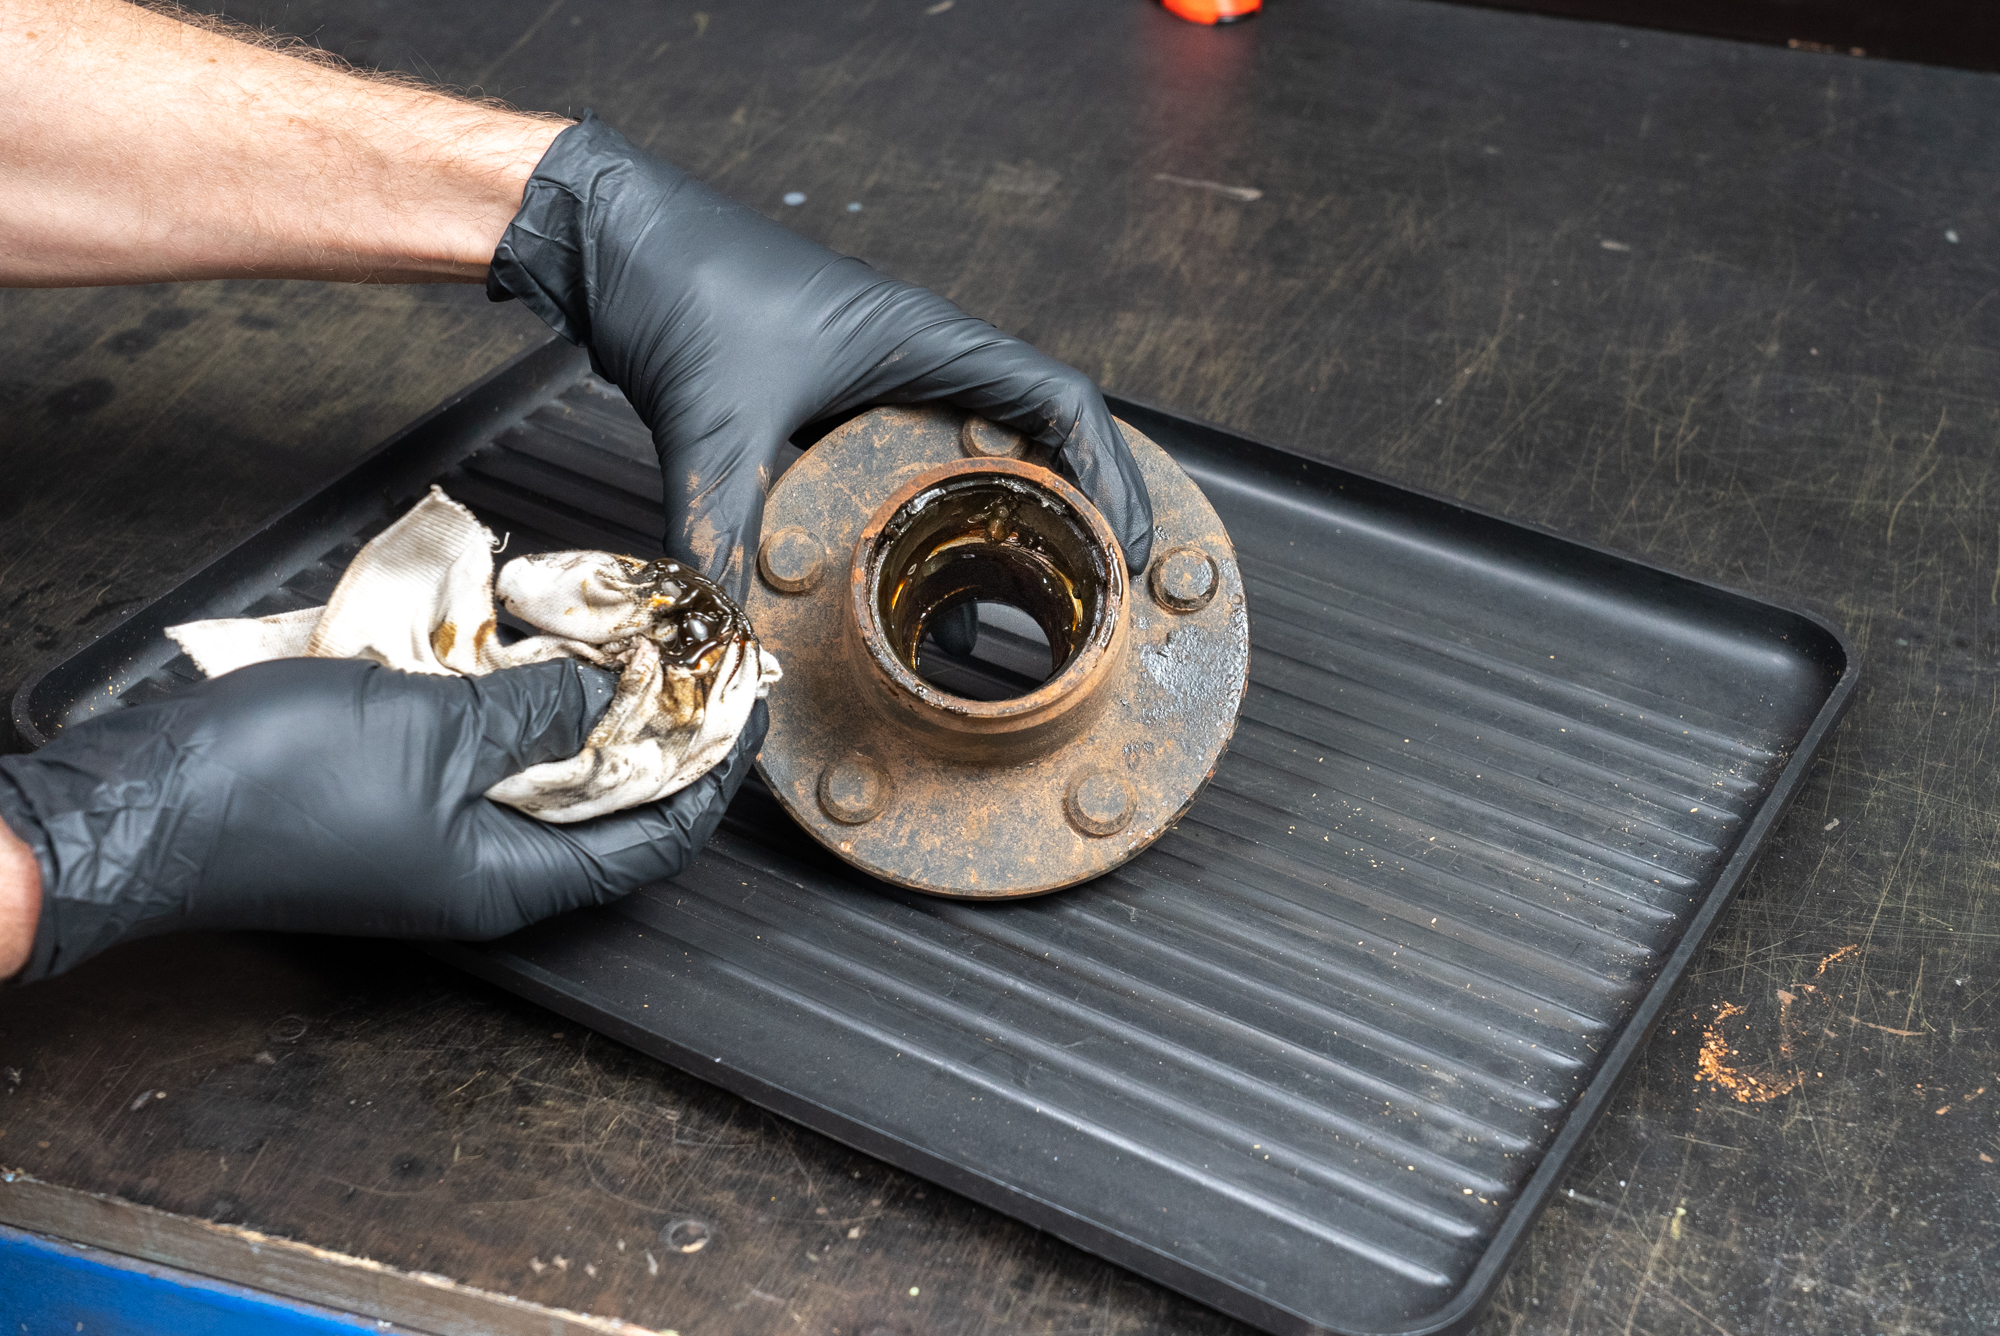
Strip the hub
Secure the hub in your bench vice and remove the outer bearing. Looking down through the hub you’ll see the inner bearing and the seal. Use your hammer and punch to drive the seal out; and the bearing will follow easily.
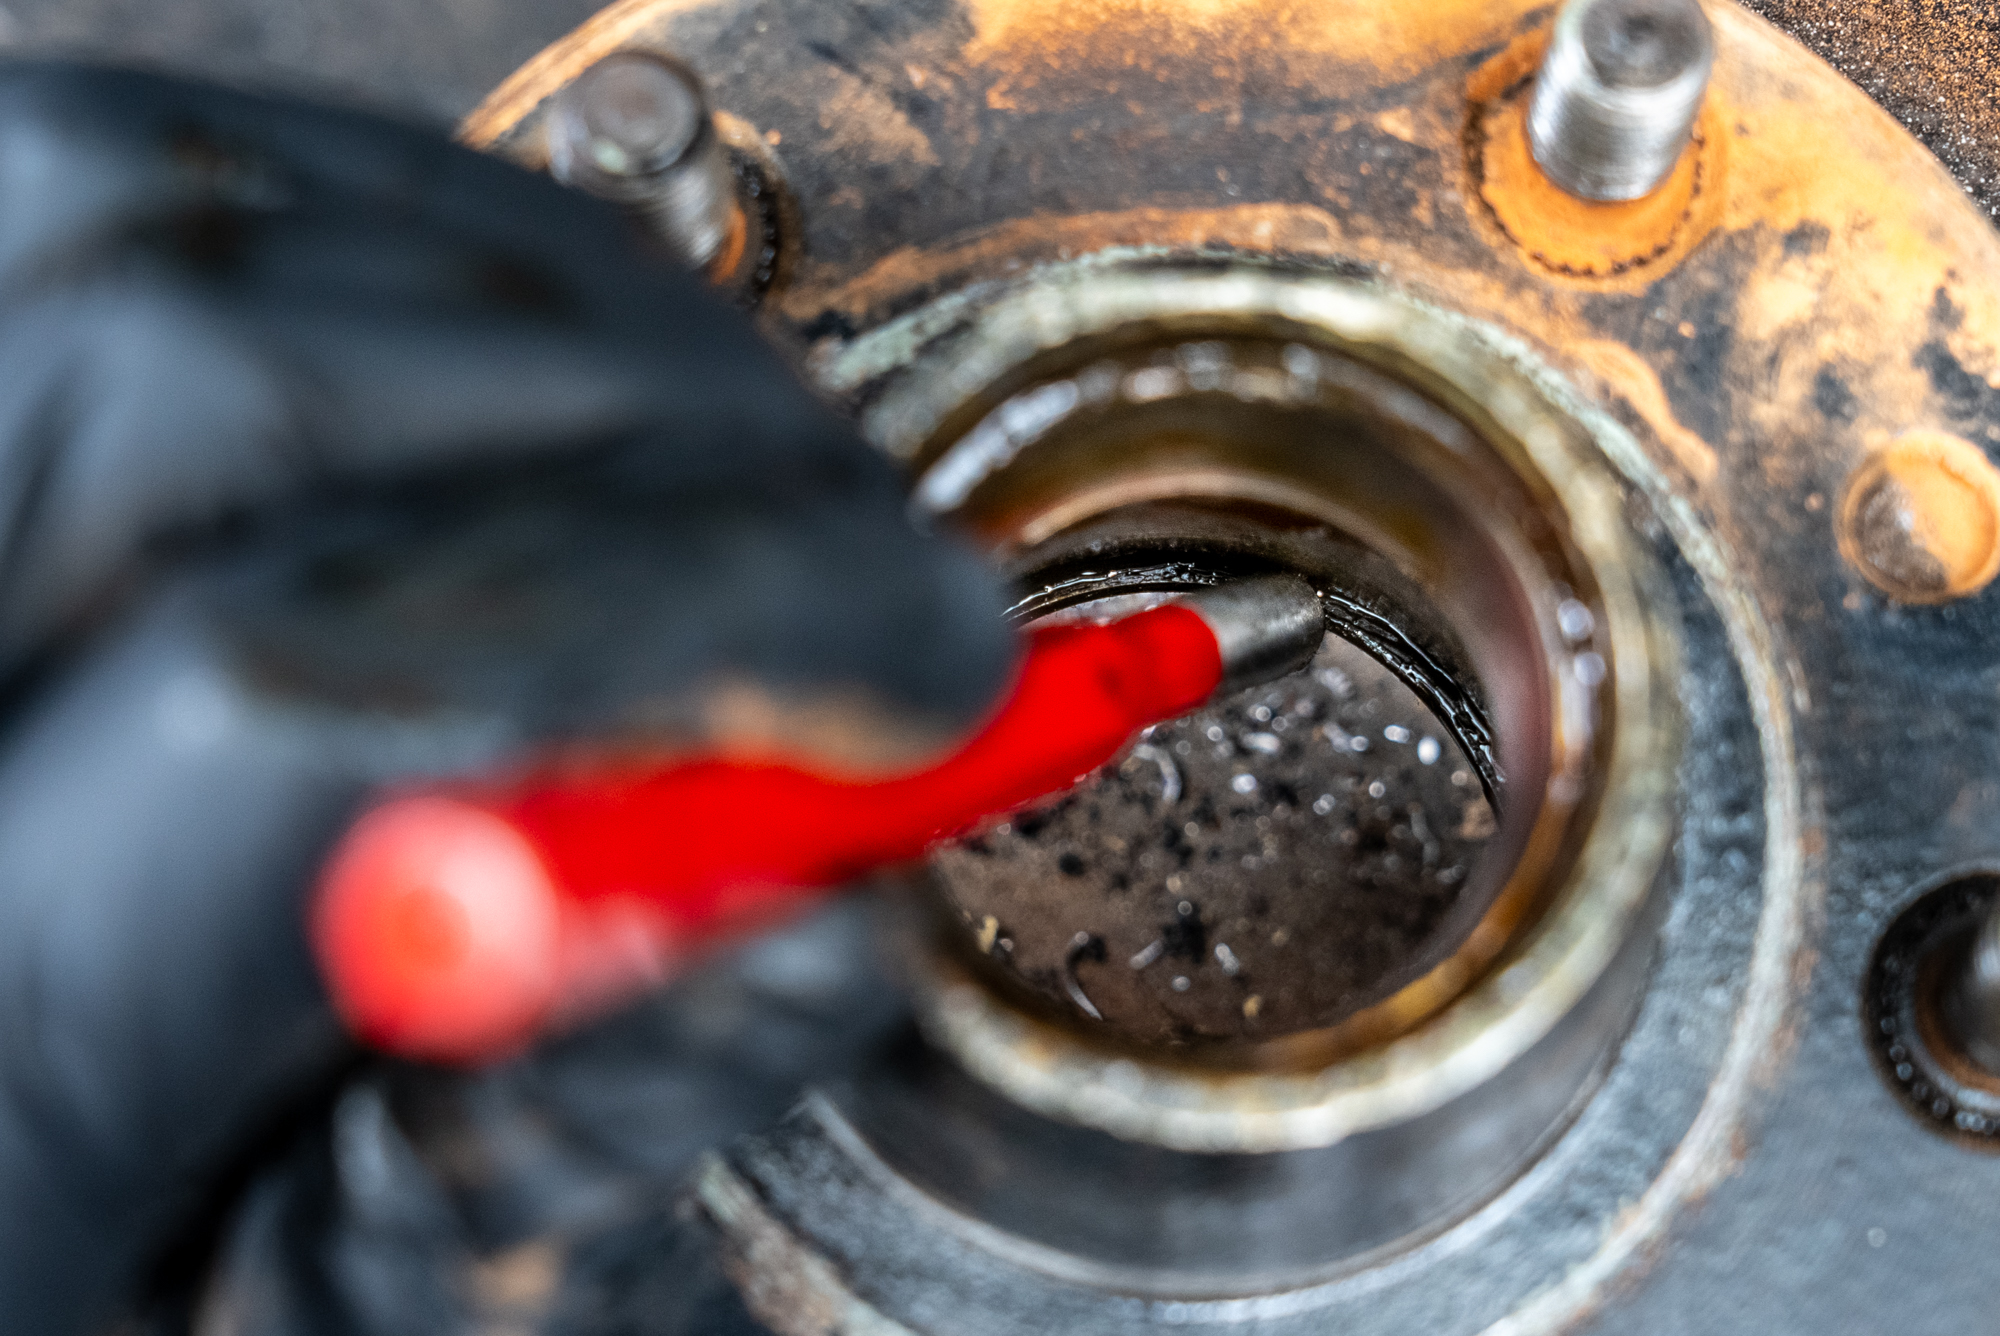
Clear away some old grease and you’ll see two gaps inside the hub revealing the back of each bearing race. This is where you will position your punch to drive each race out.
The races are intentionally tight, so take your time, alternate your punch between each side of the race, and be careful that your punch hits ONLY the race, and not the bore of the hub. Take a moment to reposition the punch after every tap with the hammer if needed.
Once both races are out you can perform a thorough clean up with more rags, and some degreaser. Head over to your trailer and clean up the spindle while you’re at it.
Fit new bearing races
Before you begin fitting the bearing races, here’s a SUPER tip! Pop those new bearing races in your freezer before you even start working on your trailer. By the time you are ready to fit the races, they have contracted in the freezer and will be MUCH easier to fit.
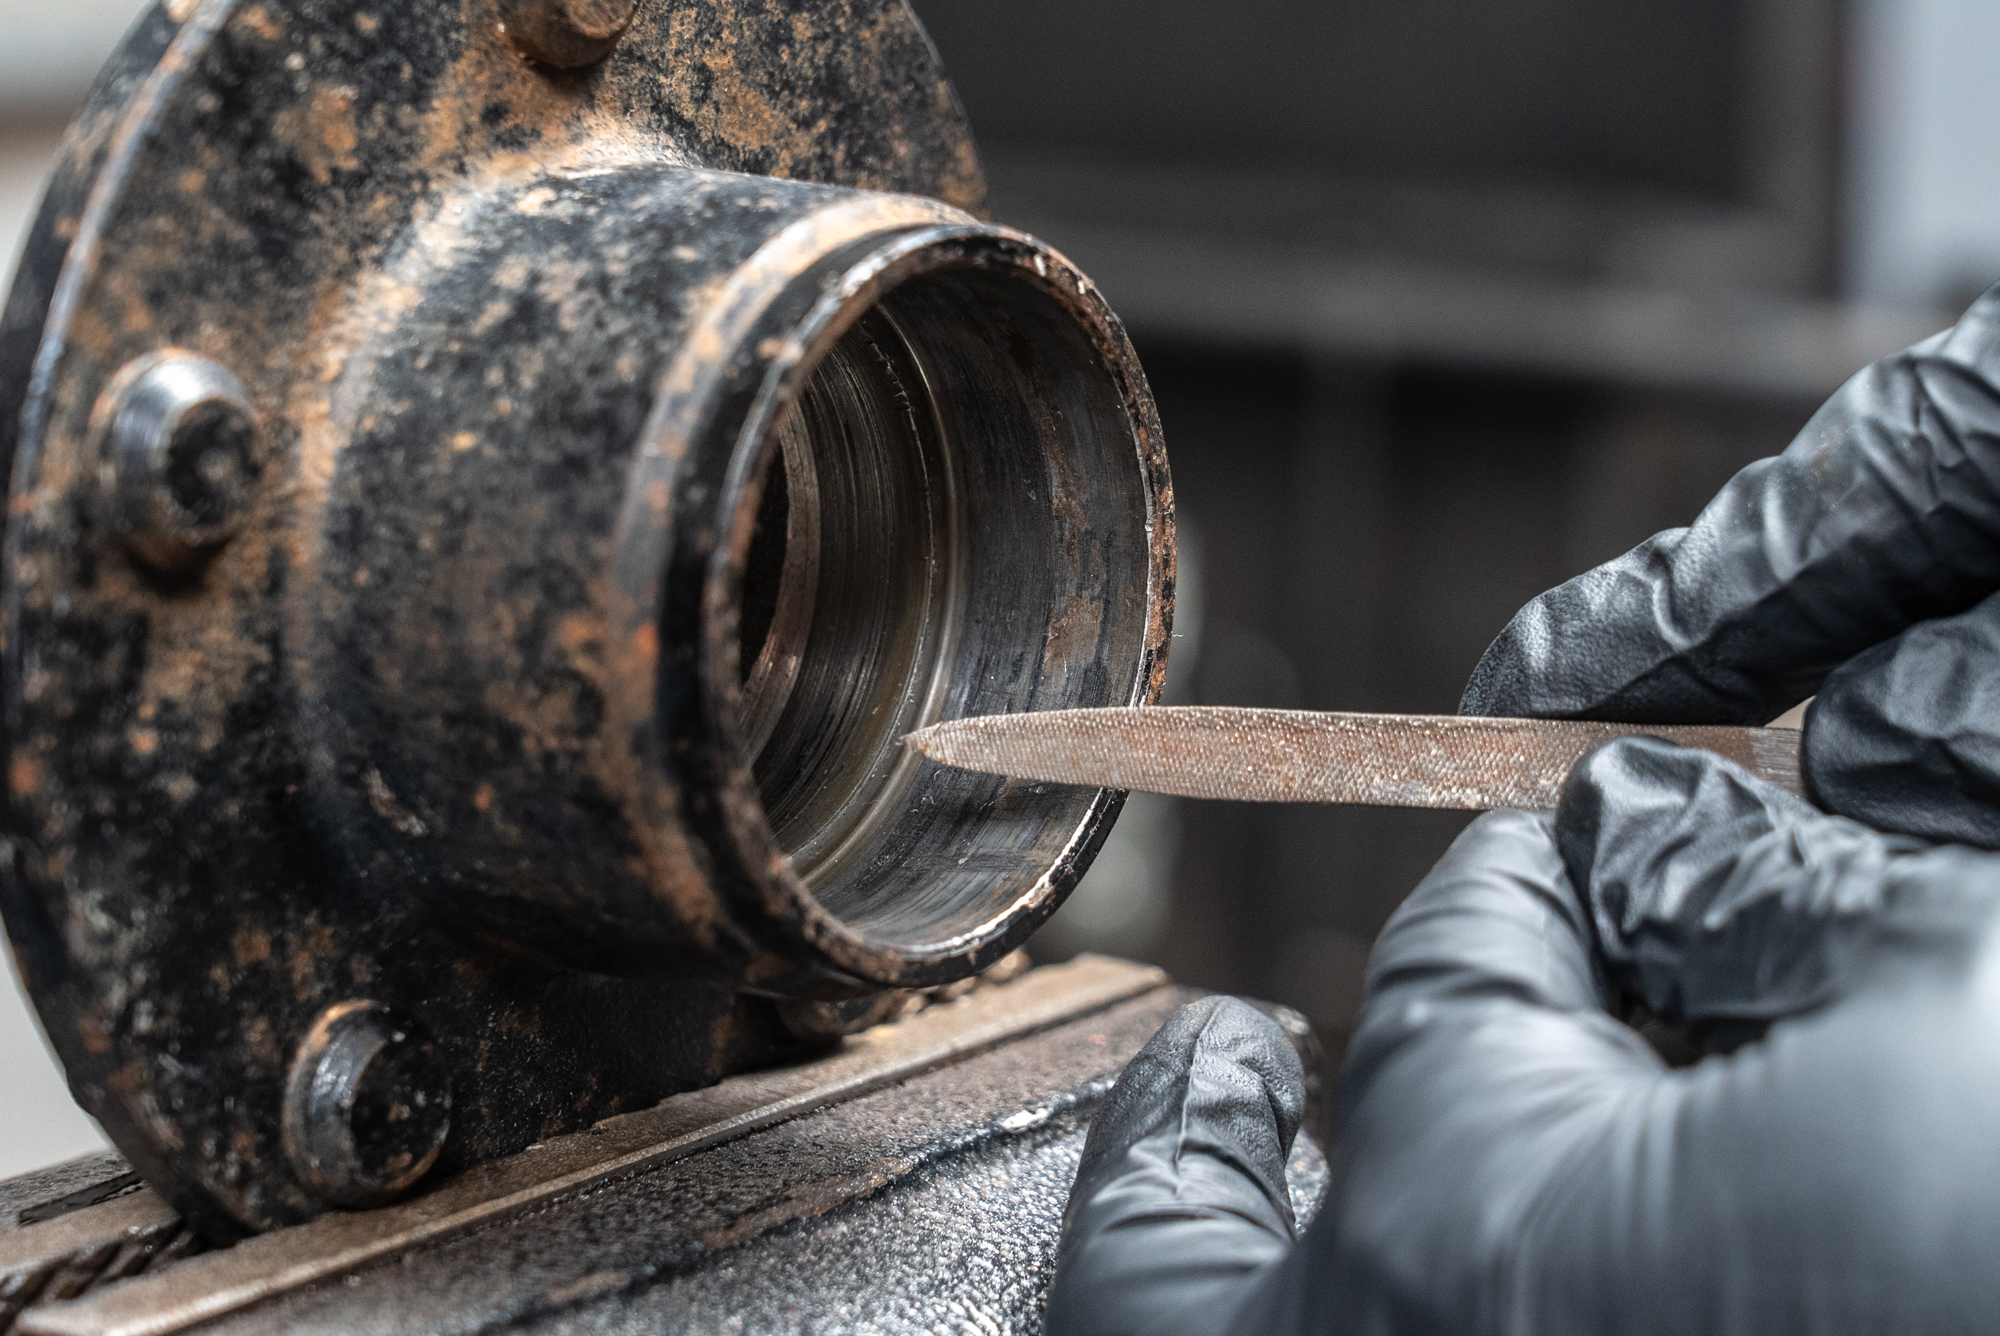
Before you drive the new races in; inspect the bores in the hub. If you slipped with the punch and caused damage earlier; you’ll need to work with files and sandpaper to get it smooth again.
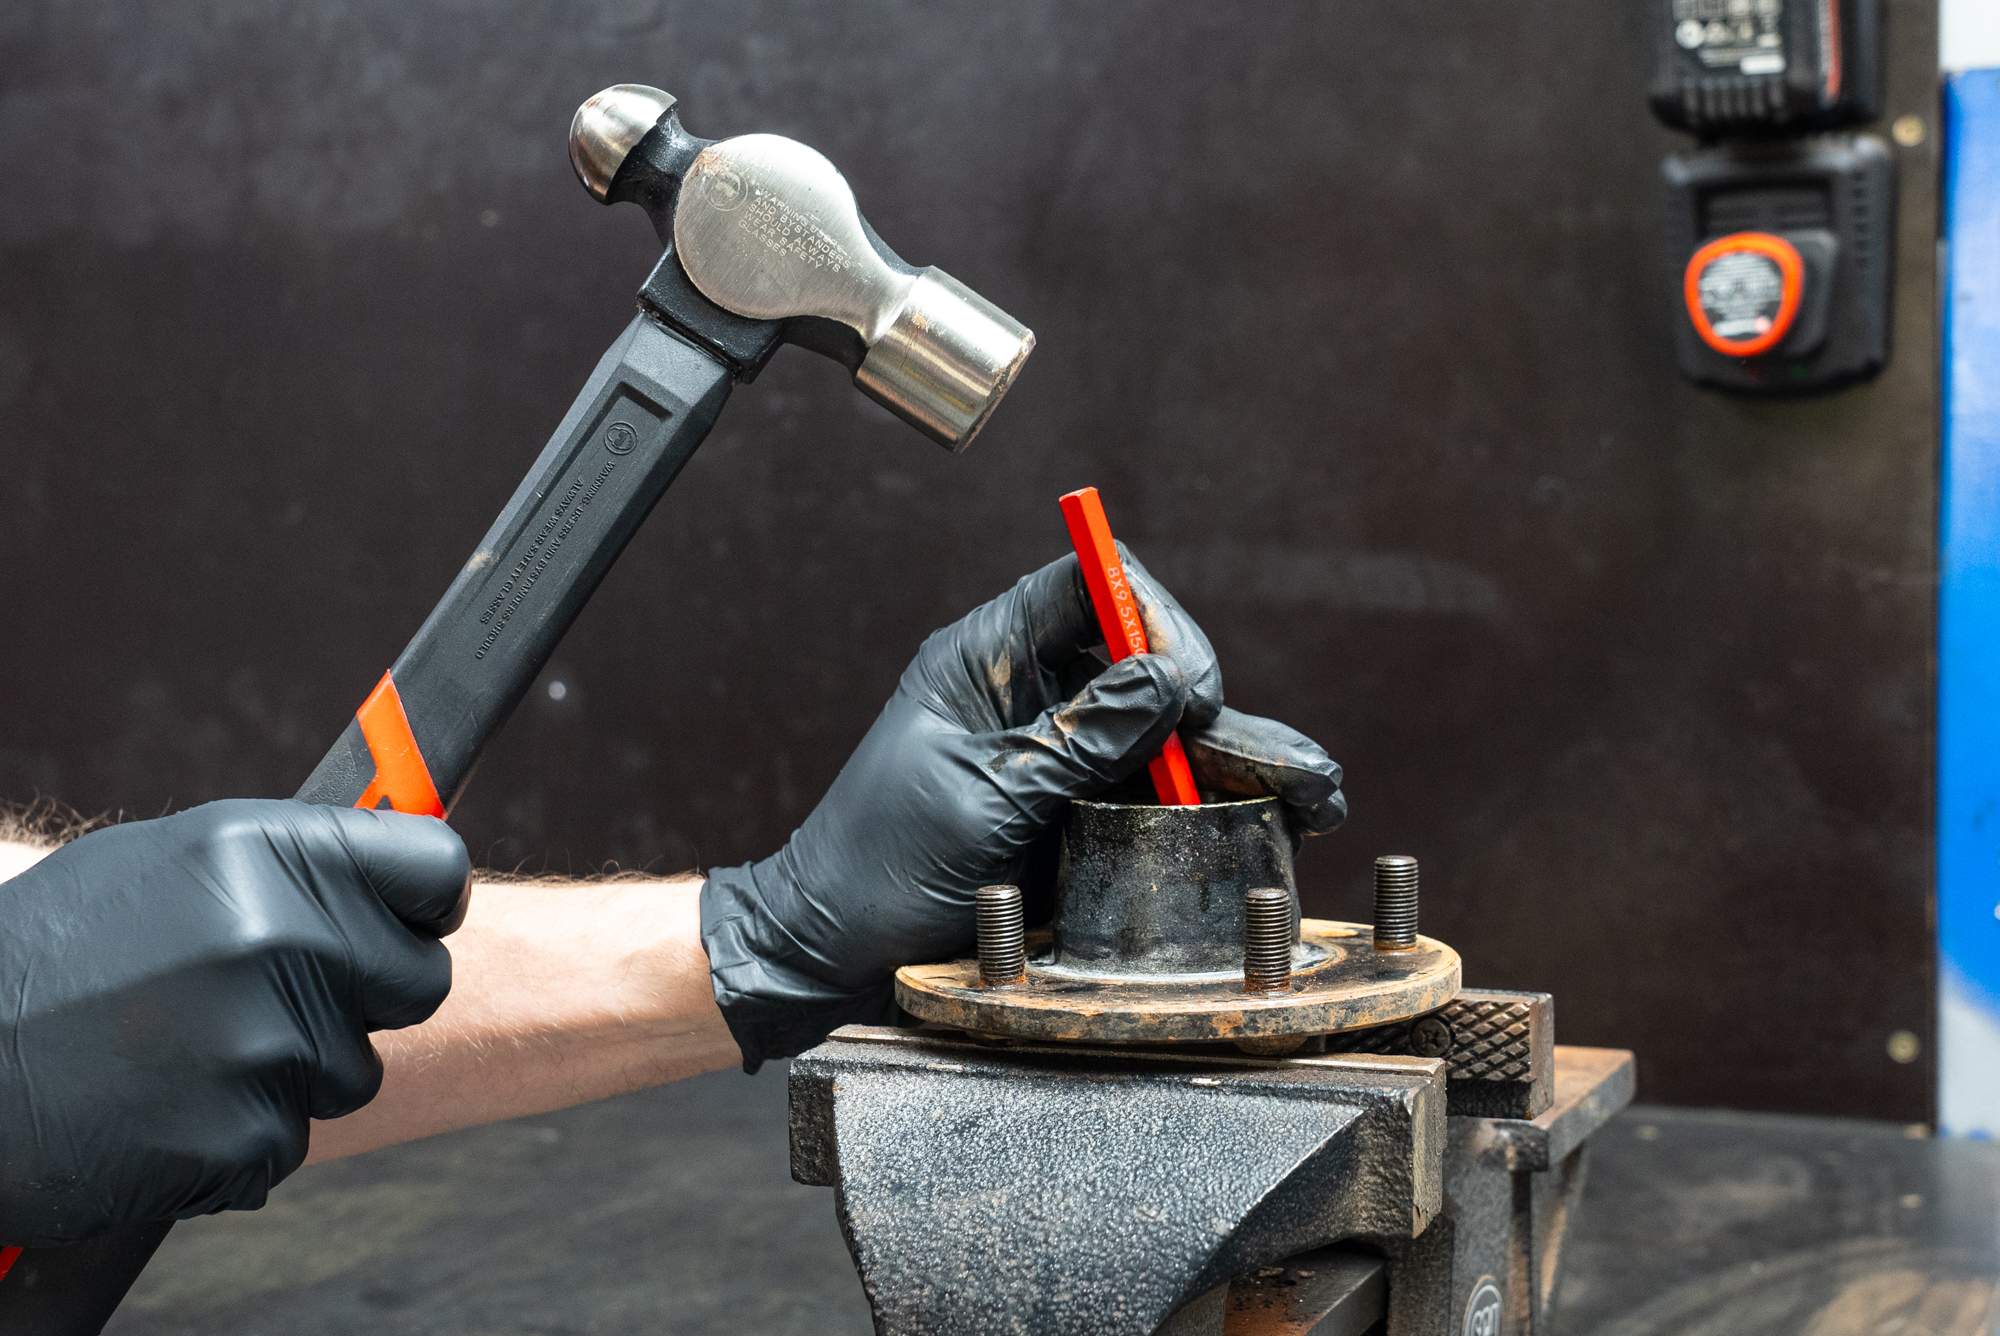
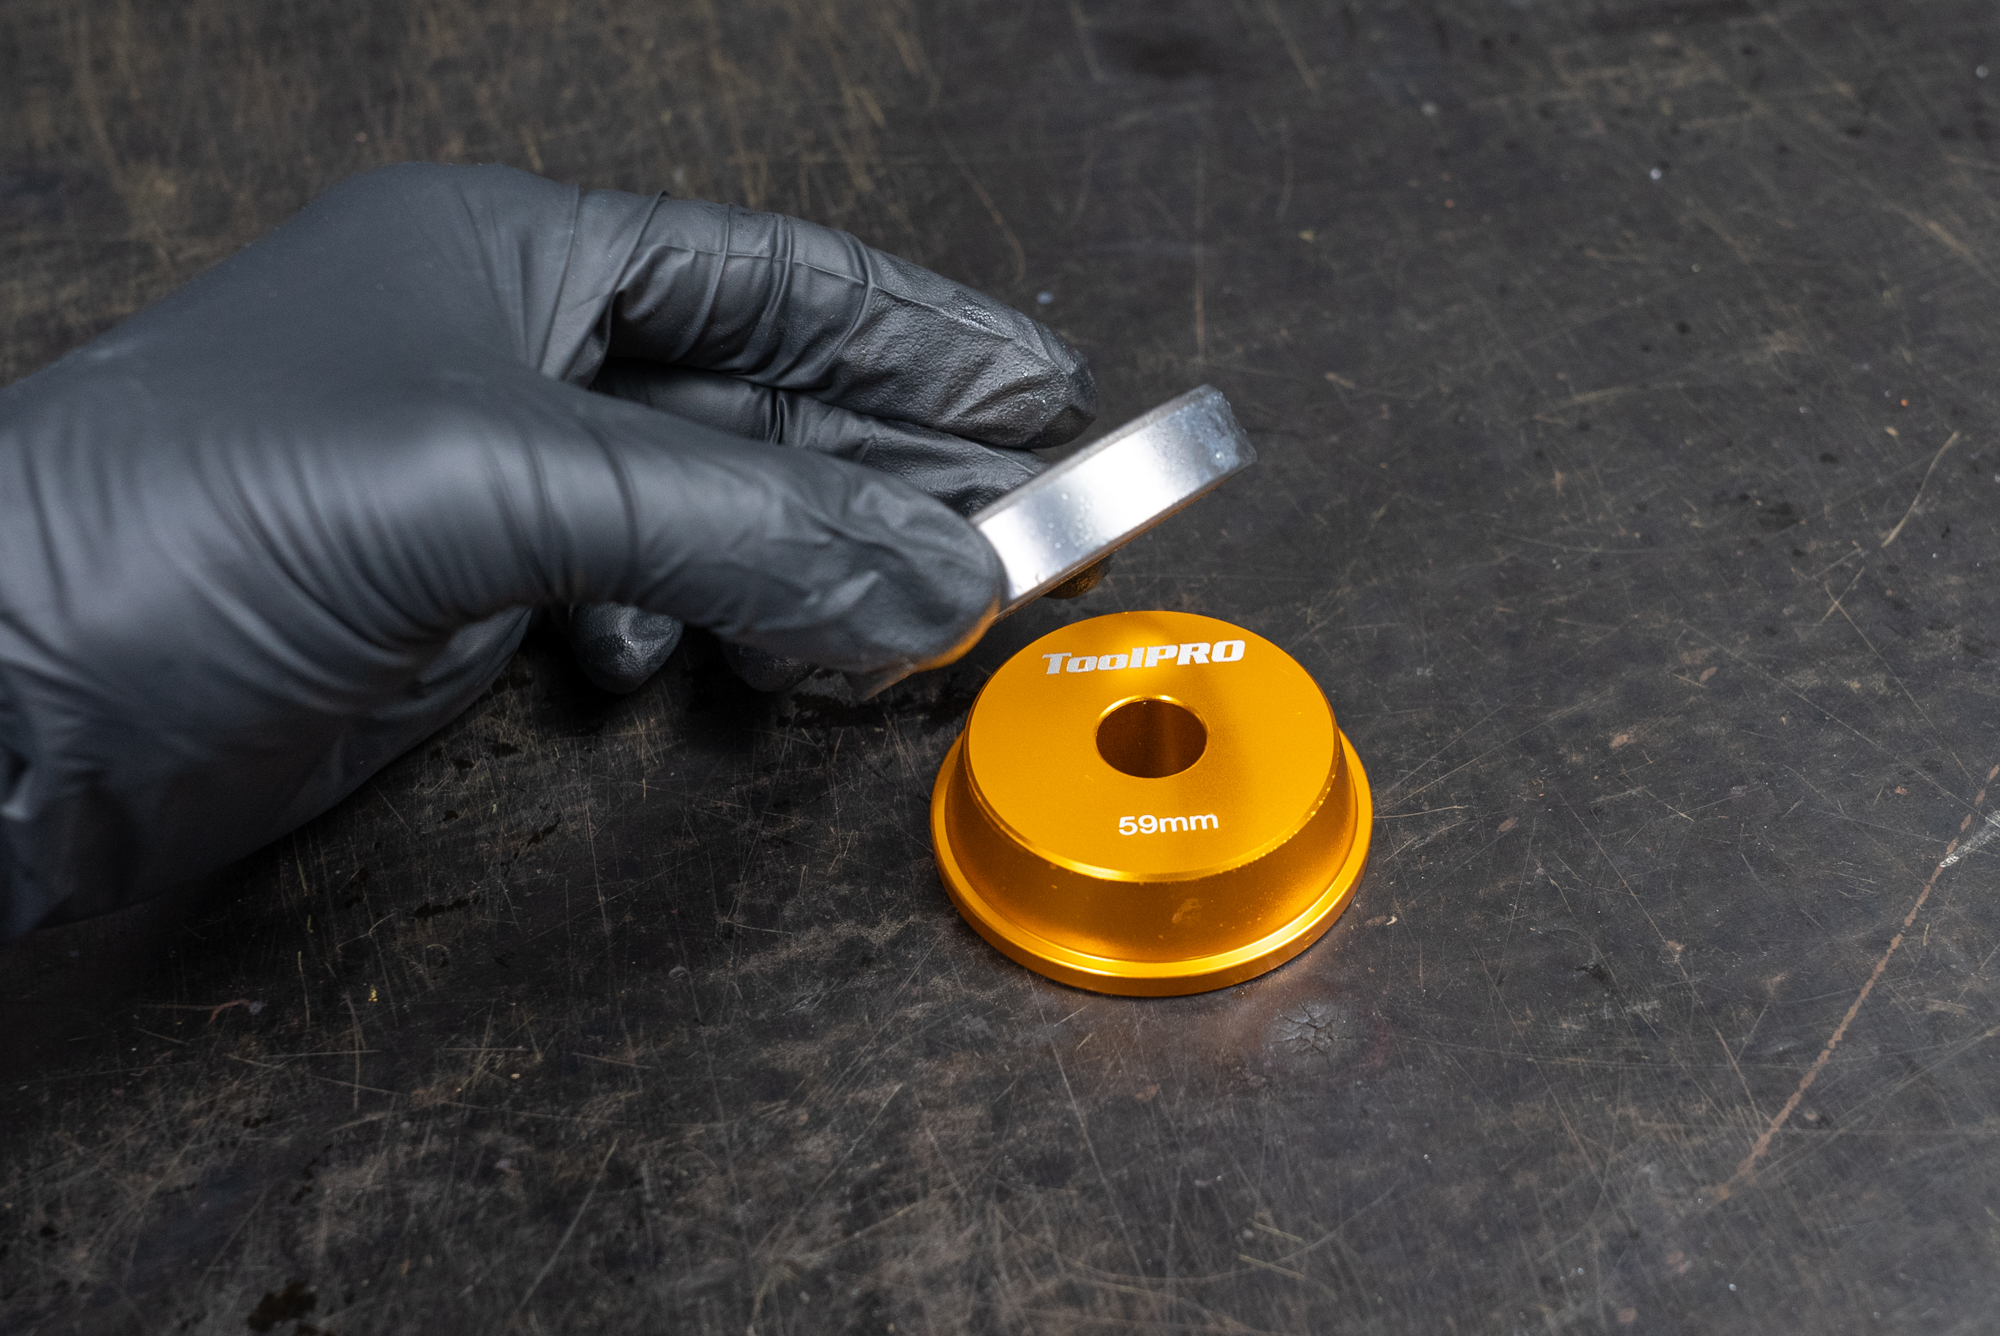
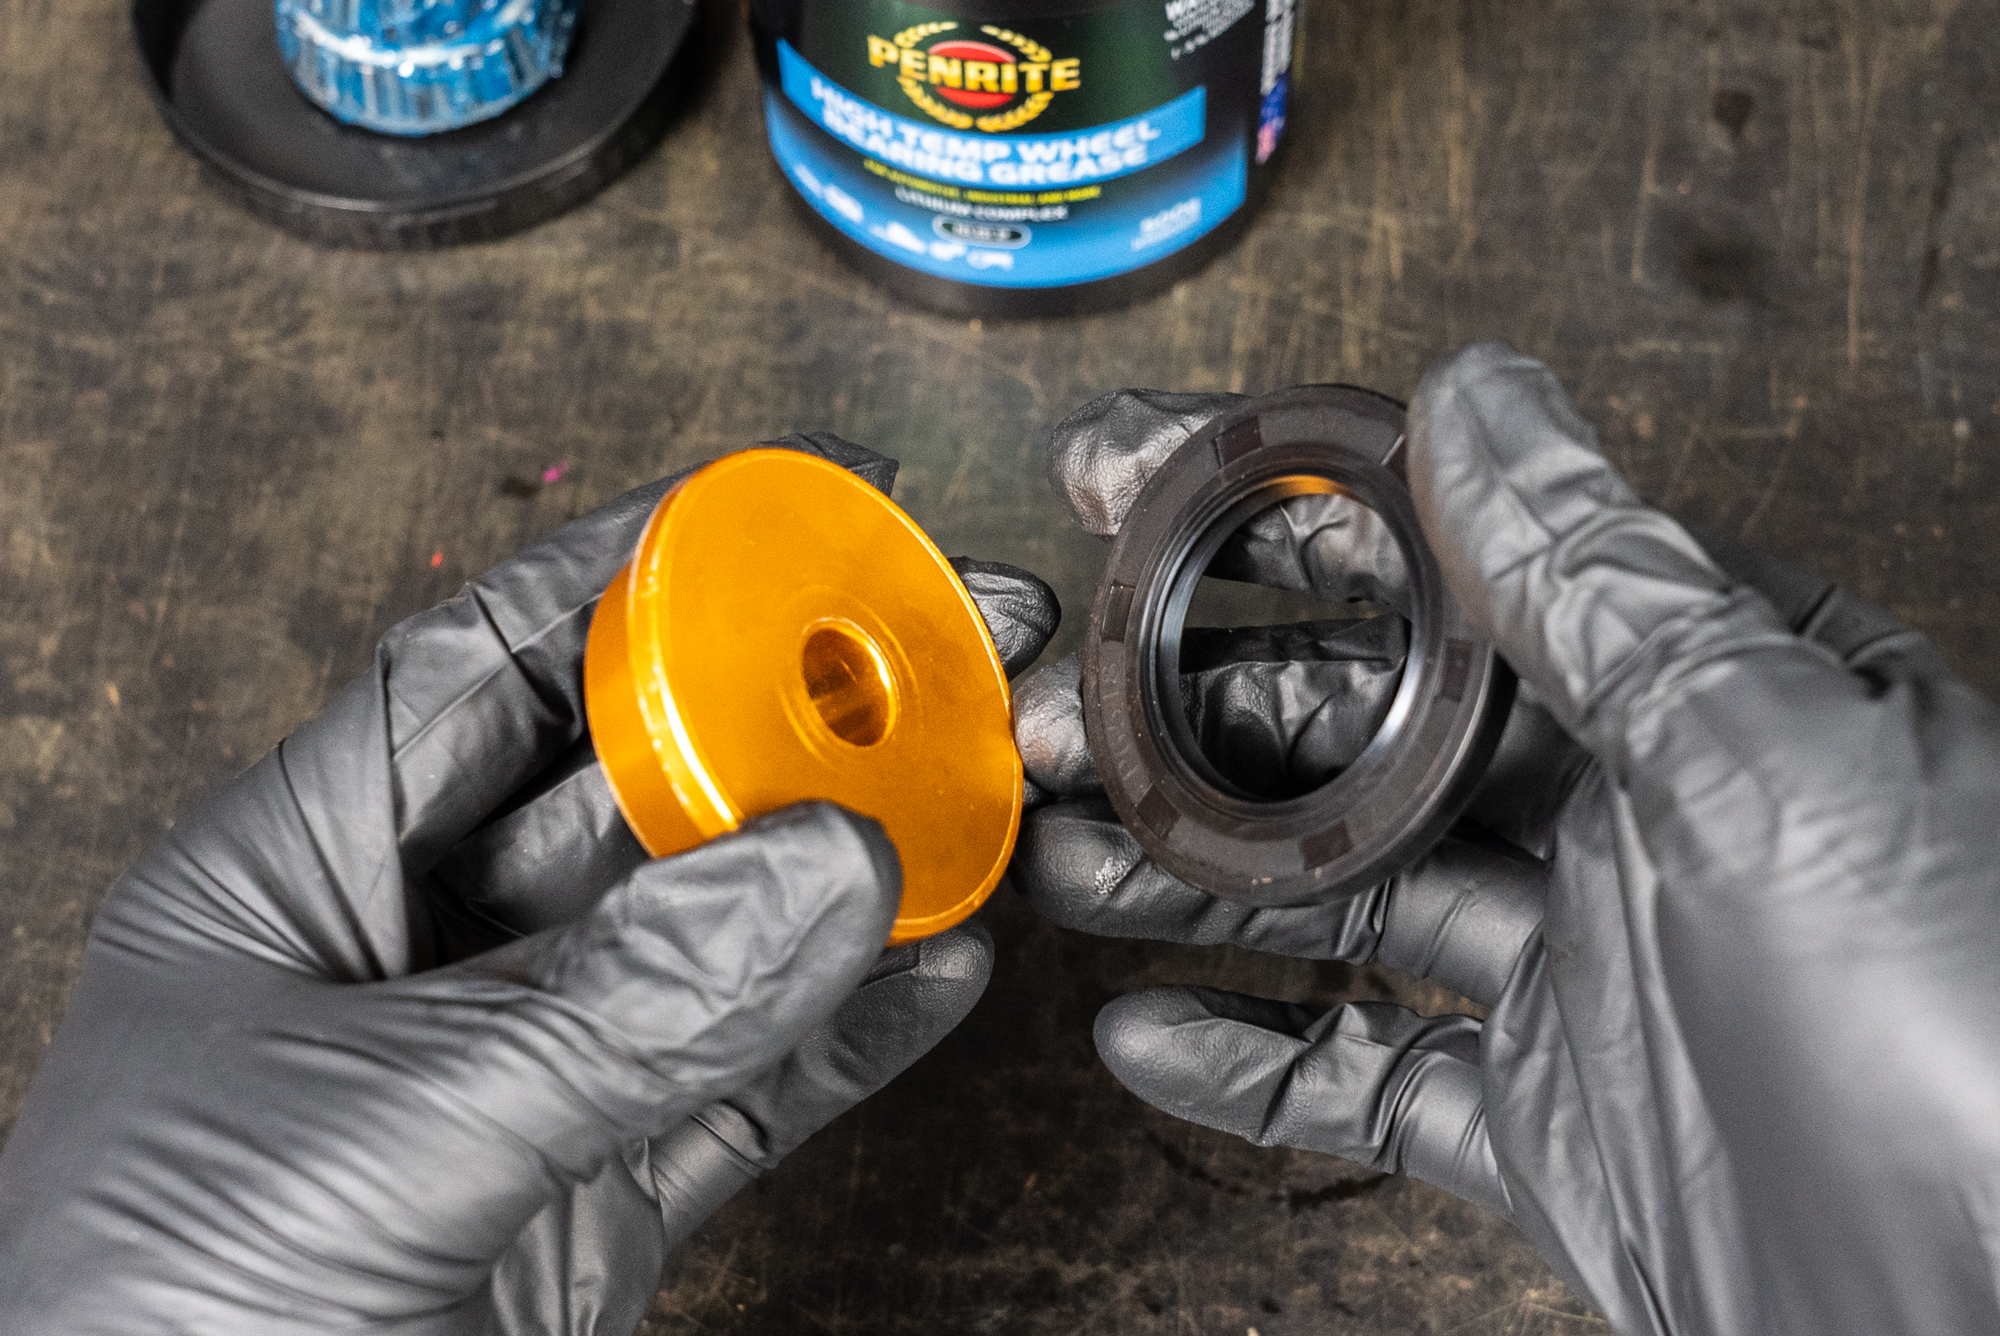
Now open up your bearing and seal driver kit. Each collar in the kit will suit a different bearing race or seal. Once you’ve found a good fit; attach the handle.
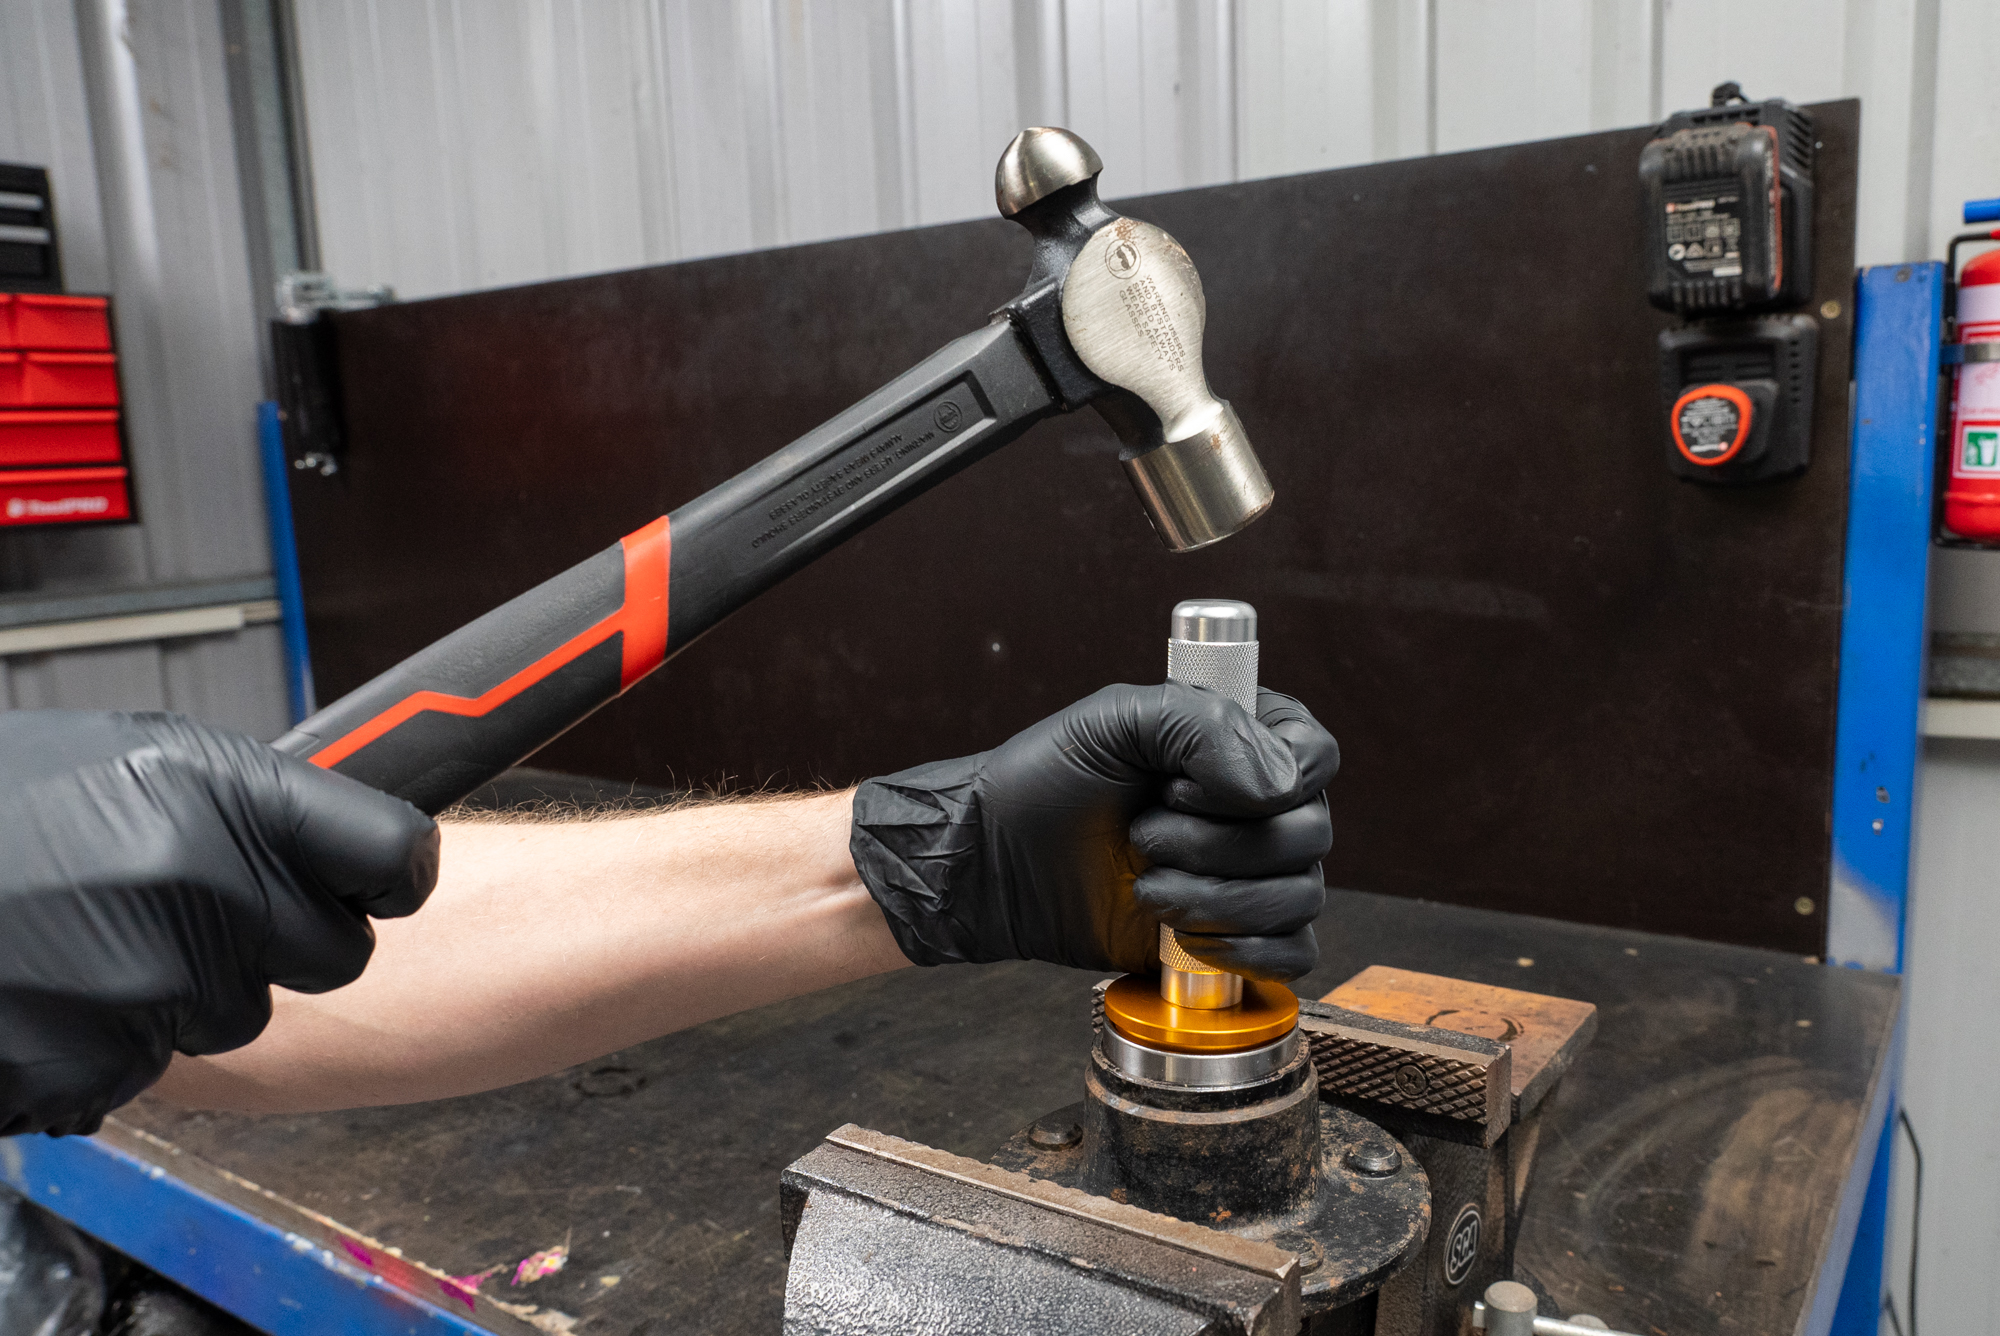
Make sure your hub is leveled securely in the bench vice. Place the new bearing race on top, ensure the taper is facing outwards, and give it a few gentle taps with your race driver. Check that it’s not crooked. You can gently tap with the hammer to level it out if required.
Now continue striking the race driver to seat the race all the way into the hub. You’ll hear the change in tone and feel a difference in feedback through the handle when the race is fully seated.
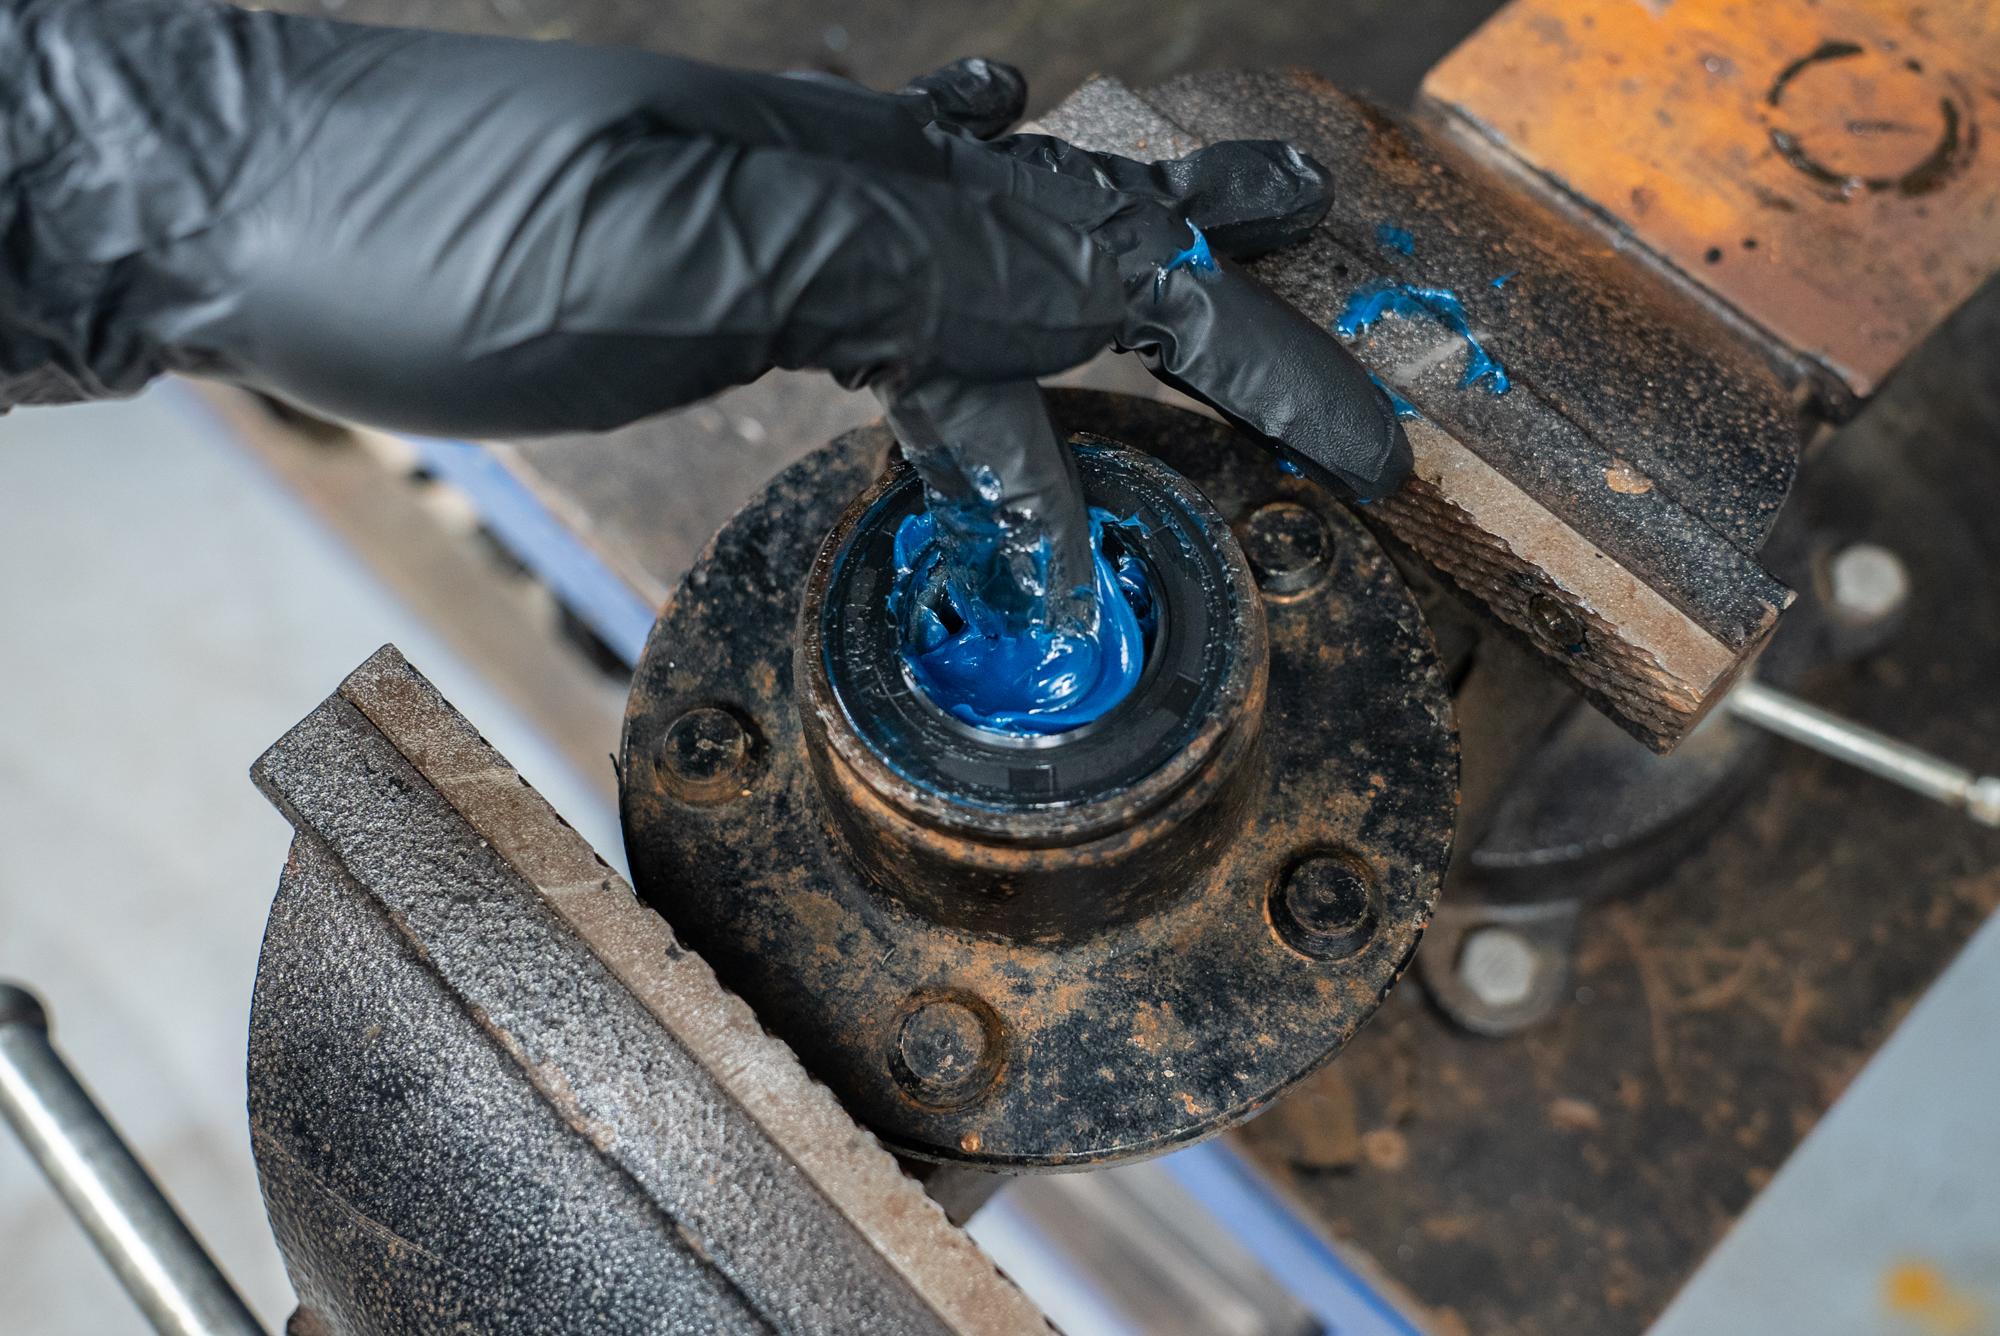
Installing bearings into hub
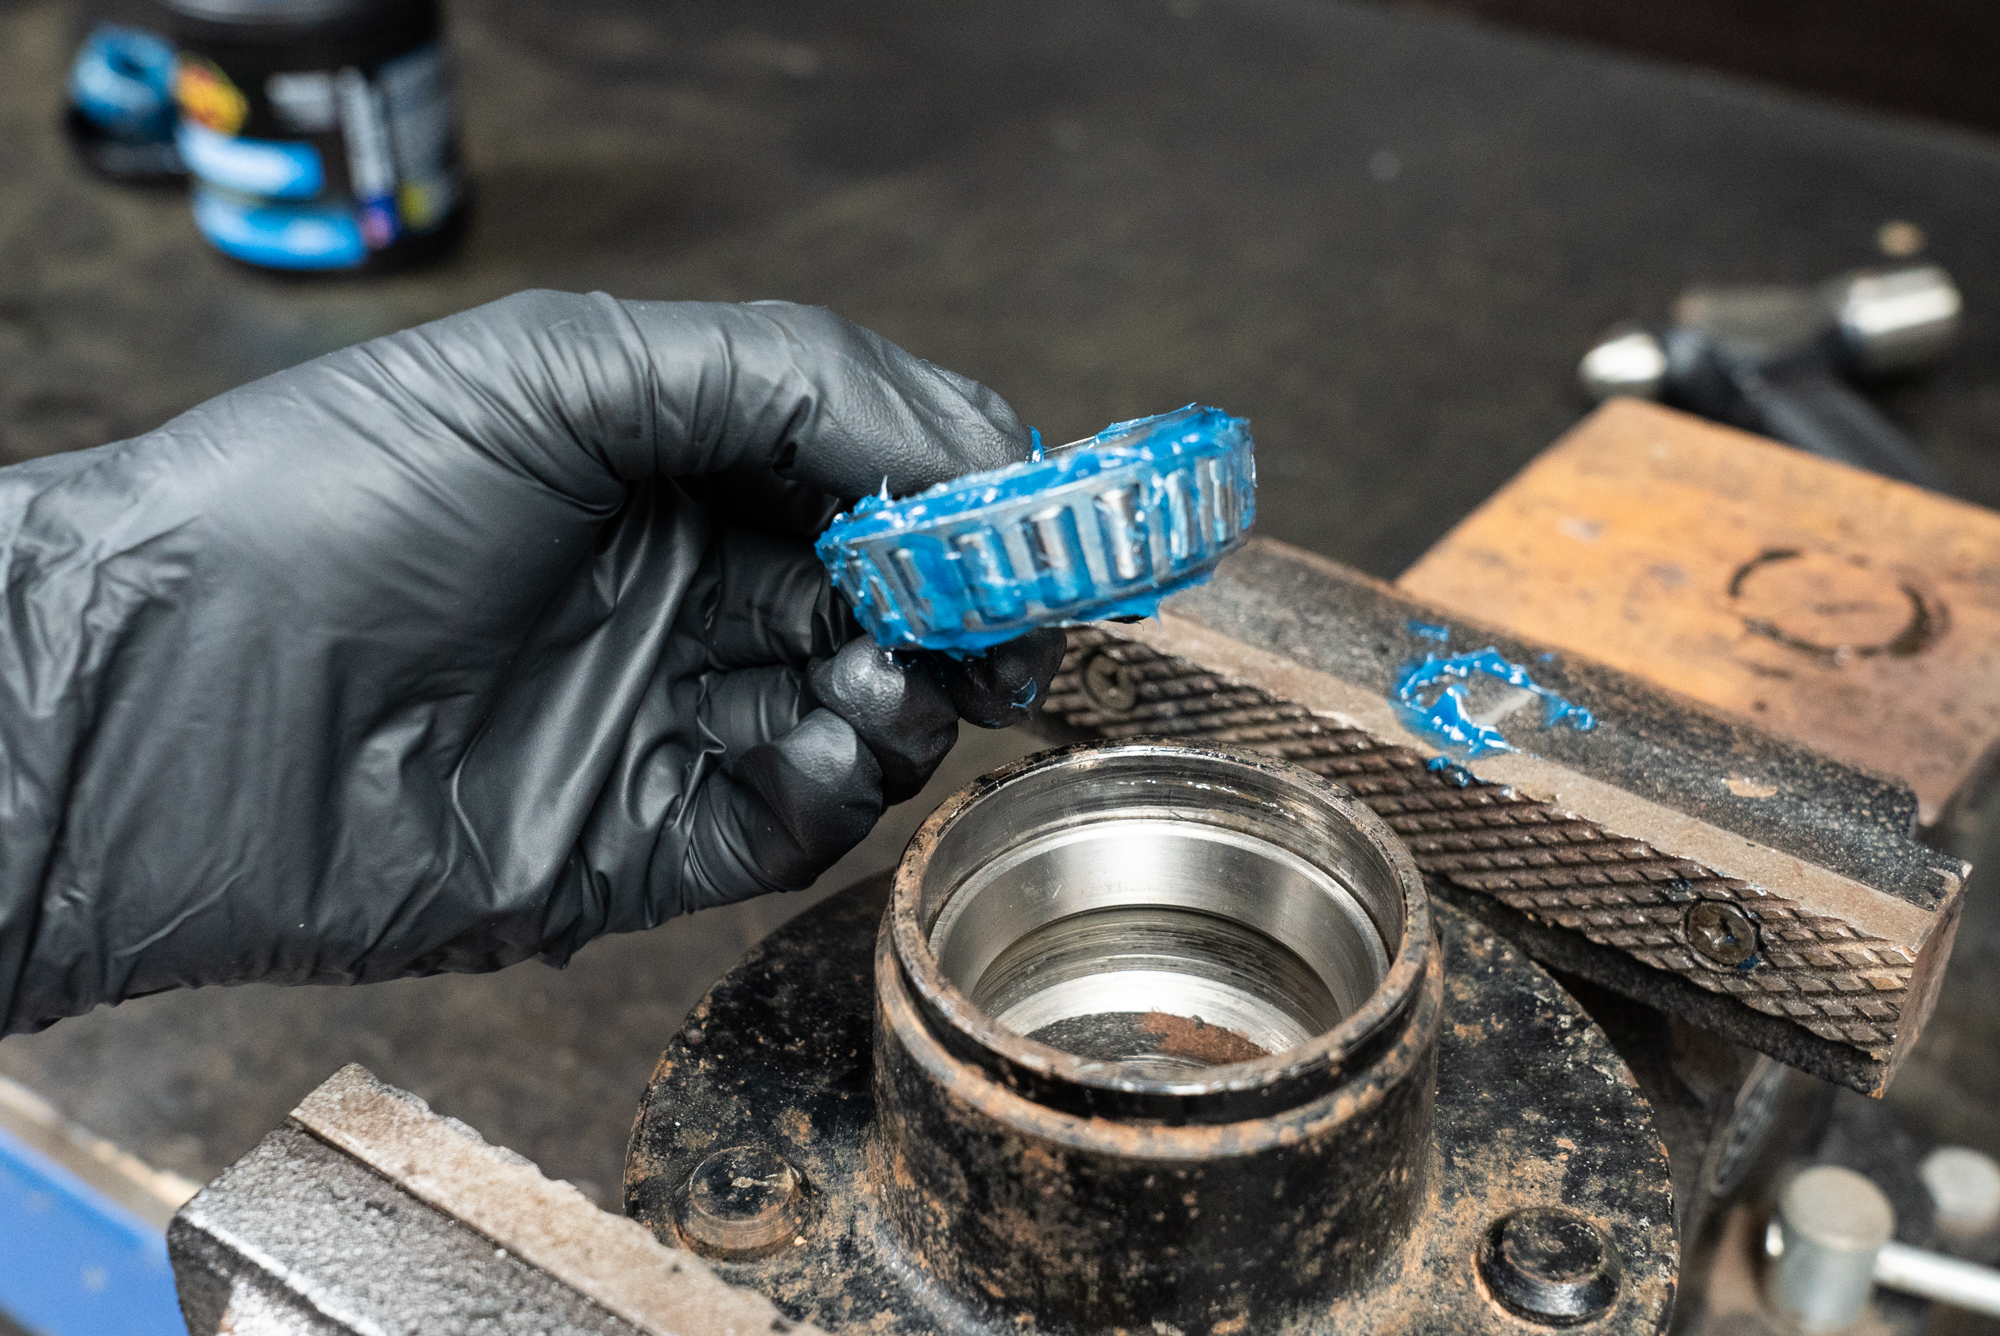
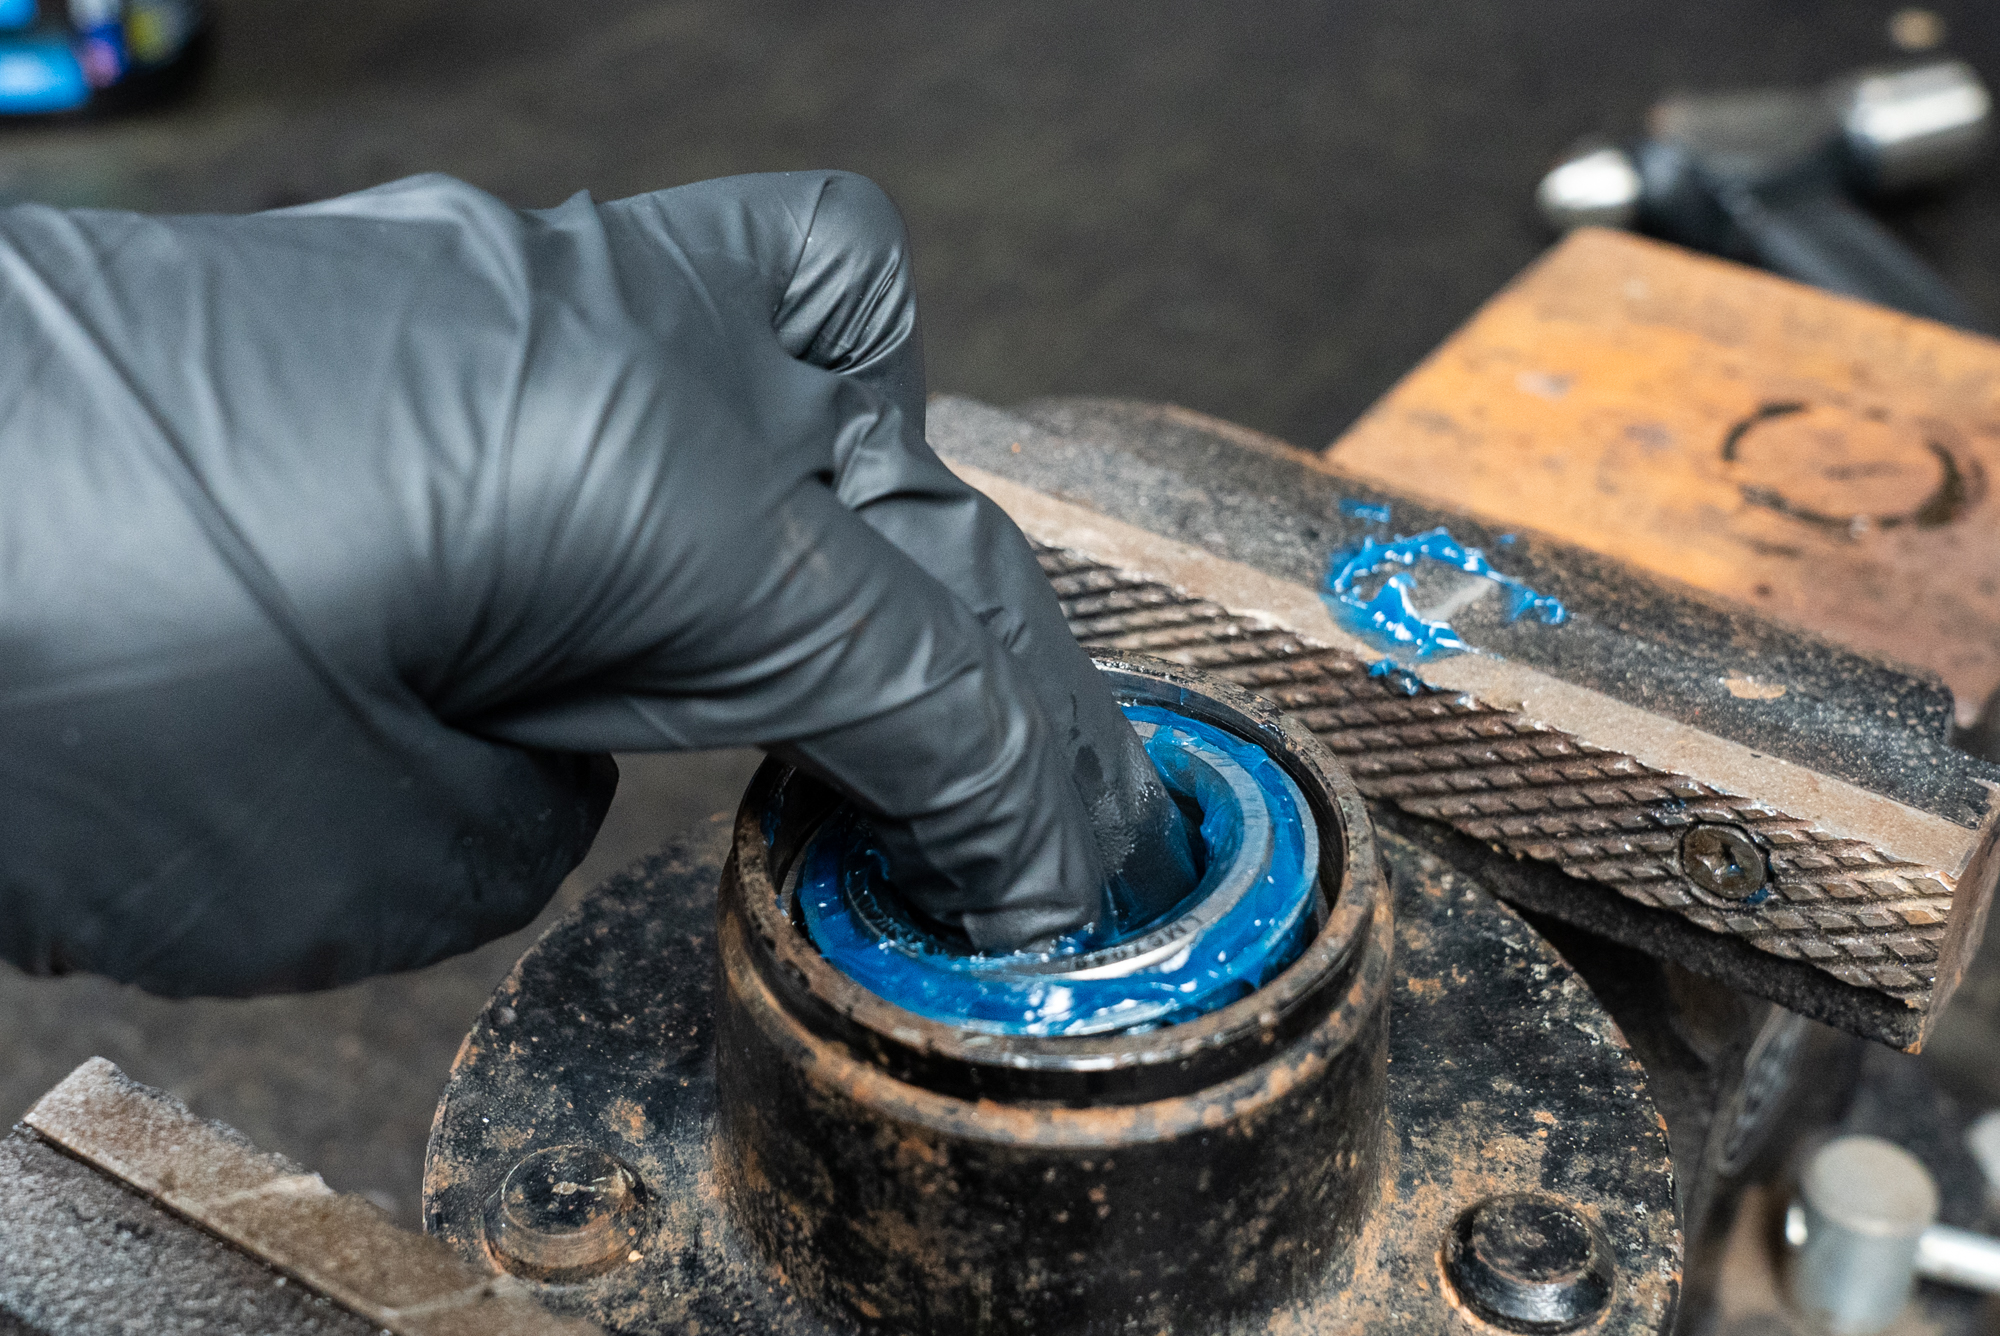
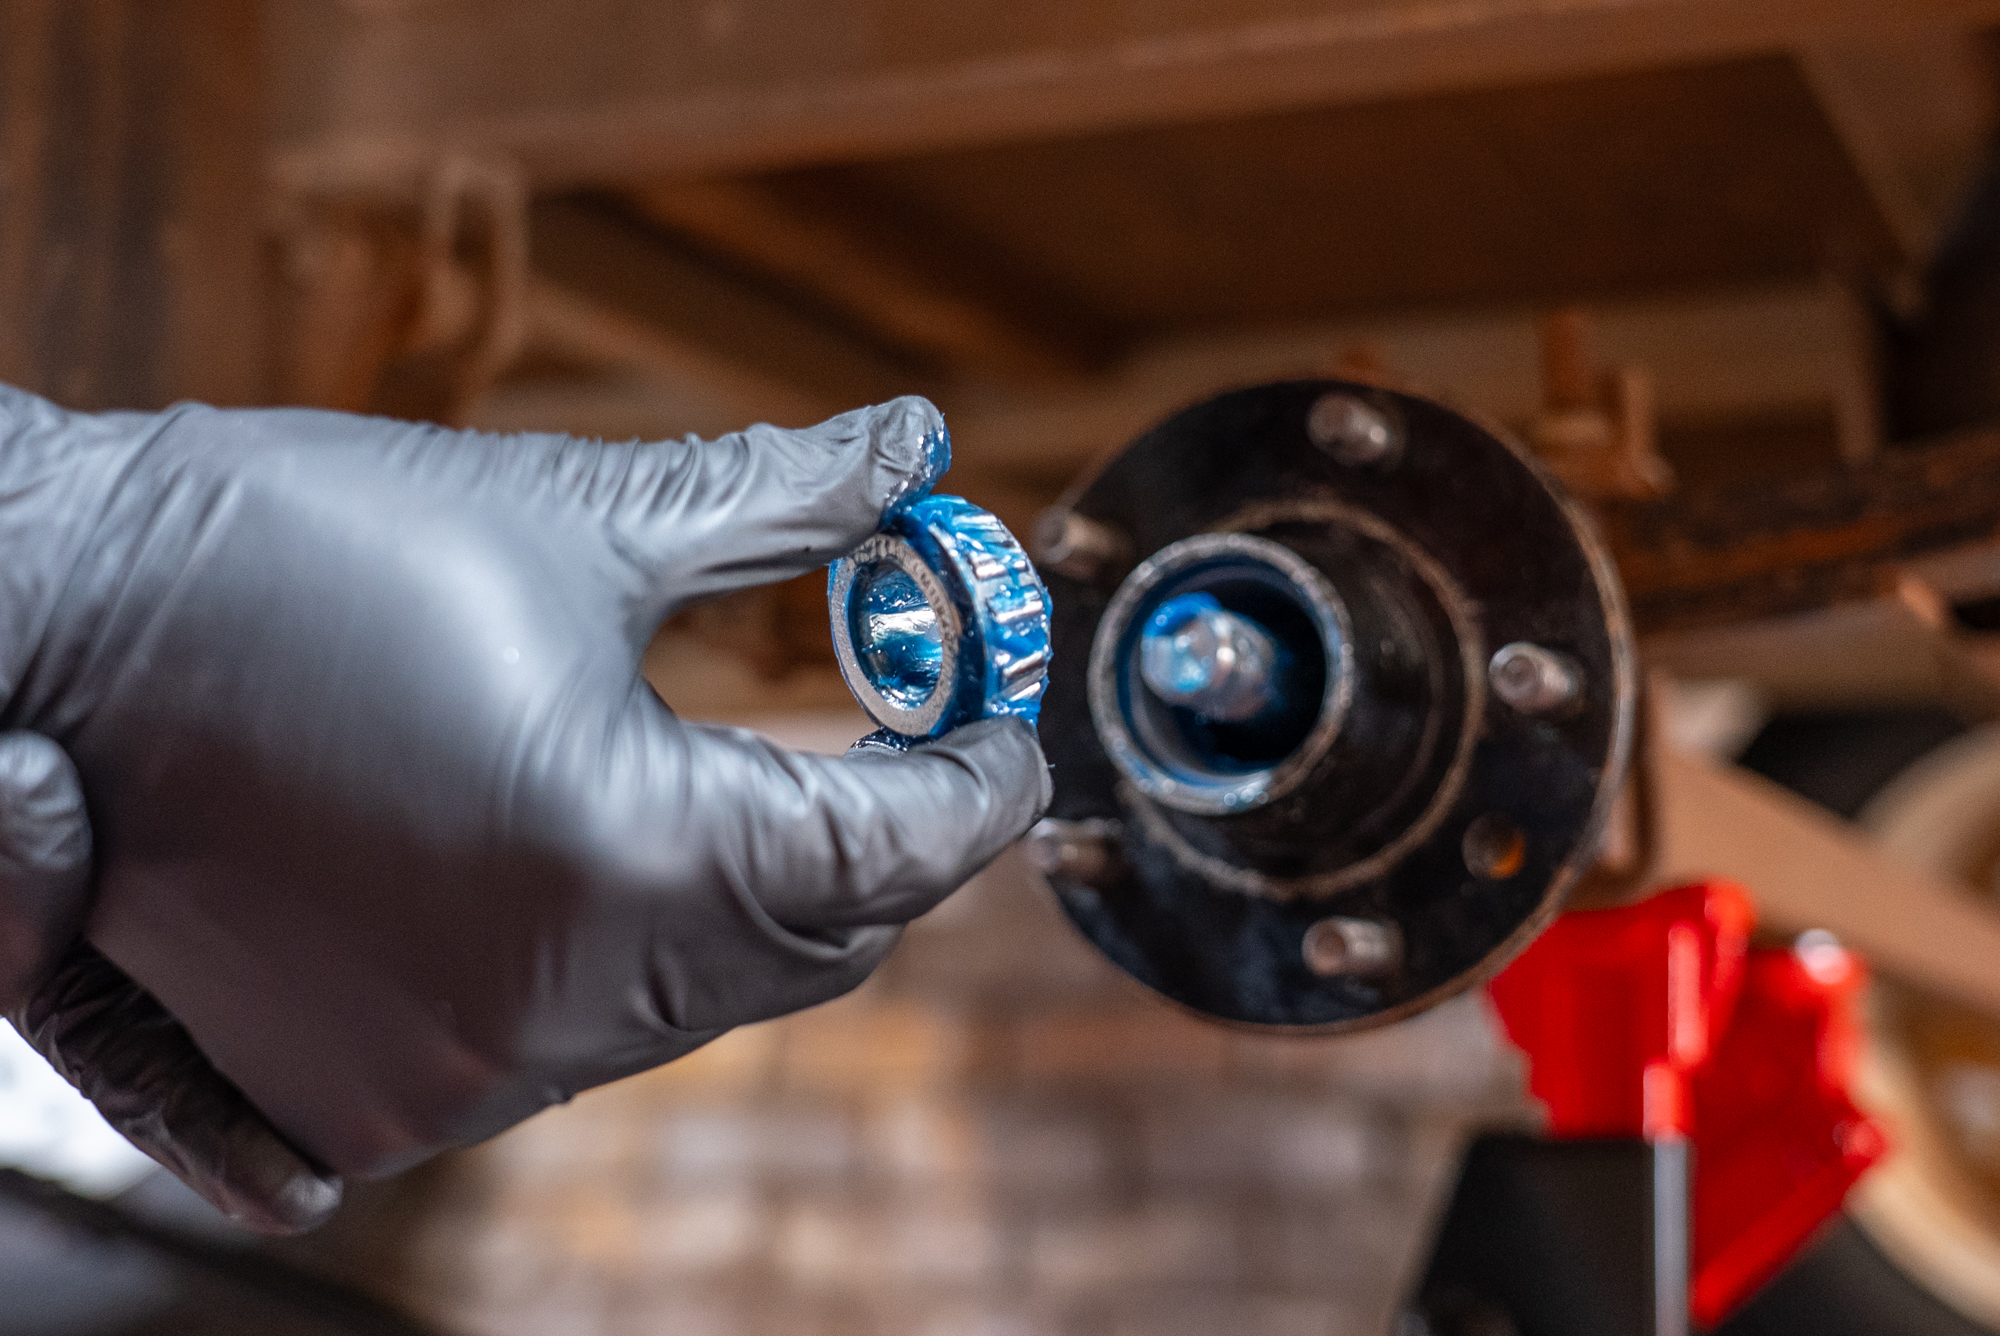
With a fresh pair of disposable gloves, scoop a fat blob of grease into one hand, and work the grease into the large end of the bearing taper. Keep going until you see grease pushing through the small end of the taper. Rotate the bearing a little and continue this way until the bearing is fully packed.
Alternatively, you can use a ToolPRO bearing packer tool.
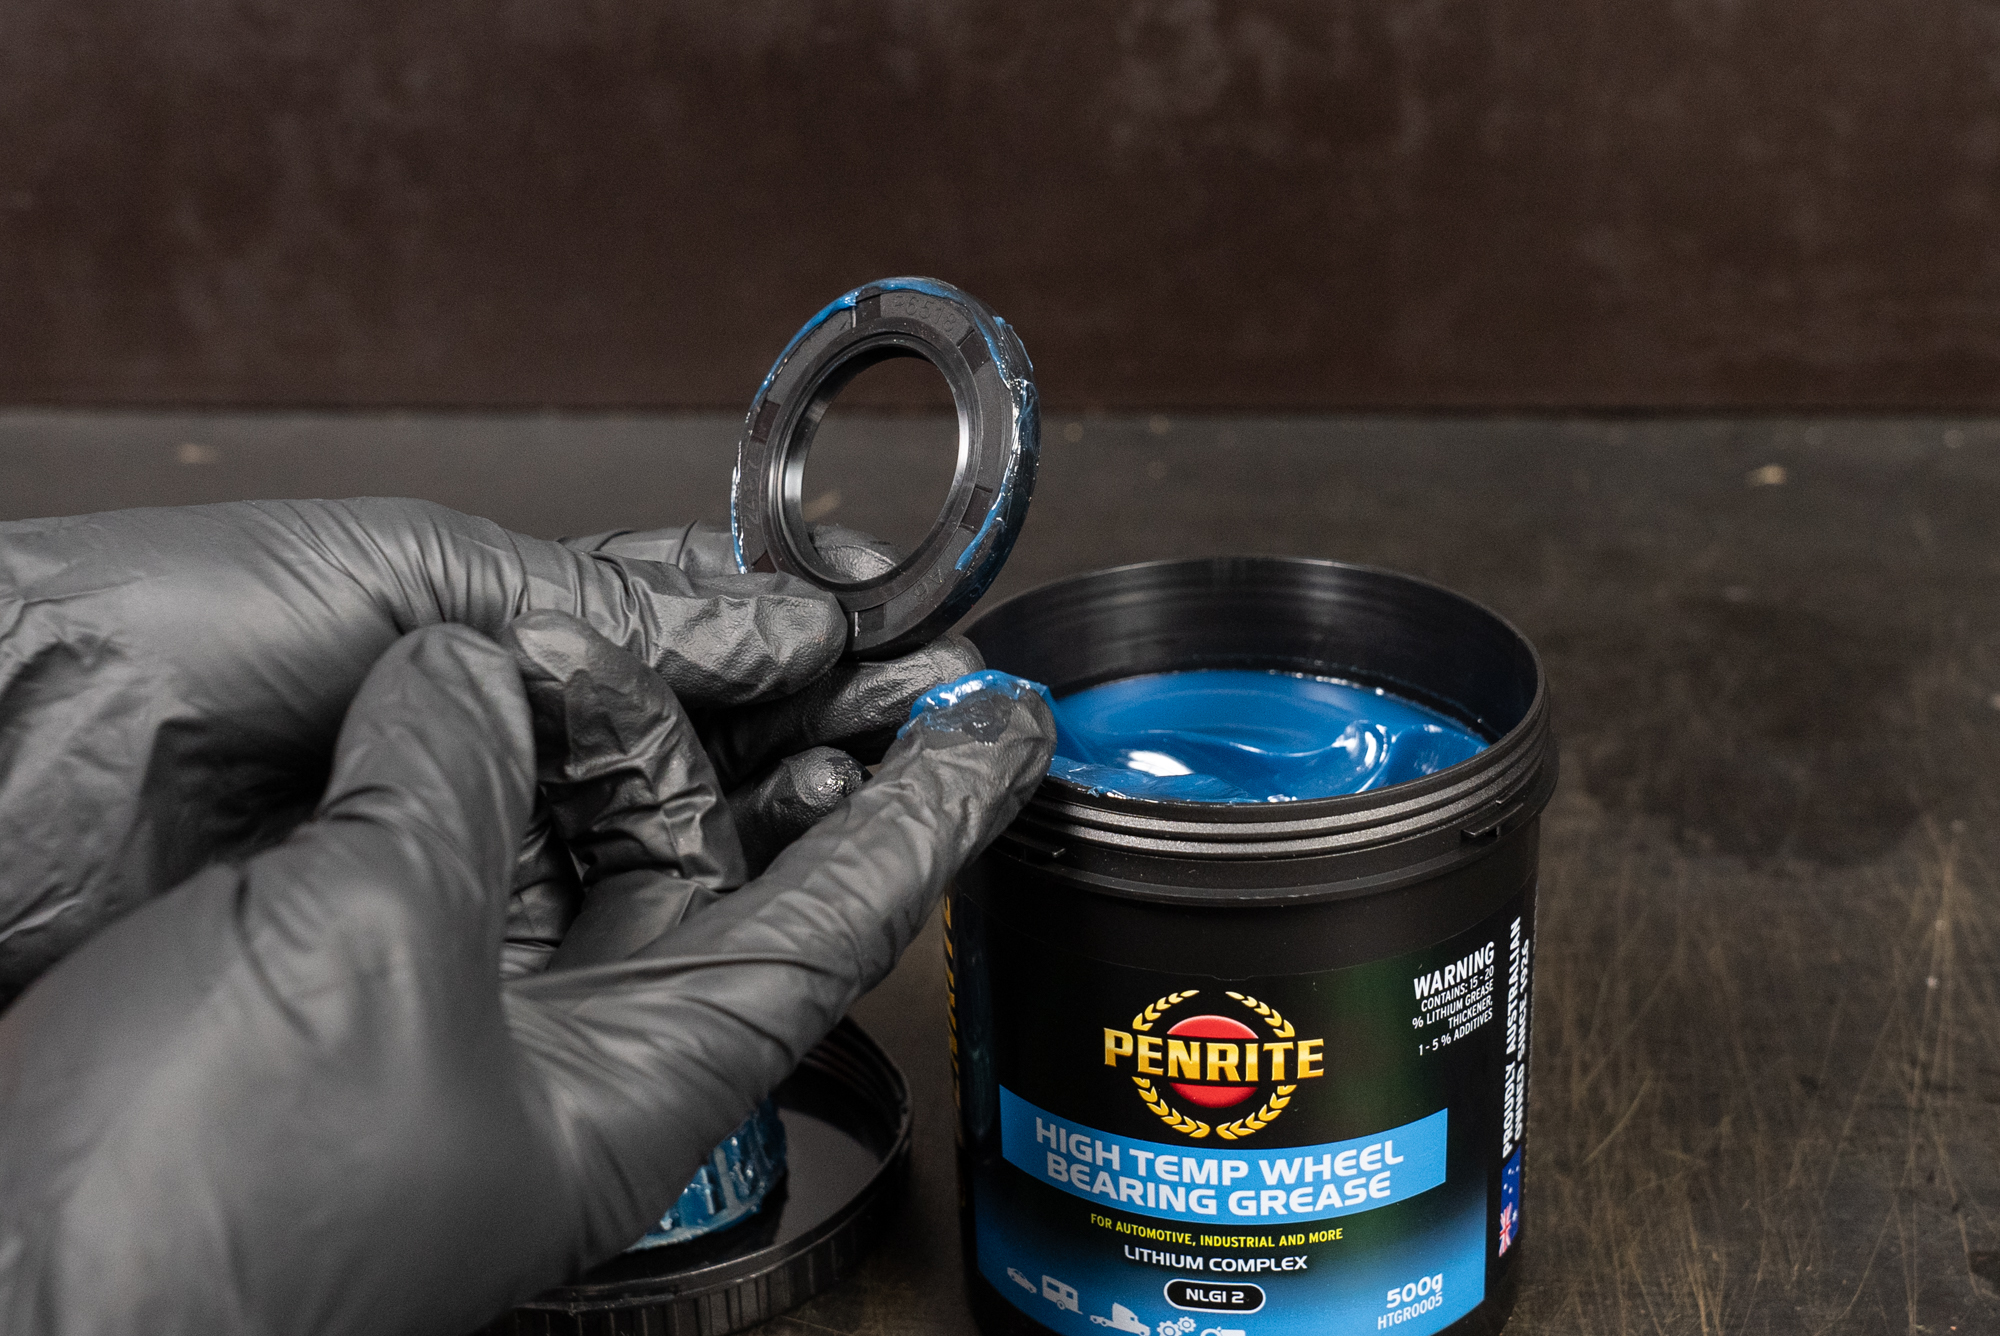
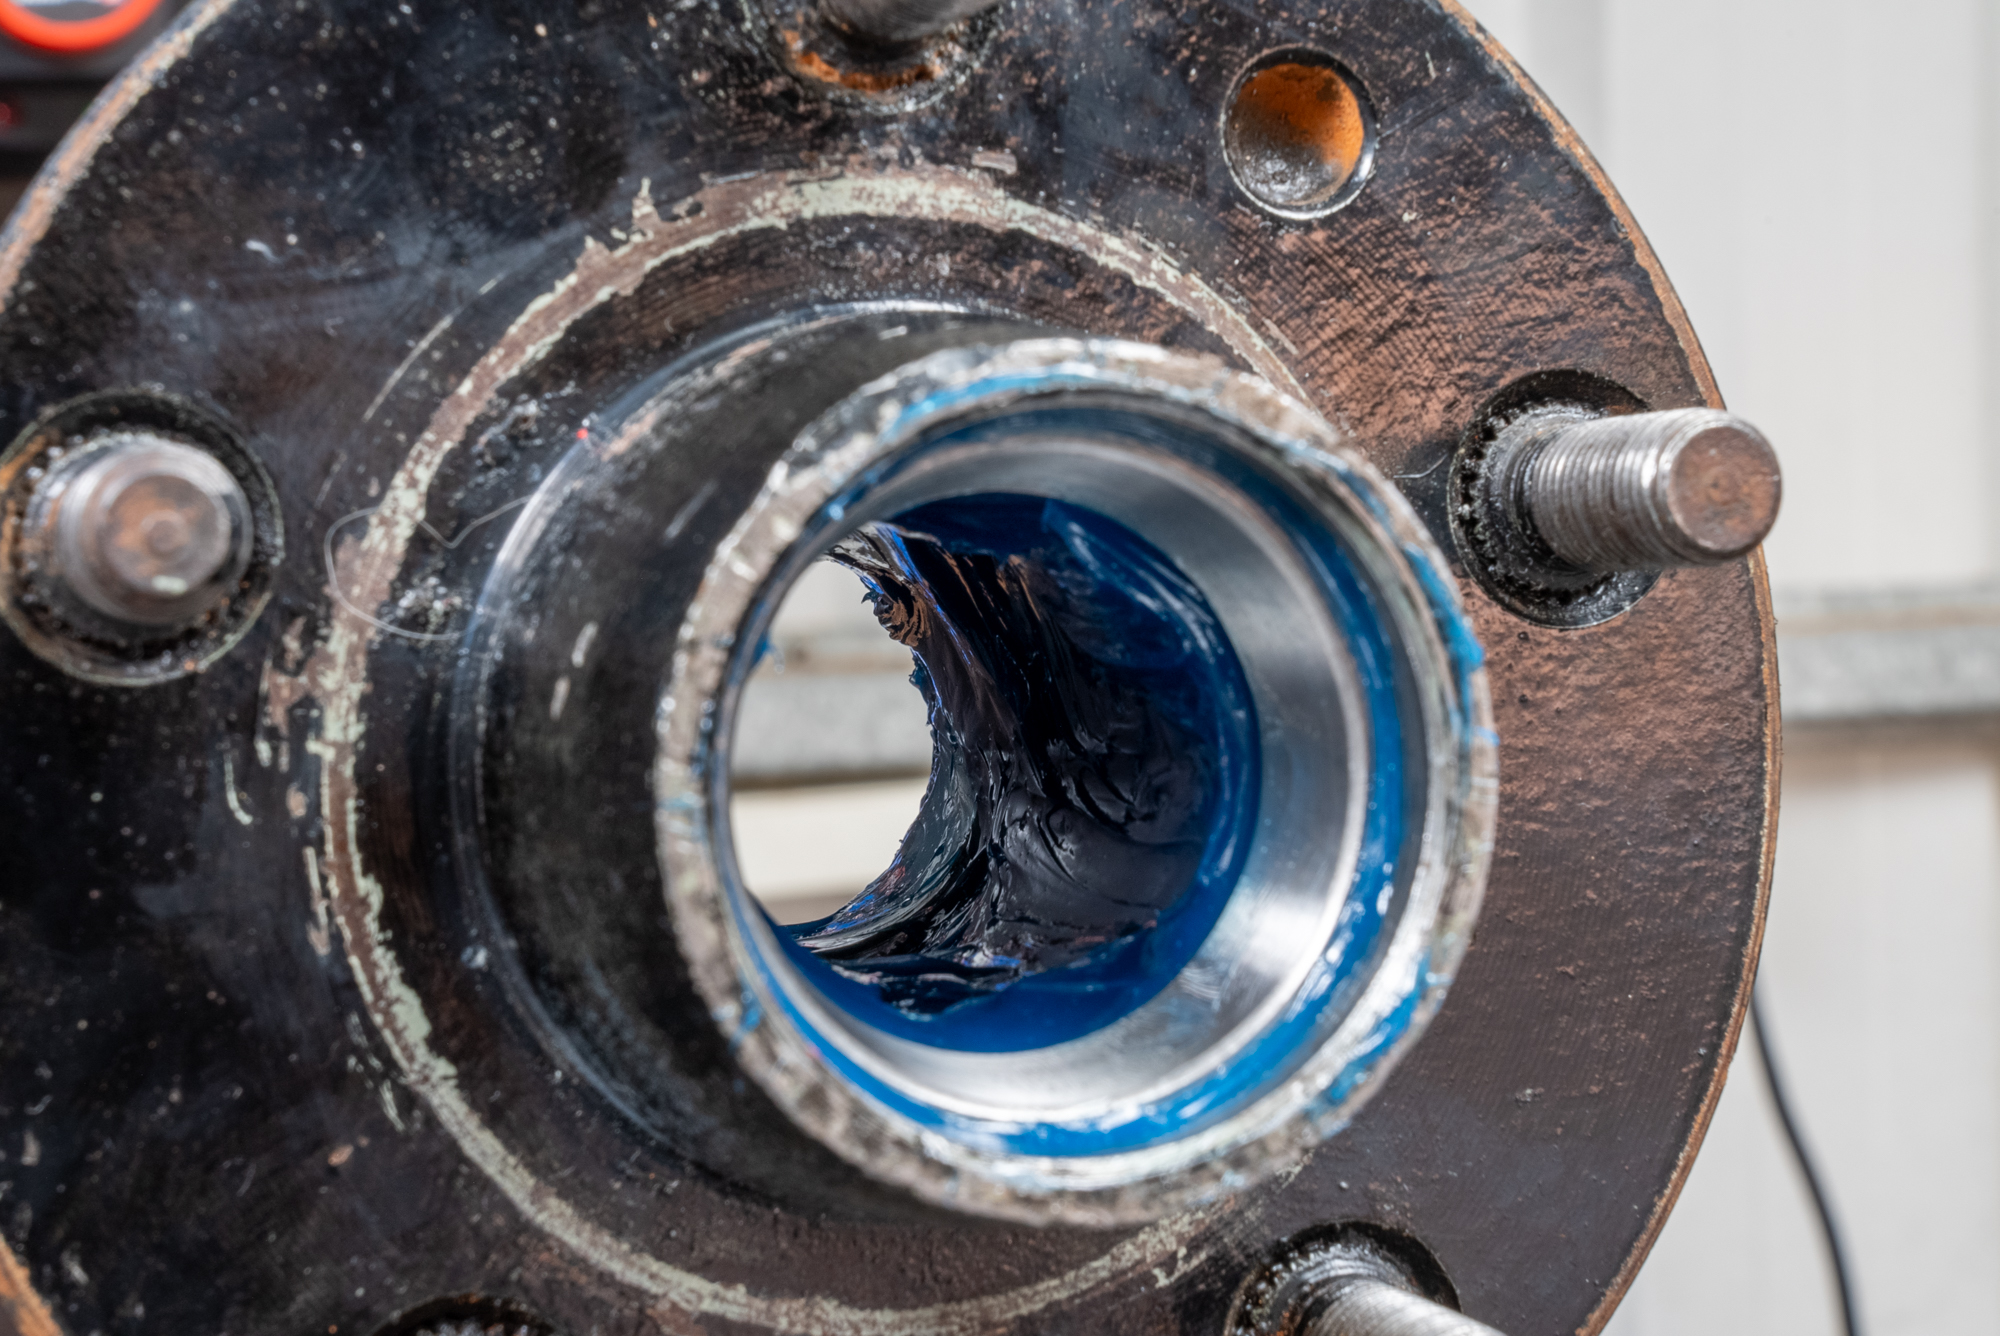
The large inner bearing can now be placed into the hub. Size up your seal with the flat side of a collar from your bearing and seal driver kit. Then smear a dab of grease around the outer edge of your seal; and drive the seal until it sits flat with the edge of the hub. You DON’T want to drive it deeper than this.
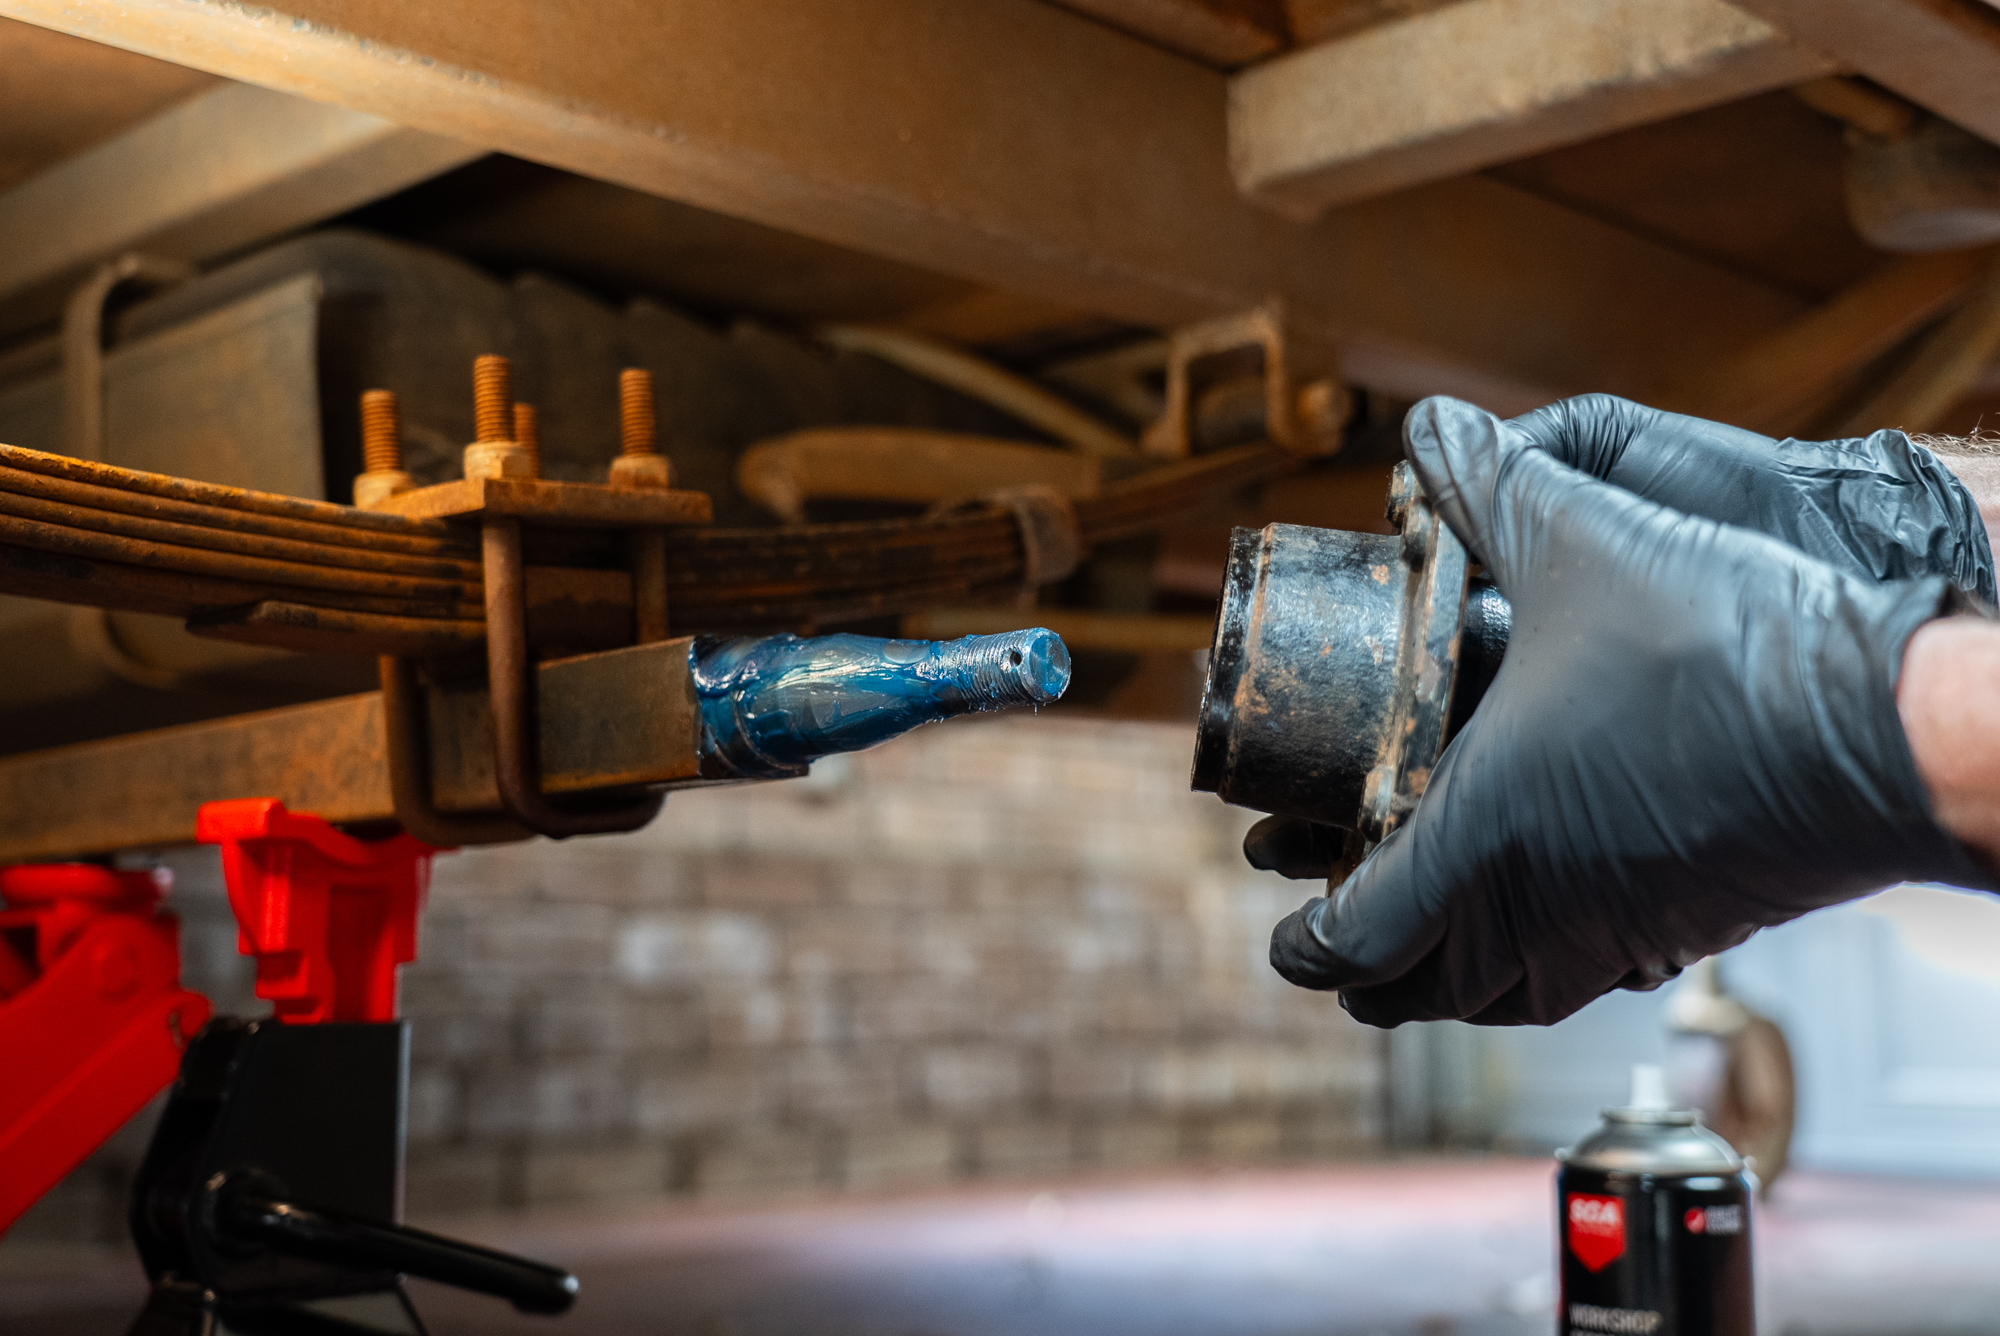
Fill the hub with grease to the inside diameter of the outer races, and over at your trailer; smear a light coating on the spindle shaft.
Reinstall the hub
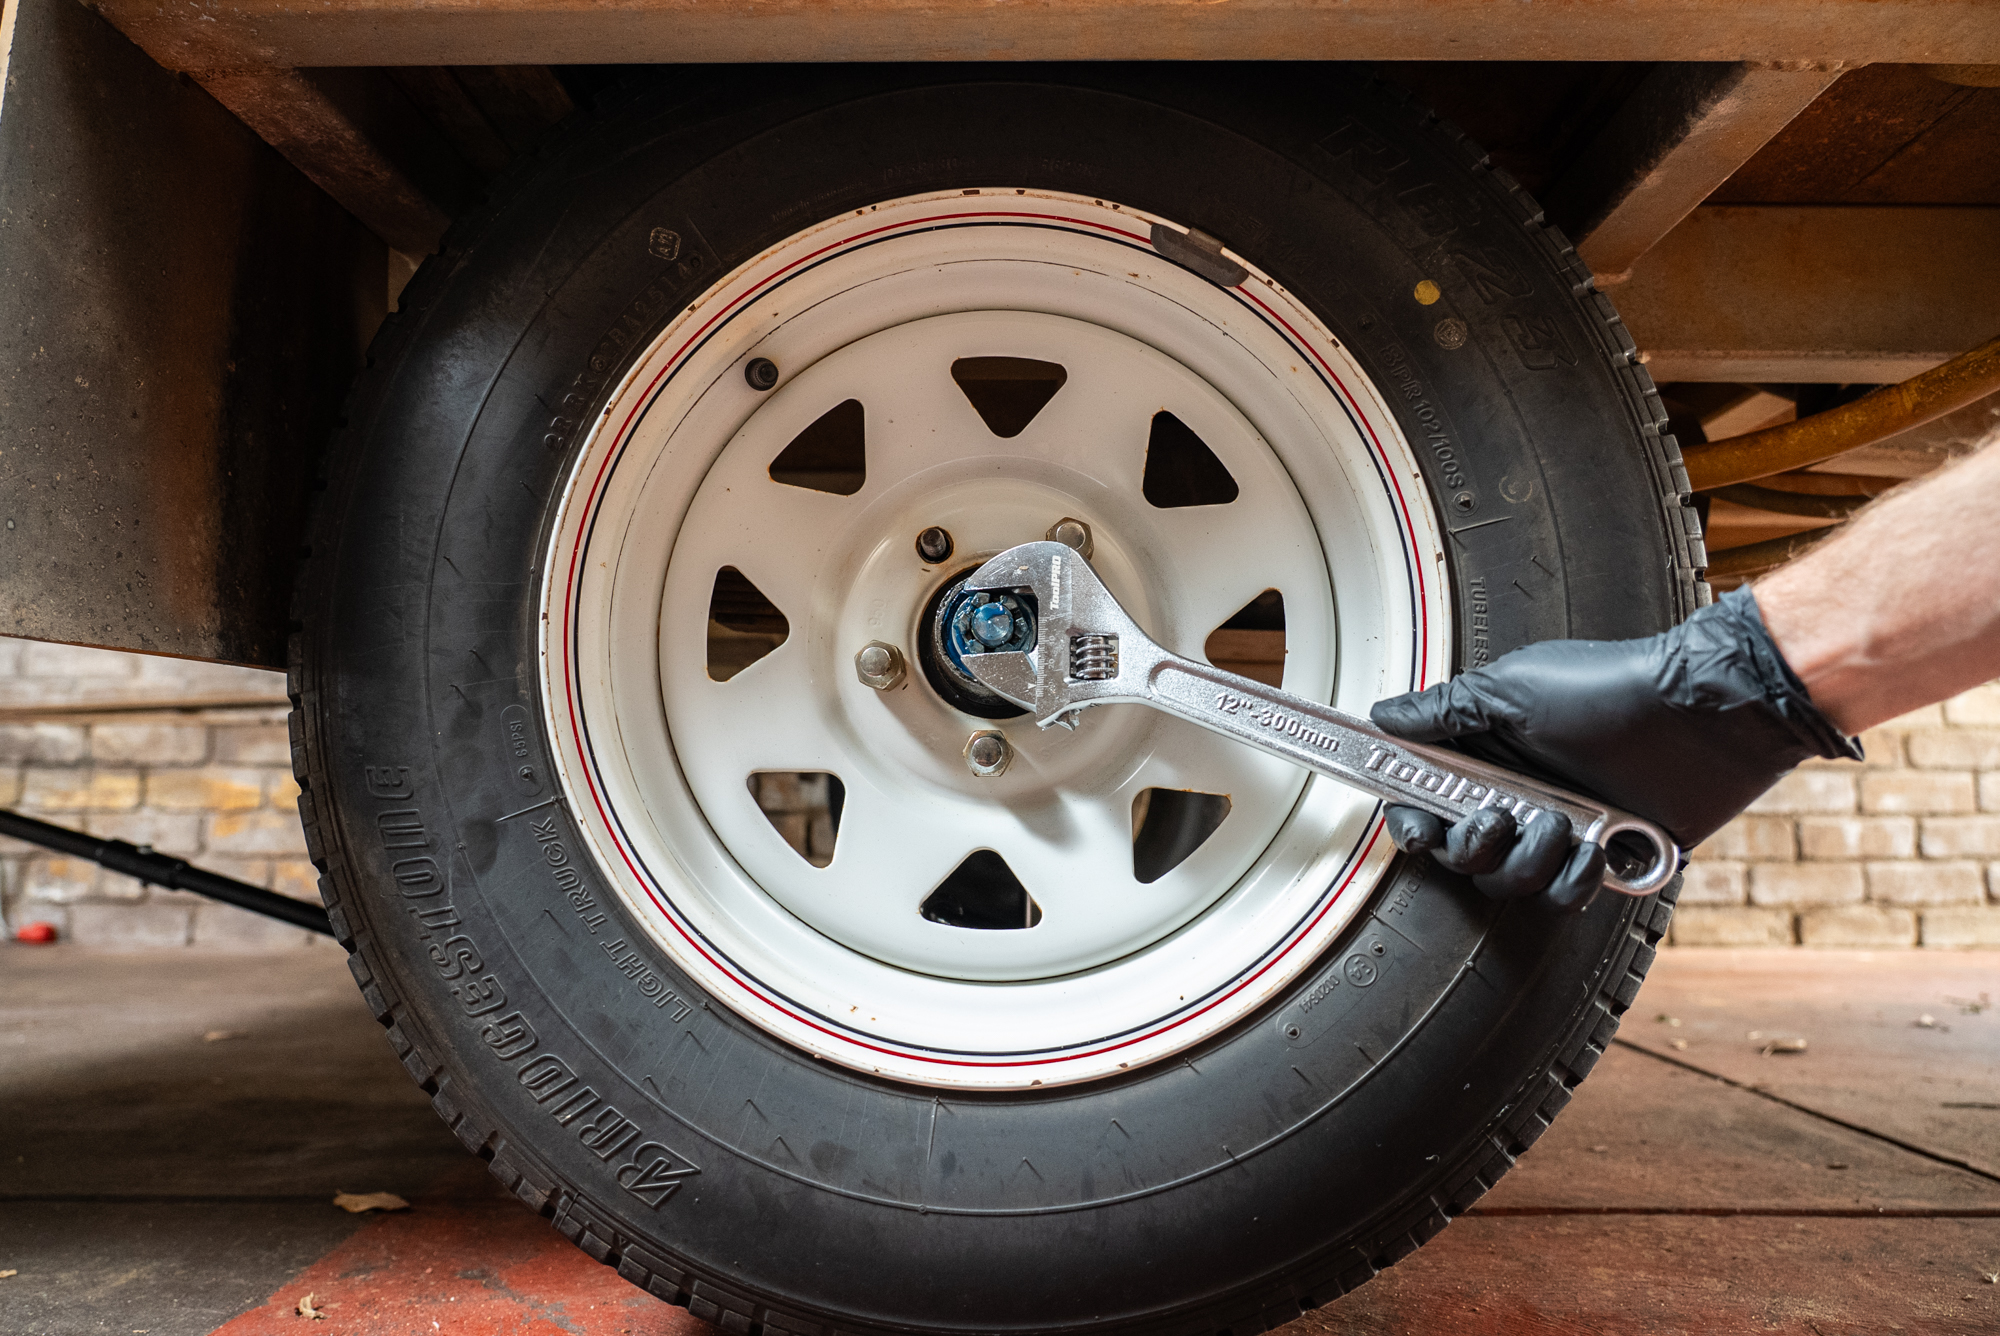
Slide your freshly assembled hub over the spindle until the seal meets the rear. Follow it up with the outer bearing, any washers, and the castle nut you removed in step two. Tighten the castle nut until your hub won’t spin, then back it off, turn the hub, and repeat this a few times.
To set the bearing preload, replace your wheel and tighten it firmly to the hub. Grasp the wheel at six and twelve o’clock positions and try to rock the wheel. If you feel movement, tighten the castle nut. Now give the wheel a spin. If it won’t spin one or two revolutions, you’ll need to loosen the castle nut a little.
Once you’ve found the perfect tension, turn the castle nut just enough to align the holes, insert the split pin; and bend it over.
Install the dust cap
Now just tap on your new dust cap, lower the wheel, tighten the wheel nuts and you’re done! Repeat the same process for the other wheels or if you’re feeling confident; remove them all at once and set yourself up a bit of a production line!
Tips
Can I replace trailer wheel bearings on any type of trailer?
All trailers have wheel bearings that are replaceable, but wheel bearings are not a universal fit. You’ll need to refer to your trailer owner’s manual or find the part numbers stamped on the existing bearings to ensure you get the right type. Once you have the correct bearing kit, you can replace trailer wheel bearings on any type of trailer. The procedure varies only slightly between different trailers.How often should you change the wheel bearings on a trailer?
If you can grasp the wheel and there’s no clunking, and the wheel doesn’t rumble when you spin it; your wheel bearings may never need to be changed. They will however always require regular maintenance. This includes removing the bearings, cleaning out old grease, and repacking them; a procedure which should be carried out every twelve to eighteen months or 10,000 kilometres. If your trailer is frequently submerged (like a boat trailer) or sees a lot of rough roads – this maintenance should be carried out more often.Can I replace trailer wheel bearings on my own, or do I need professional assistance?
If you’re comfortable with hand tools you’ll be comfortable with replacing your trailer wheel bearings. If you’ve not spent much time on the tools, all you’ll need is confidence in yourself and a little extra time to follow the instructions closely. However, if the wheel bearing appears to be in bad shape, or it has failed completely; you may like to seek professional assistance so that the extent of the damage can be fully assessed and repaired.*Important information* - Click here to read more about our DIY Advice Terms and Conditions.